| Date: | 31 May 2025 |
| Location: | Whalan Reserve, Australia |
| Conditions: | Mostly sunny, 20C, wind < 10km/h |
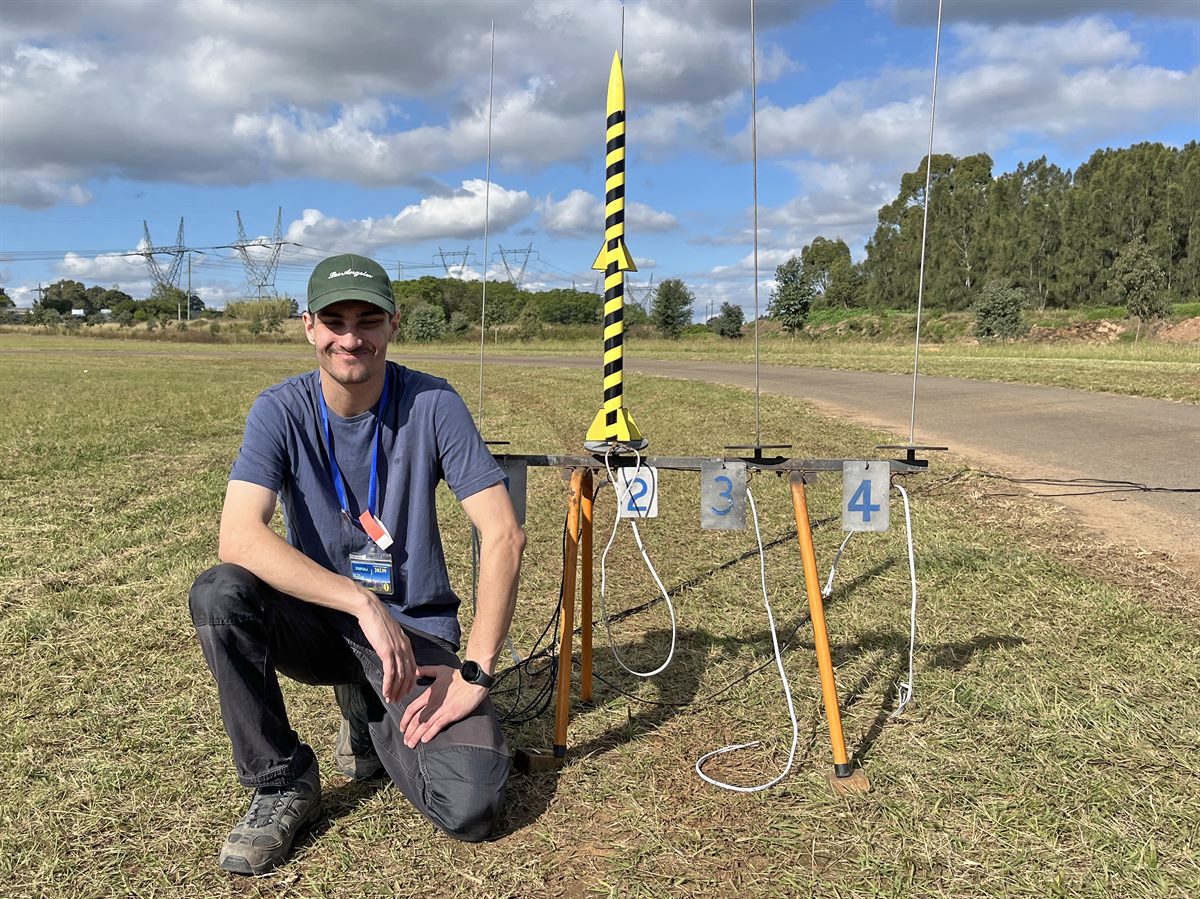
| Members: | GK, Paul K and PK |
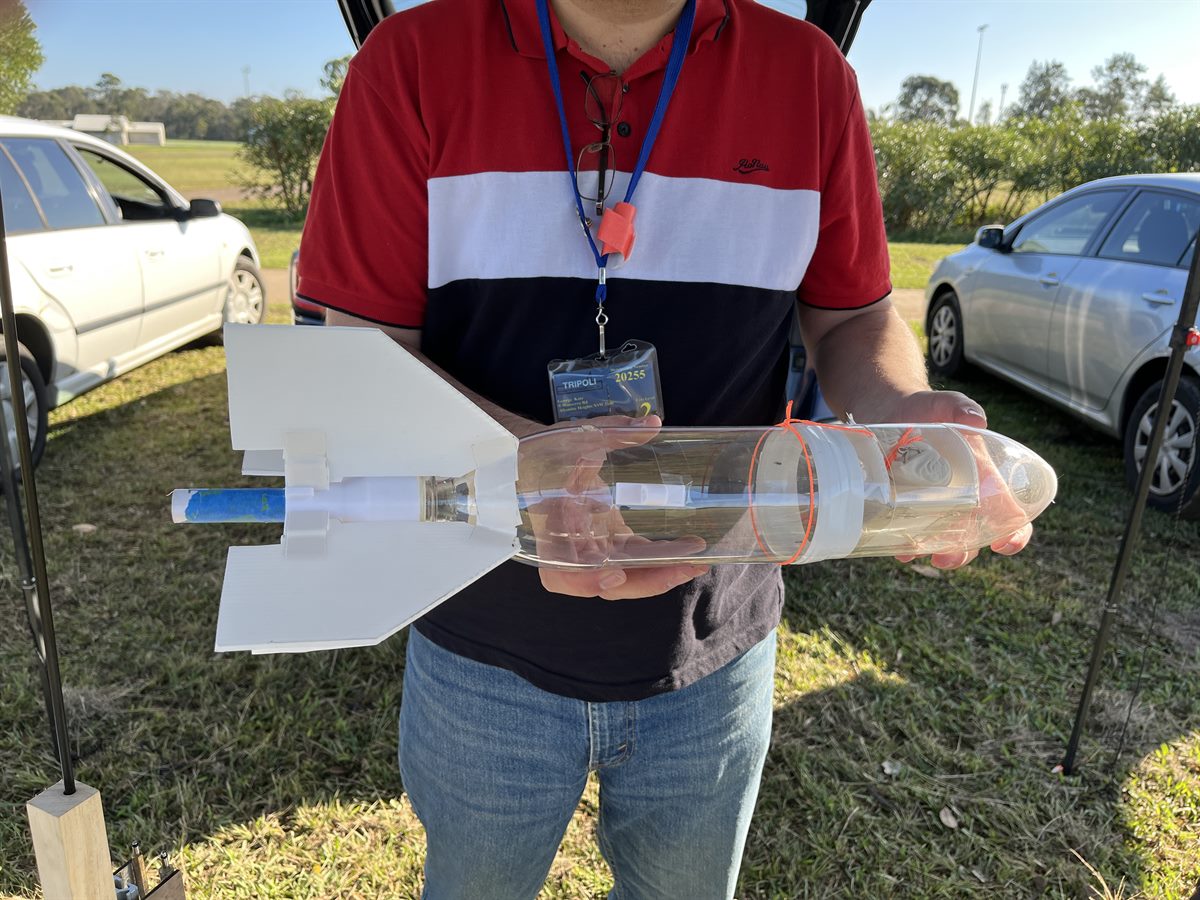
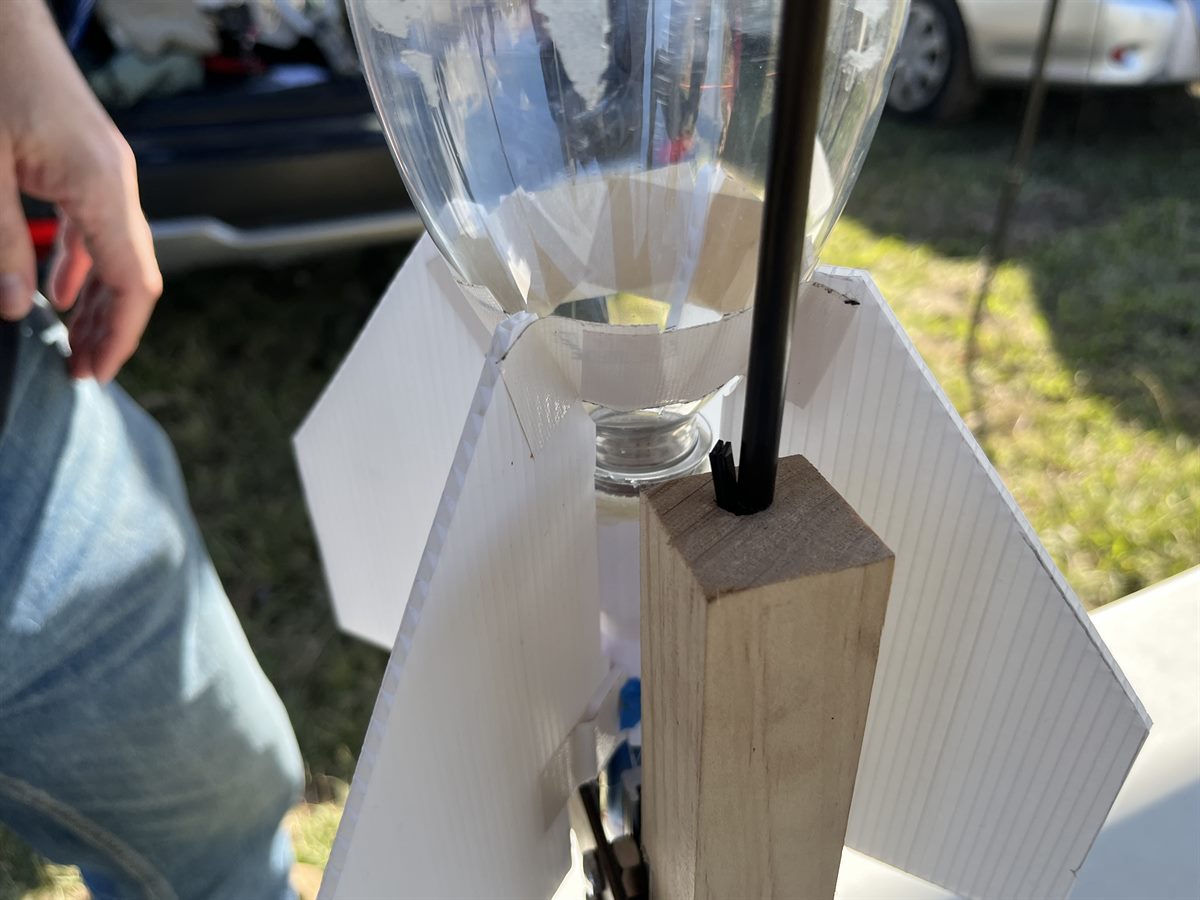
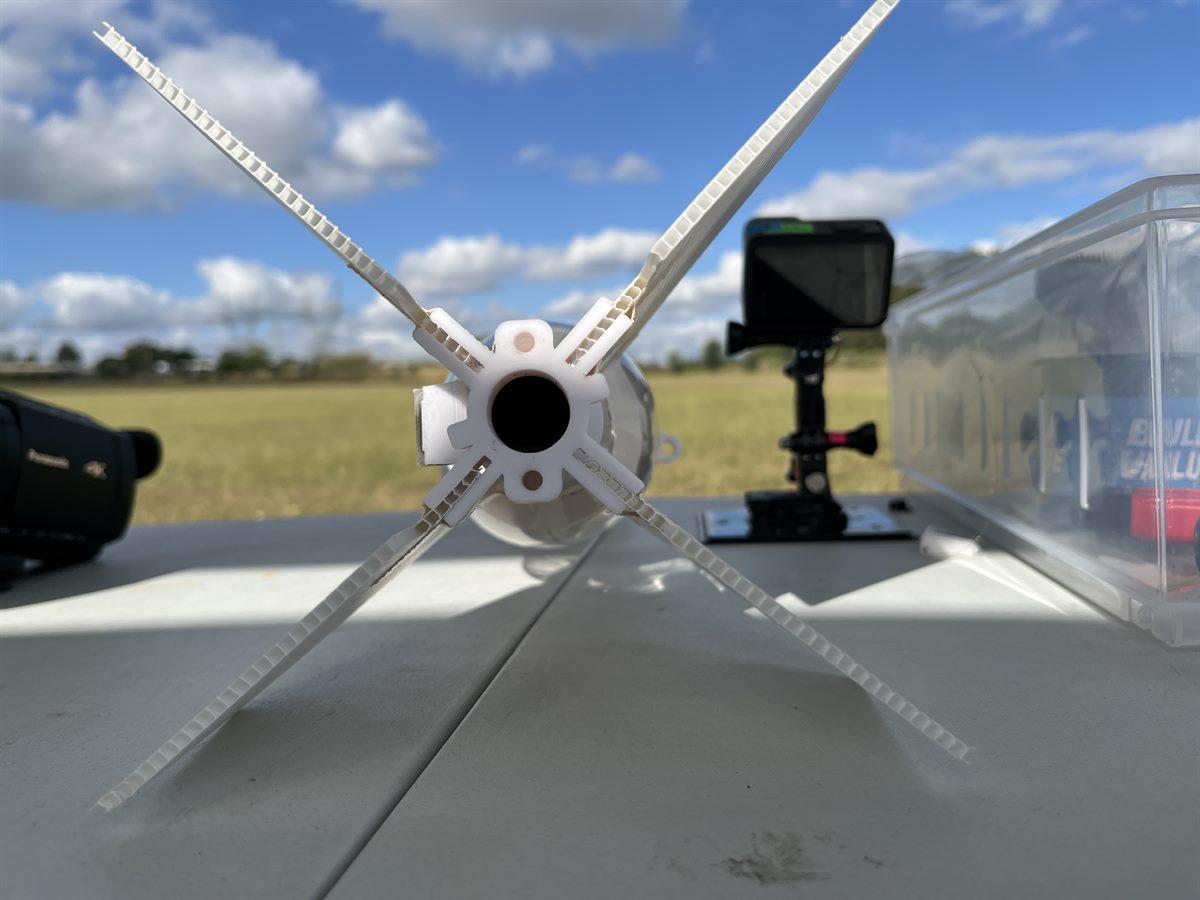
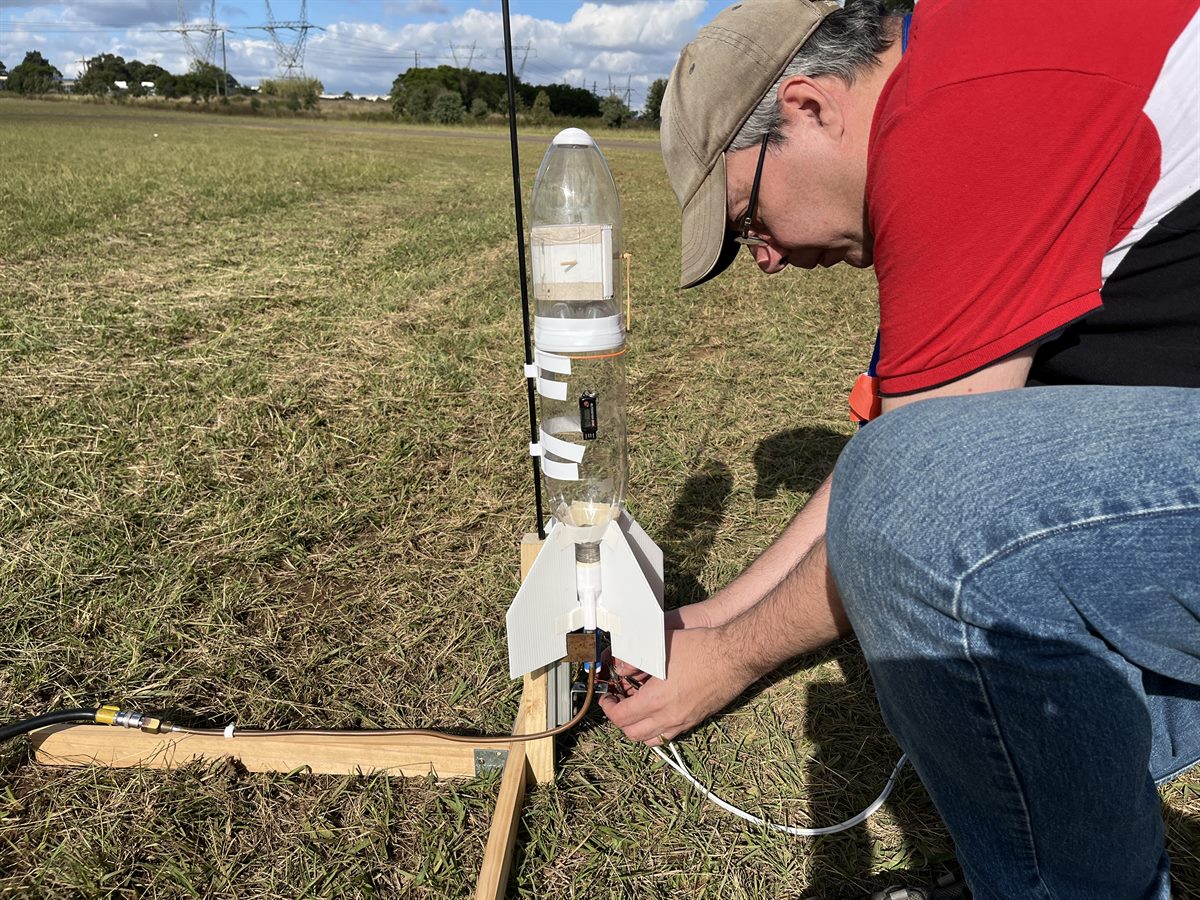
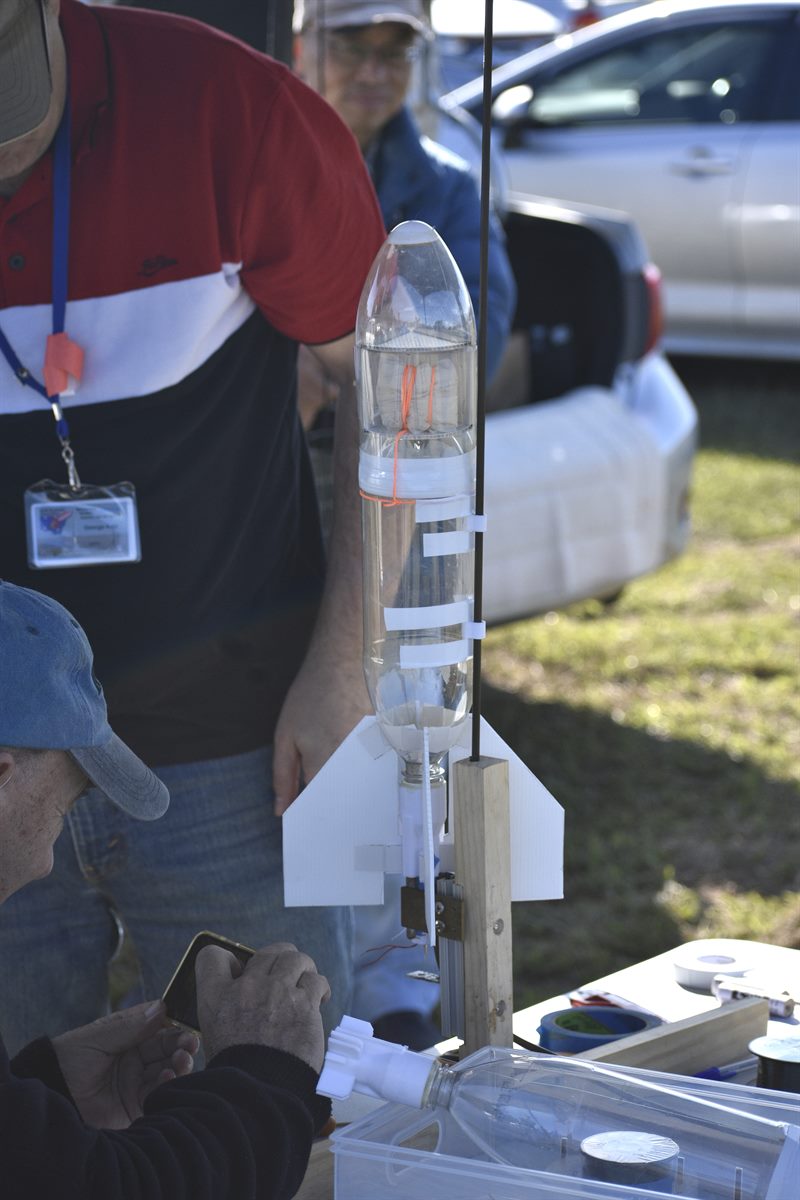
The AirHawk rocket was developed to see if we could augment the thrust of a solid motor with compressed air stored in the rocket's air frame. Originally the plan was to make a carbon fiber pressure chamber with special dual nozzles so that we could put the motor in between those nozzles. But that was going to be a lot of work just for a proof of concept so we decided to use an existing pressure chamber - a PET bottle and 3D print an adaptor that would hold the motor and route the air nozzles around it. The same adaptor would also support the back of the fins.
We would simply glue in a bottle cap so the bottle could be screwed in. Ideally the 3D print would have the bottle thread already built in, but this was just easier than having to model the specific bottle thread.
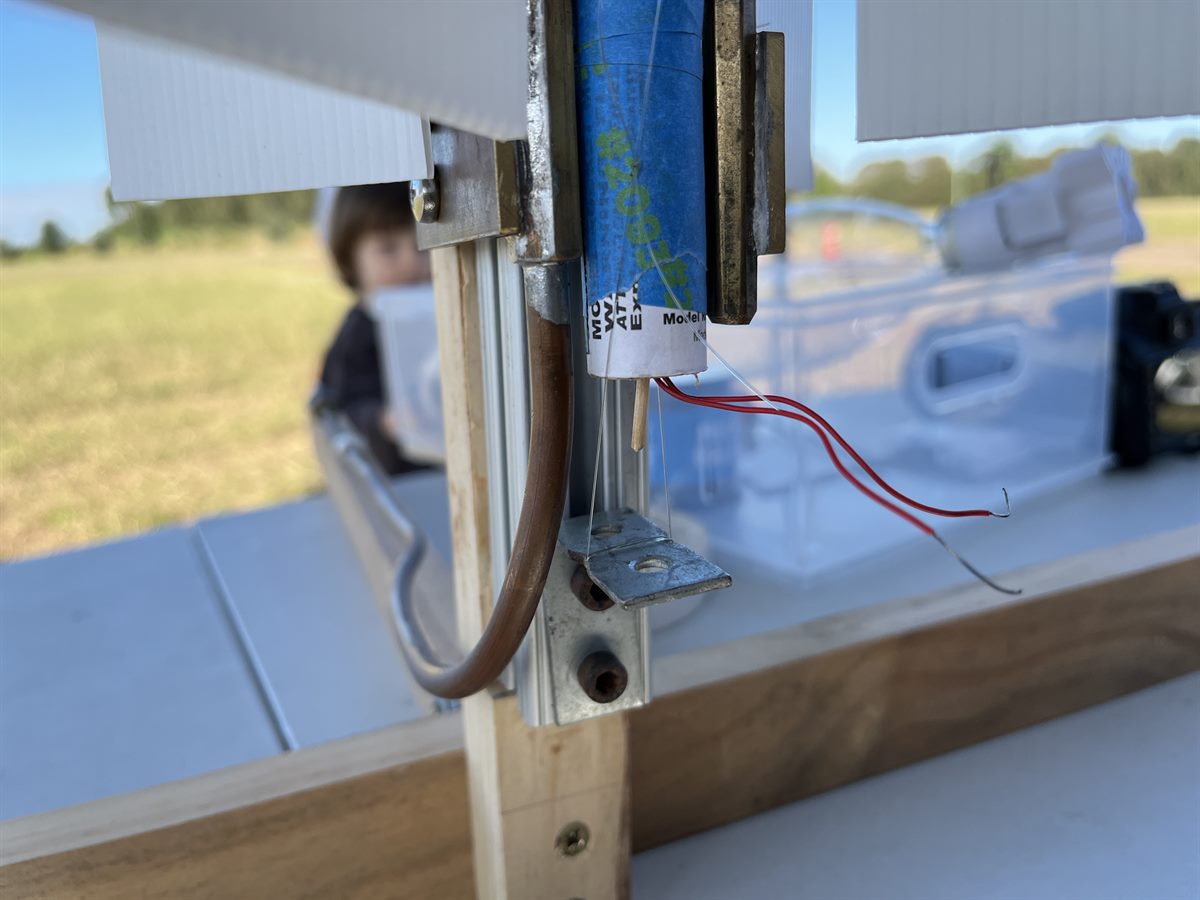
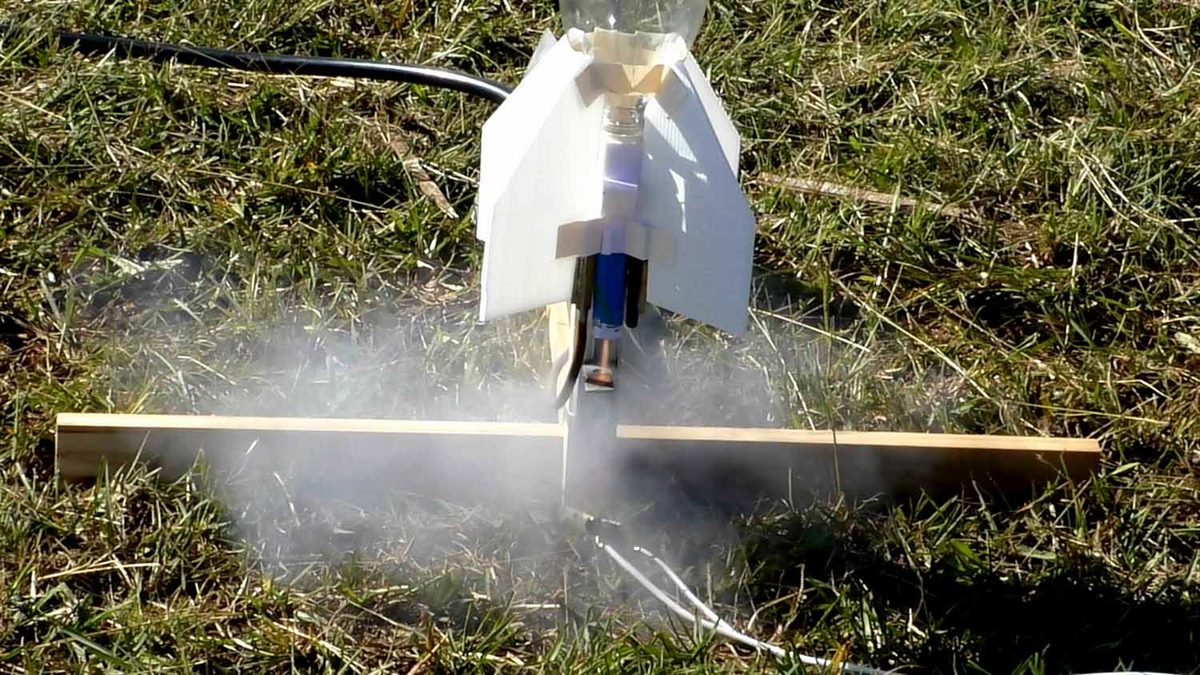
Because the pressure chamber would now be sitting on top of the motor, we couldn't use a conventional parachute ejection system using the motor's ejection charge. So the system we set up was using a side deployment design very similar to what we normally use on our water rockets, but instead of using a timer and a servo motor to deploy the parachute, we simply tied a rubber band to the door, and wrapped it around a skewer stick hanging out the side of the rocket, and routed it down to the motor via a fishing line. The end of the fishing line was threaded through a small door that was wedged against the motor ejection port off to the side. The setup made it that door stayed wedged no matter how much you shook it, but would only deploy once the charge went off.
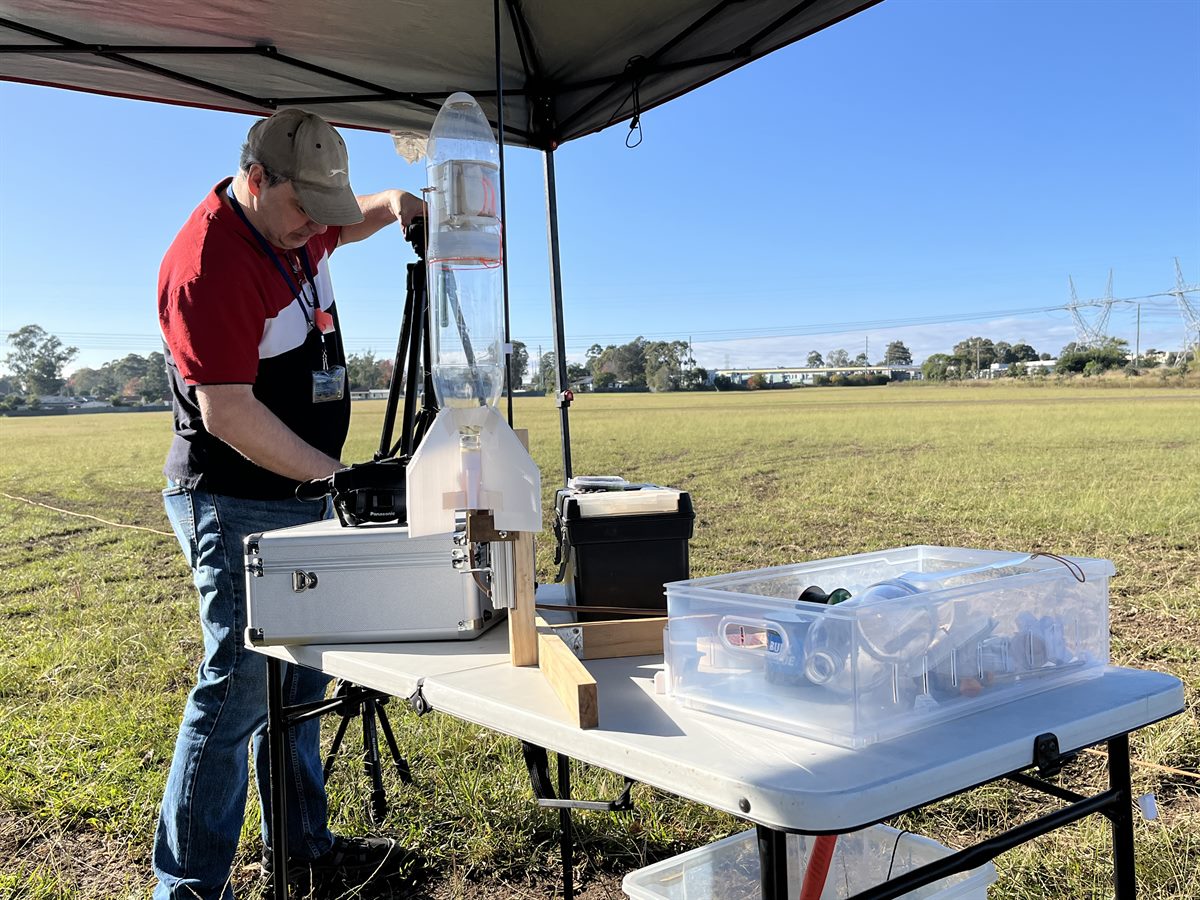
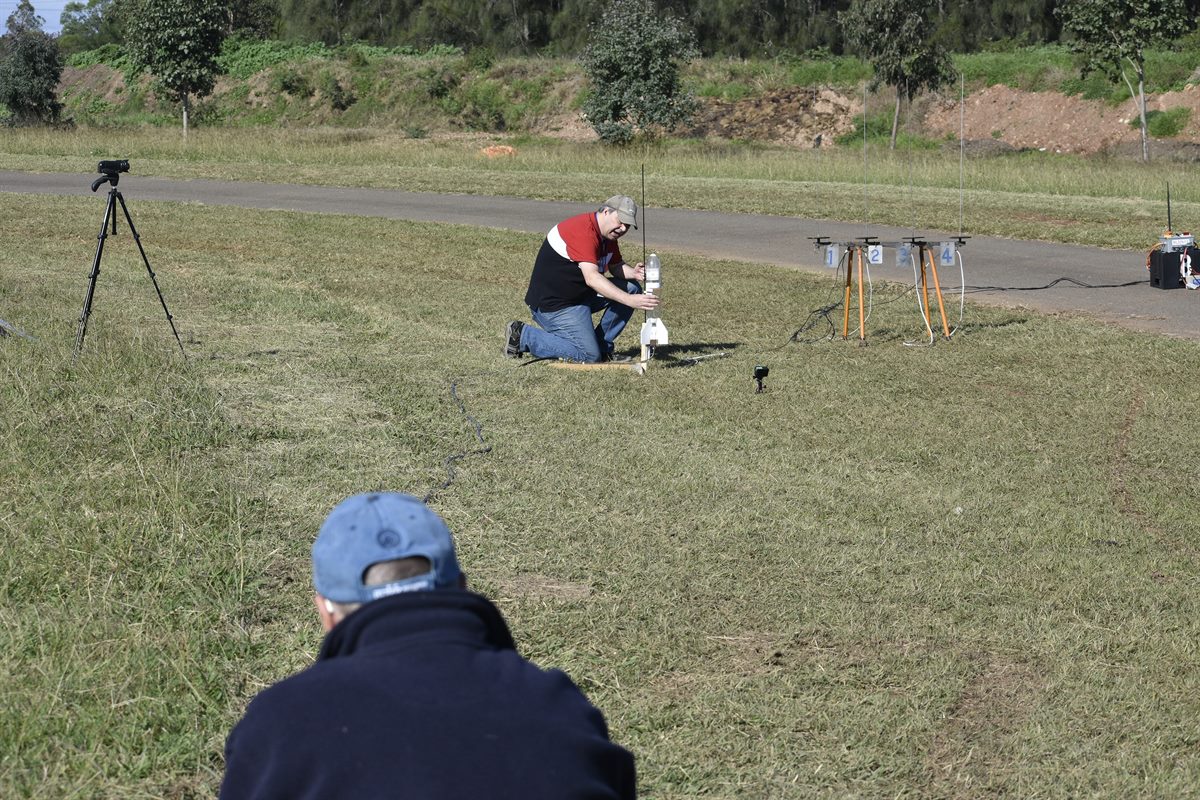
The launcher was based on two HP swivels used for connecting high pressure scuba hoses. This made sure the nozzles were small enough and had matching o-rings already built in. We glued these into a couple of brass connectors that could then be soldered to the rest of the frame. Only one of these was connected to a brass tube that had our normal quick release connector connected on the other end. The other swivel was just plugged to stop air coming out of the second nozzle.
These were then connected to a section of a 1010 rail to allow things to be adjusted.
Just below the motor is an angled bracket that can adjust up and down. A piece of fishing line goes from one side of the 3D printed adaptor wraps a few times around this angled bracket and goes back up to the other side of the 3D printed adaptor. The wraps of fishing line are connected directly below the motor nozzle so that as soon as the motor ignites, it burns through the fishing line and it releases the entire rocket.
The top of the launcher also has a guide rod fitted.
Before putting the whole rocket out on the launch pad, because there were so many unknowns with this rocket, we decided to do a couple of ground tests first. The first test was a pressure test to see if the whole launcher and adaptor would hold the pressure. We quickly noticed that the adaptor was leaking around the nozzle. It turns out that the bottle couldn't screw in far enough to compress the rubber washer we had in there. Adding a second rubber washer sealed up the adaptor.
Next we did a pressure test to see if the rocket would release by itself if it had enough pressure. Even when we pressurised it to 100psi, the rocket didn't want to slide of the o-rings on the swivels. Extra grease didn't help. It turned out if the rocket was angled slightly, it would tend to wedge itself. We tried a couple of different approaches to see if we could put a little extra tension on the rocket with a counter weight, and although that worked, in the end we decided that the thrust from the motor should be enough to provide that extra nudge to release it.
The next static test was to put the rocket horizontally and pressurise it to full pressure and with a nudge release it down the lawn. That worked well and gave us an idea how much of a boost that would give us.
The last test was to test to see if the ejection charge would blow off the door and release the parachute. We strapped the rocket to the side of the balcony, and loaded a C6-5 motor in the adaptor. We fired the motor and after the 5 second delay it blew off the door and ejected the parachute cleanly. We were surprised at how energetic that ejection charge was with a great big flame shooting out the side of the rocket.
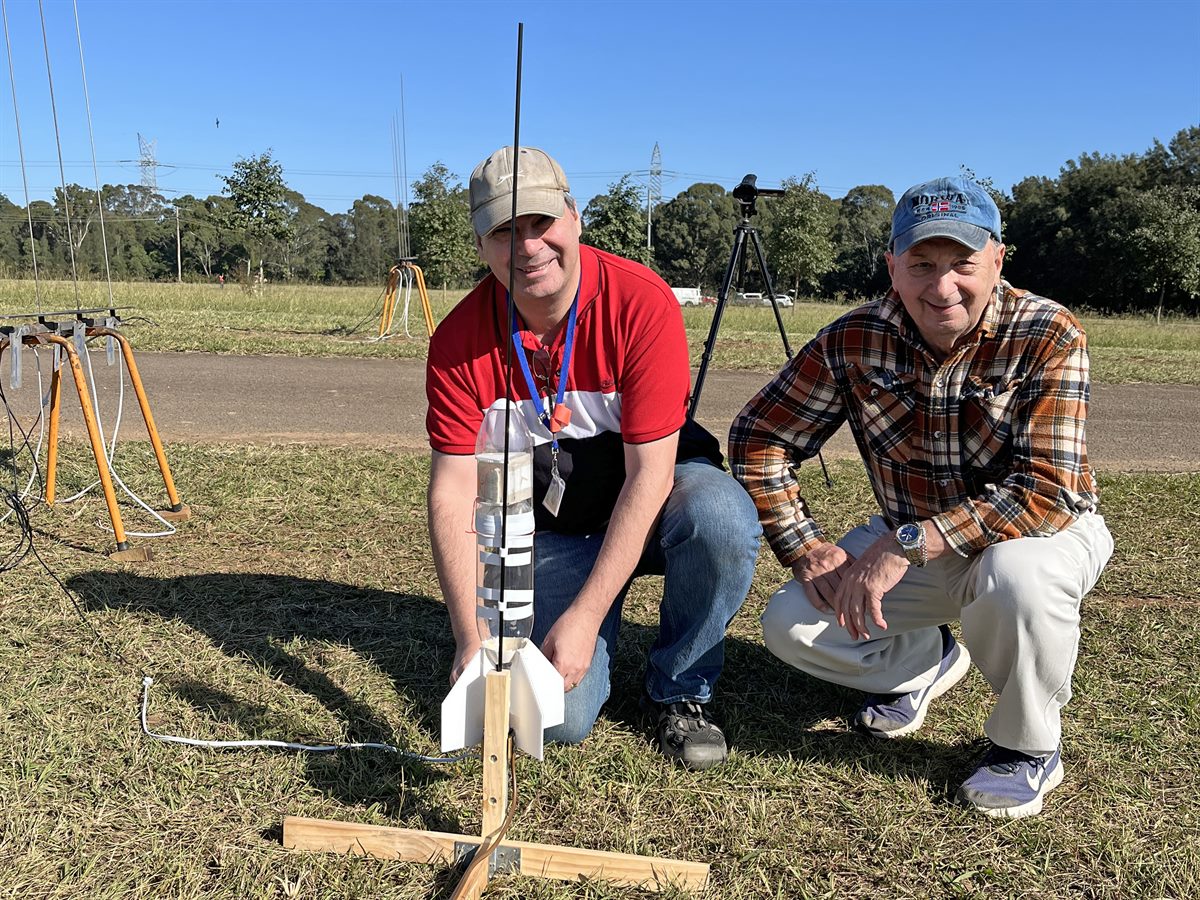
With that we waited for the next NSWRA Launch day to flight test it. We only had to wait 7 weeks for the weather to clear up!
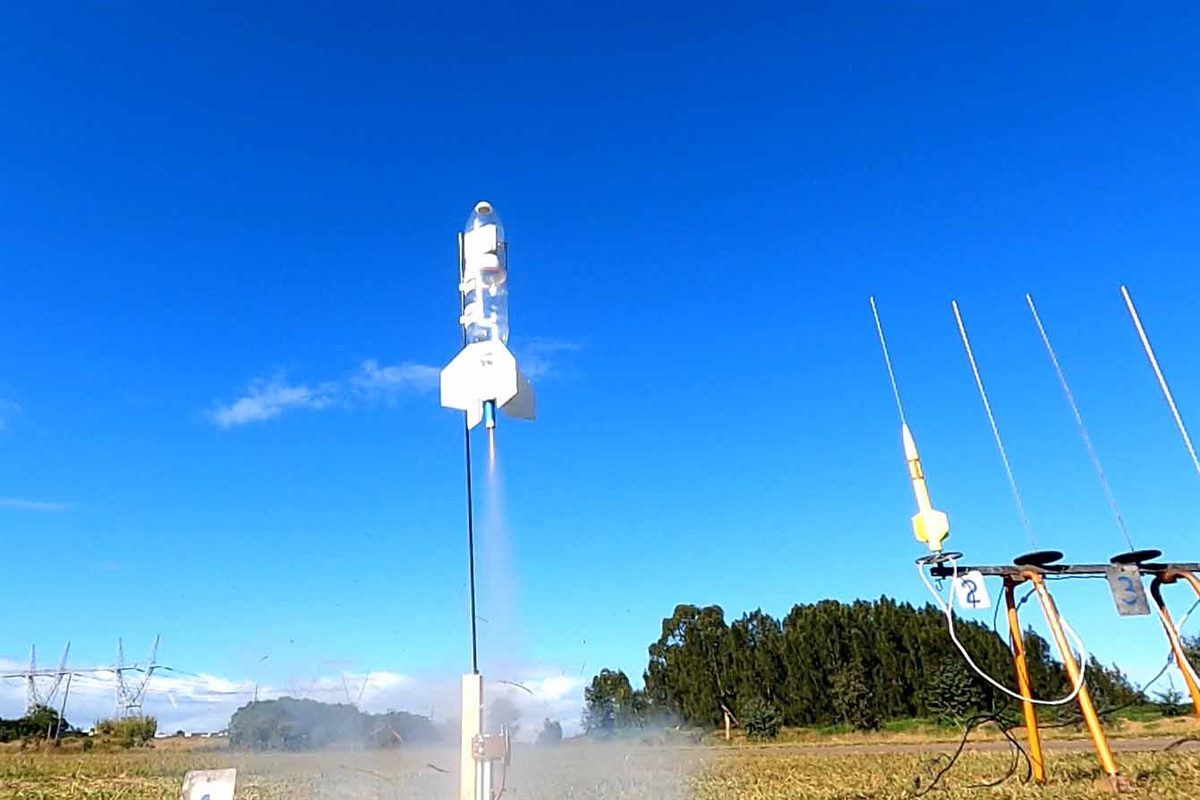
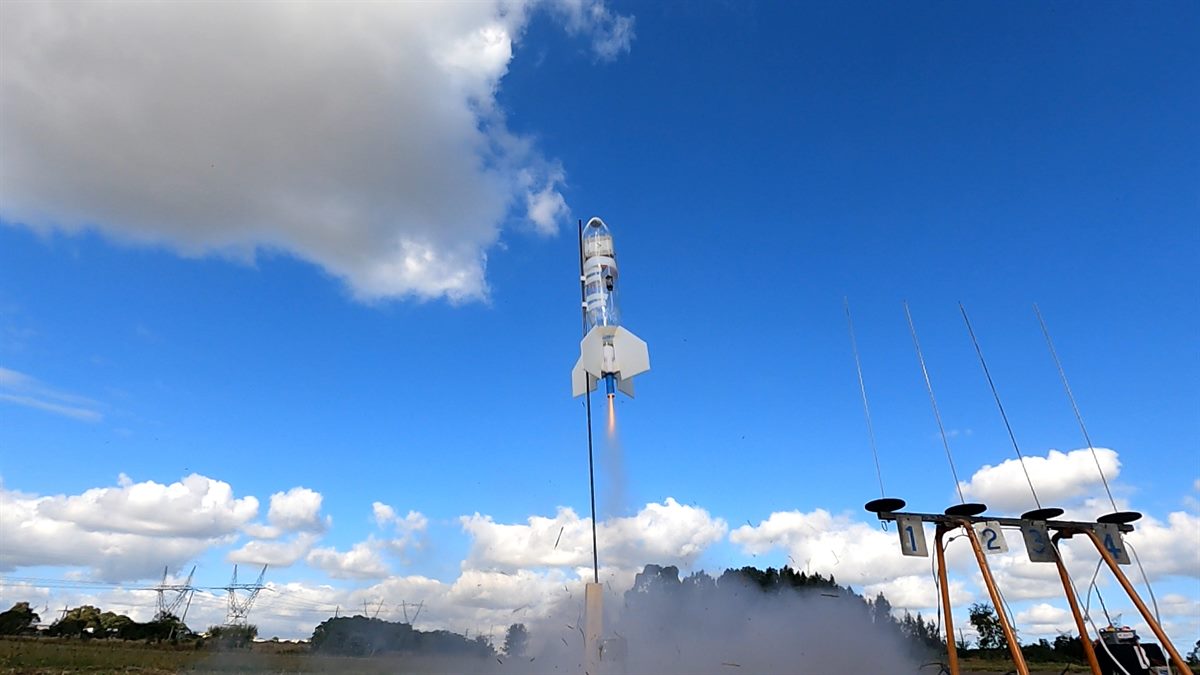
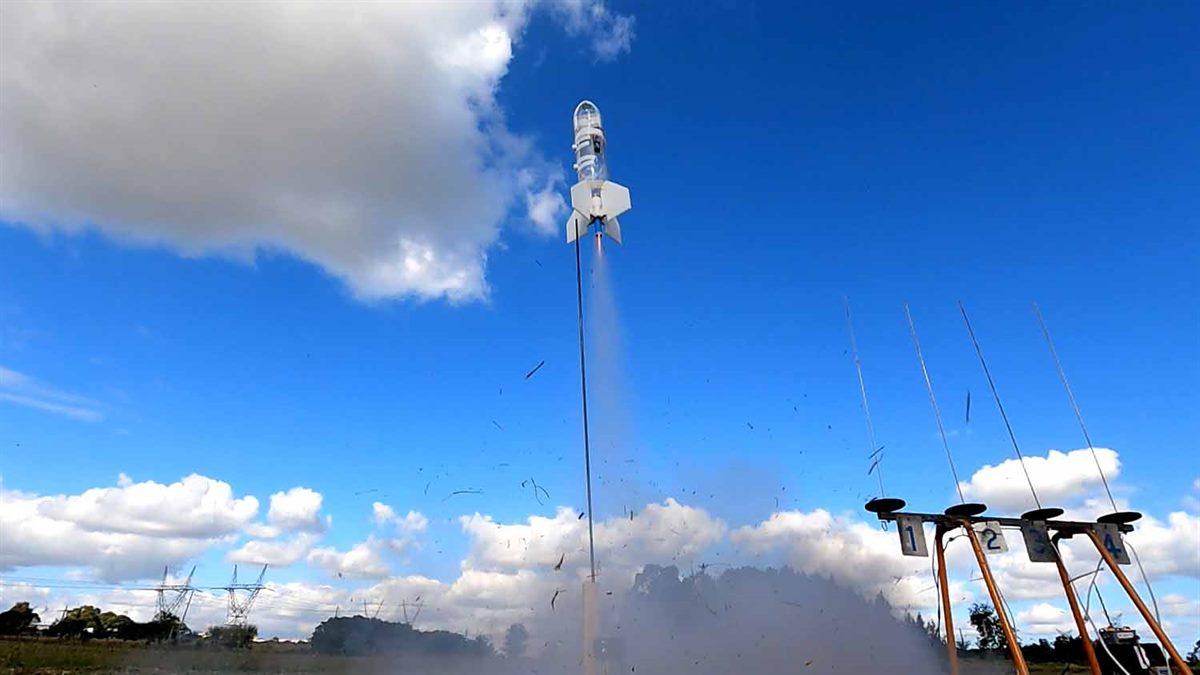
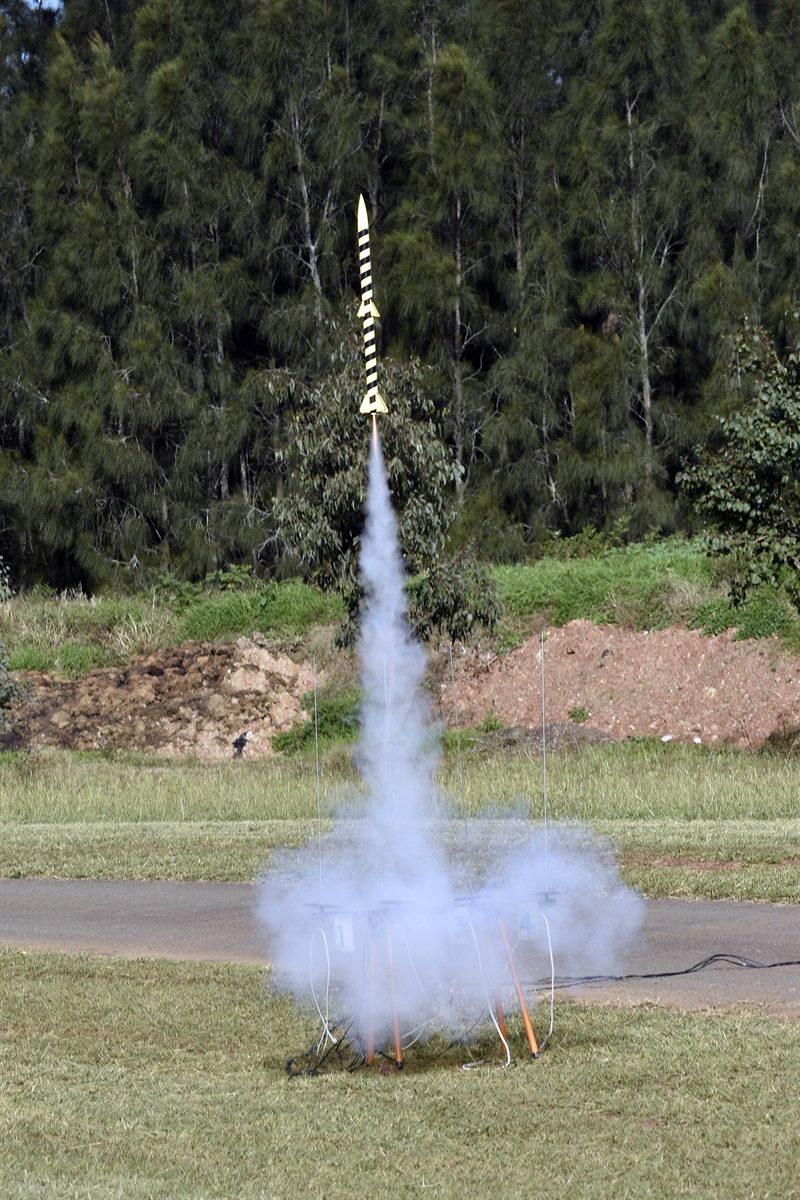
Today we test flew the AirHawk rocket a couple of times to see if the entire system would work.
The prep was fairly straight forward. Though tightening the fishing line was a bit tricky because of the angle bracket, but I think it would work better if that angled bracket was a round freely rotating pipe. That way it would be easier to adjust the tension. But we were still able to pre-tension the fishing line to keep the rocket on the pad.
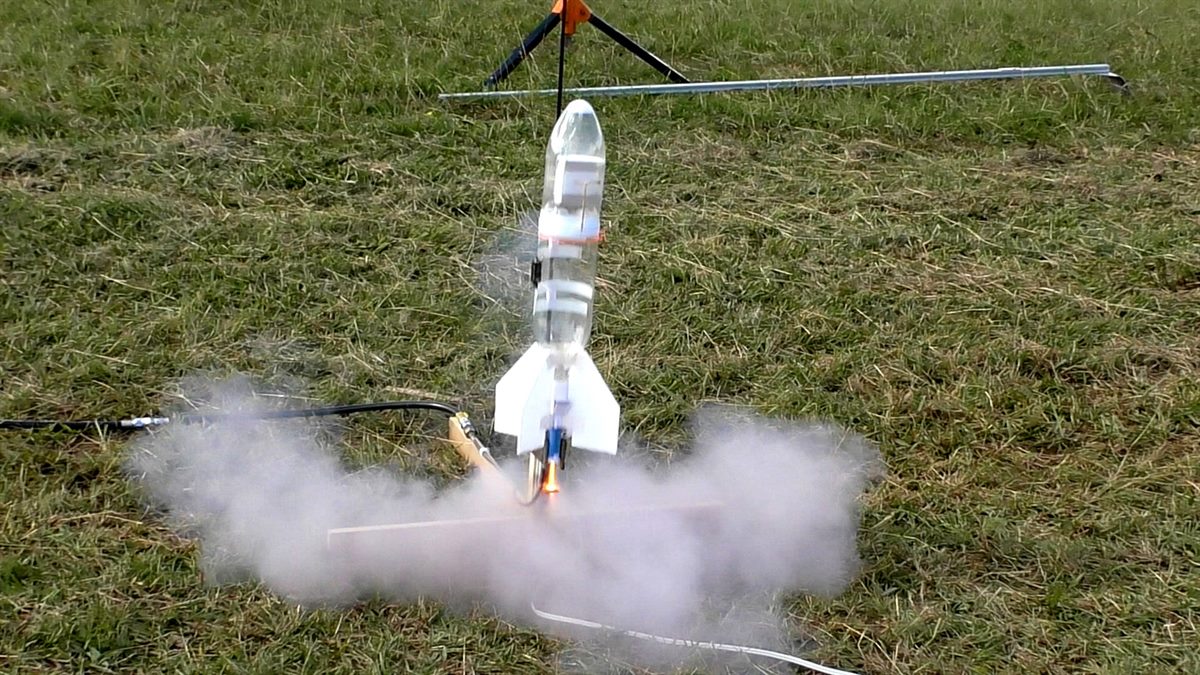
On the first launch we decided to pressurise to only 100psi to see if everything would hold up. The we counted down and the LCO hit the launch button. The ignition and release of the rocket were almost instantaneous so the fishing line burned through quite quickly.
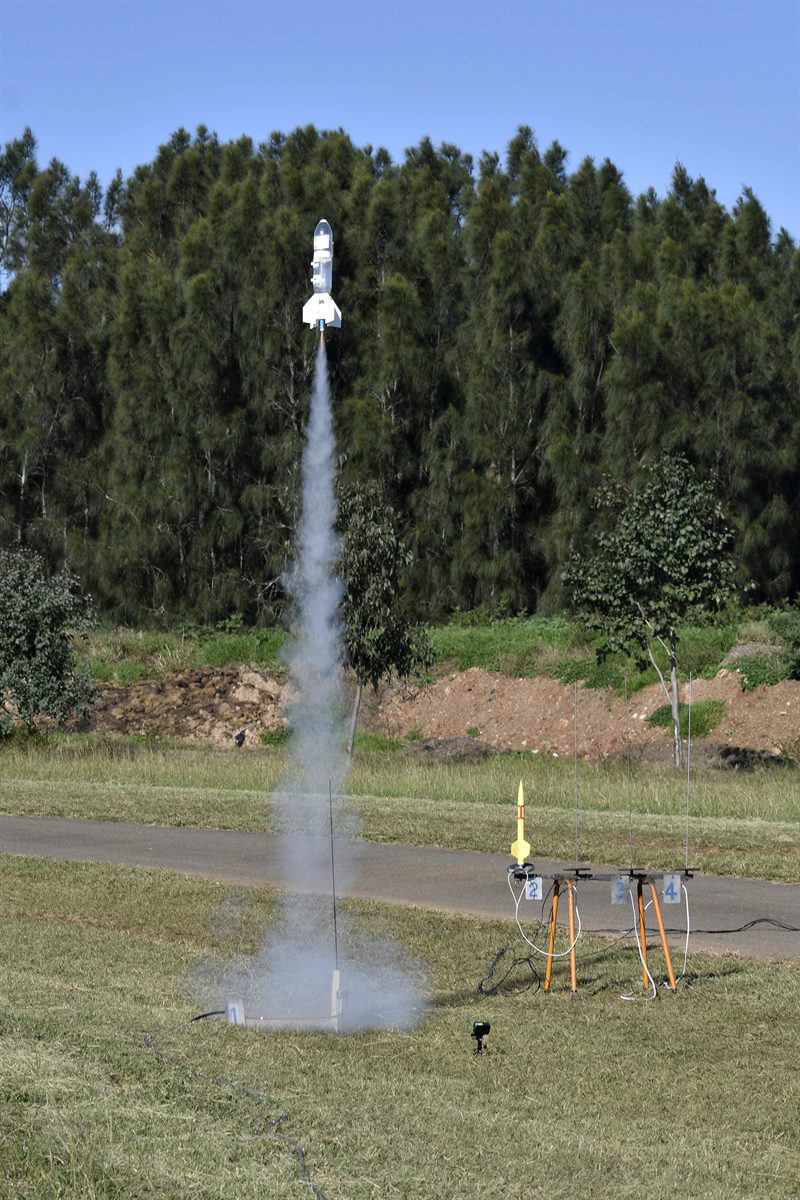
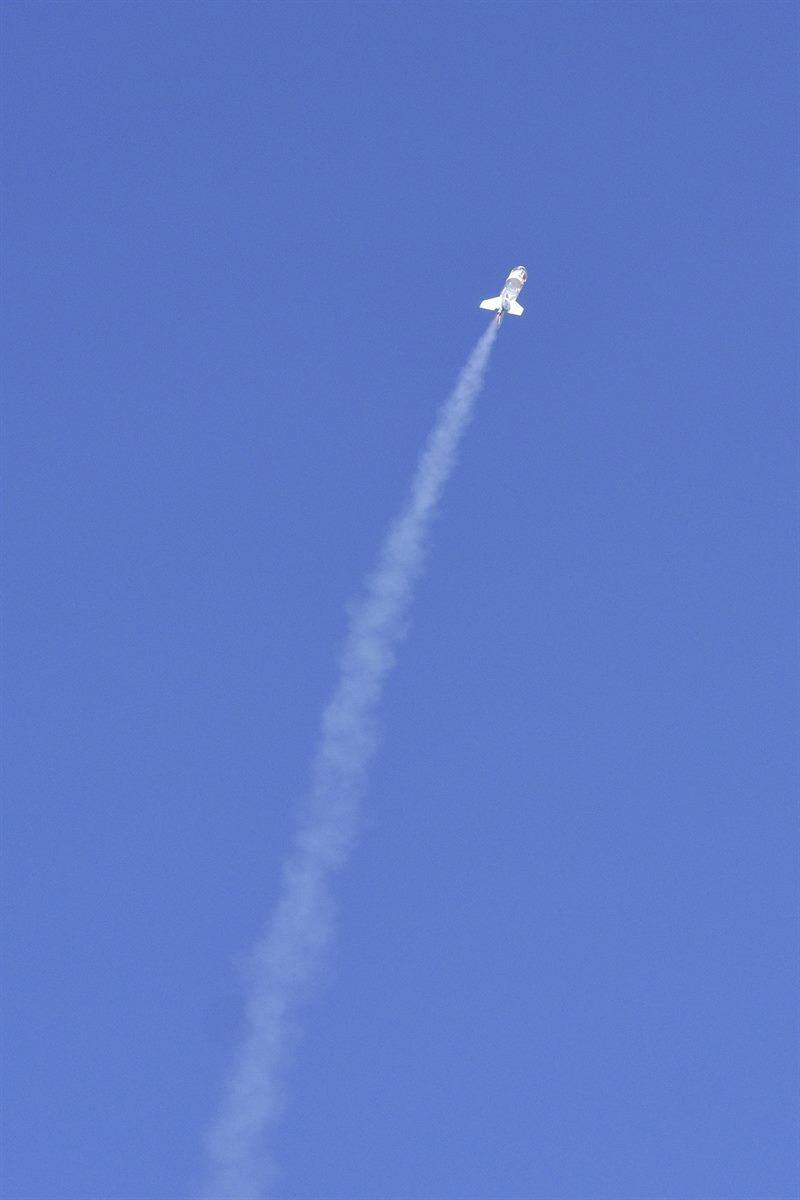
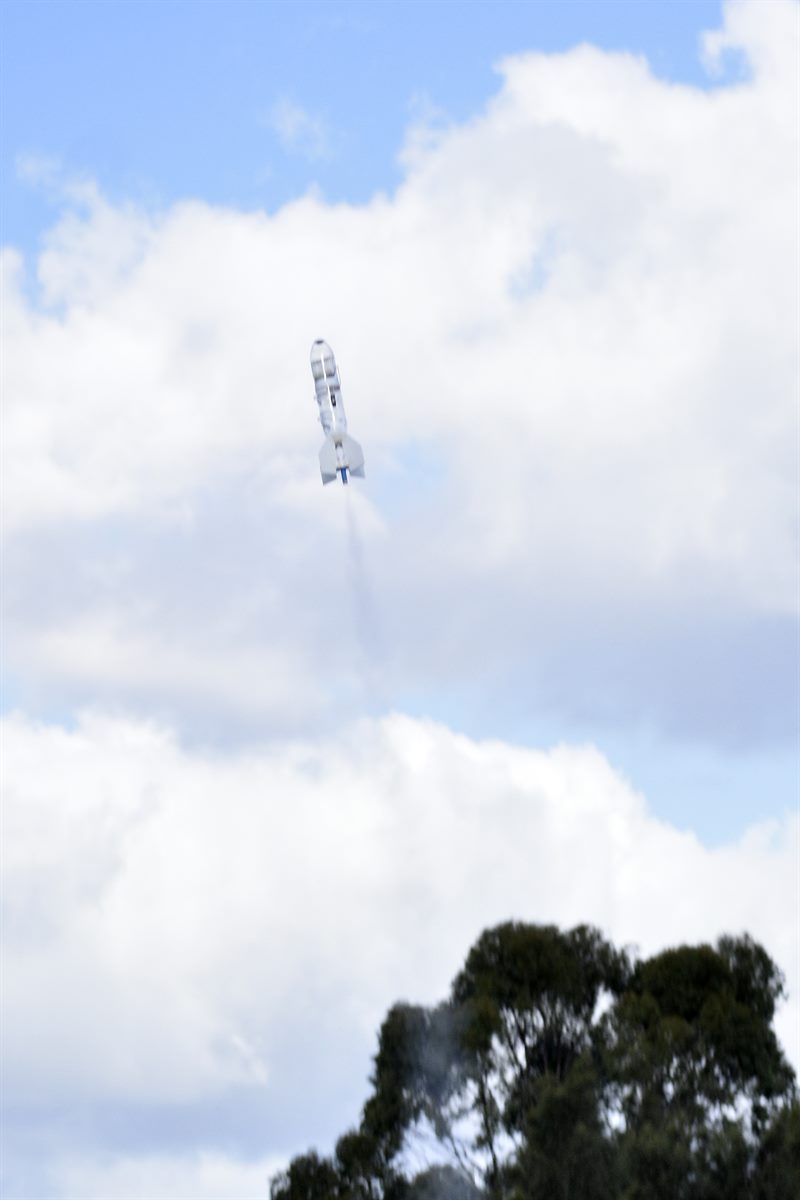
The rocket had good acceleration off the pad. You could hear that the launch sounded different with the air rushing out during launch. The rocket actually weighed in at 220grams which is almost double the recommended take-off weight for the C6-3 size motor, but the air gave it a good boost.
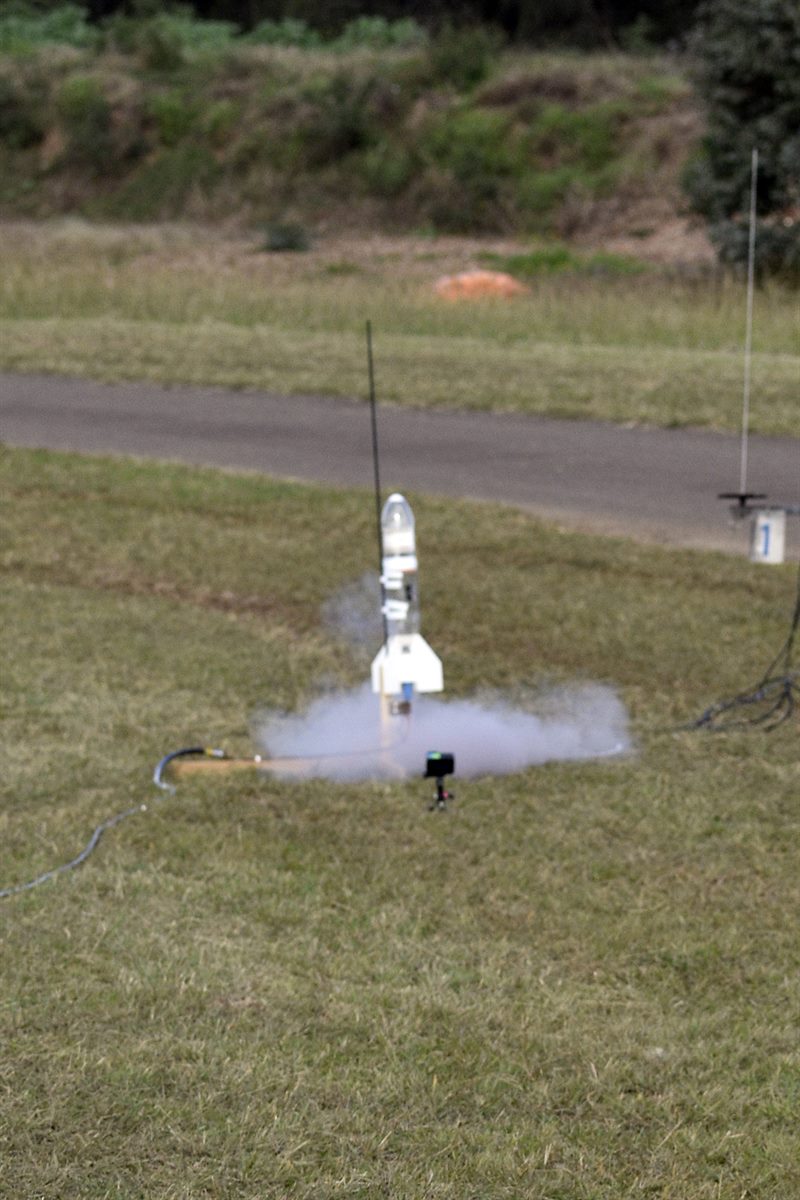
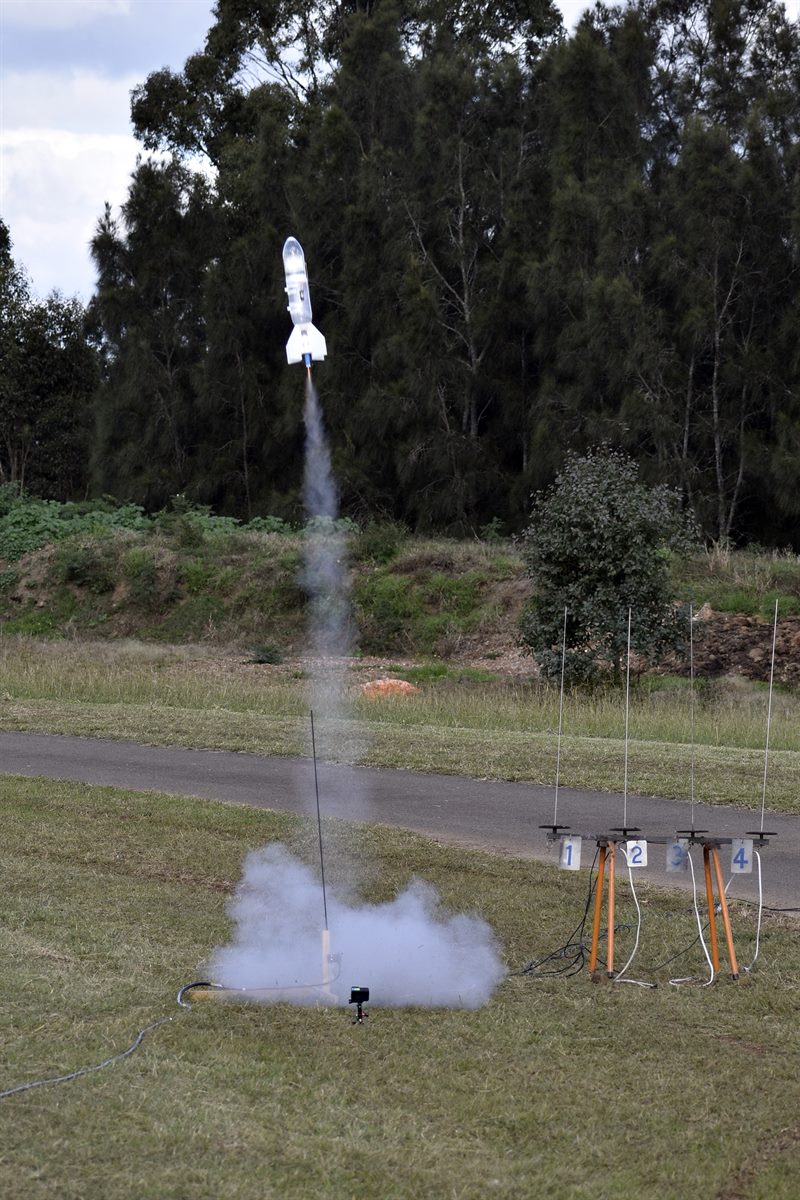
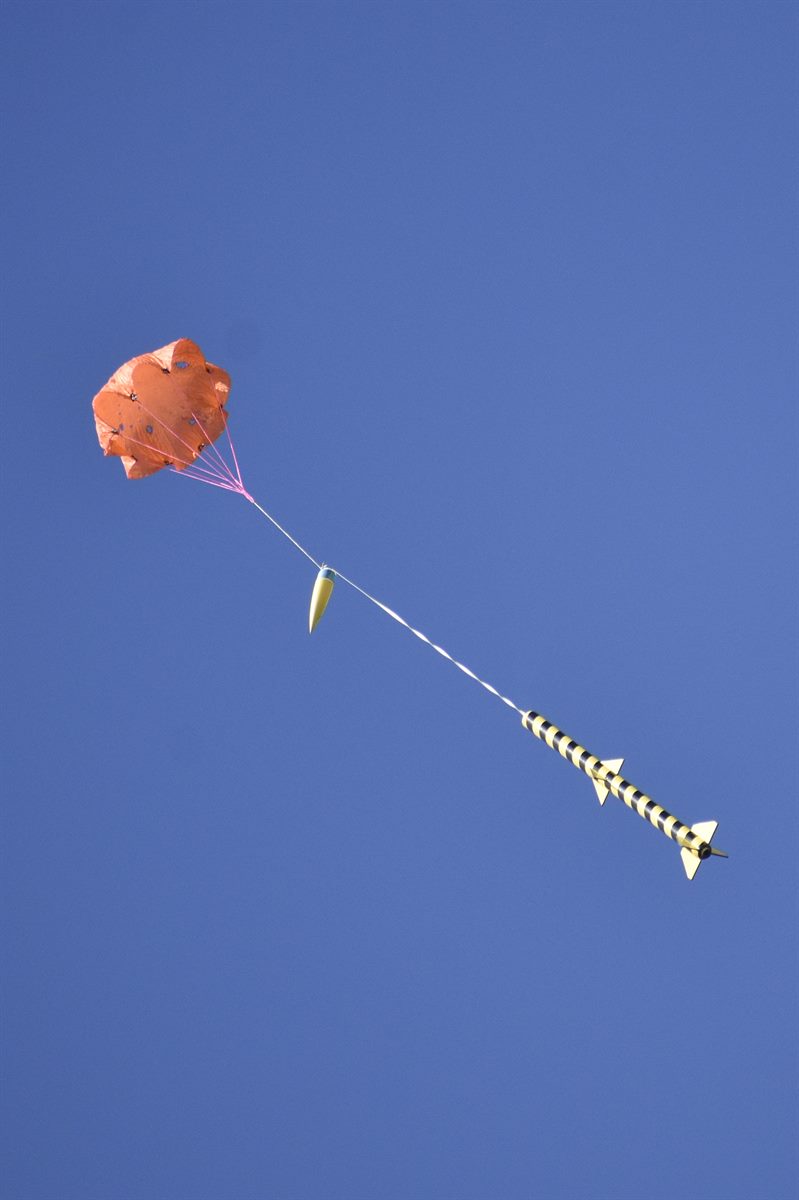
The rocket flew fairly straight, and flew through apogee with the parachute deploying quite a way past apogee. This rocket is quite draggy with a 90mm diameter air frame, so I wasn't surprised that it didn't coast too long. The parachute delay of 3 seconds seemed about correct from burnout. We measured this on the video replay.
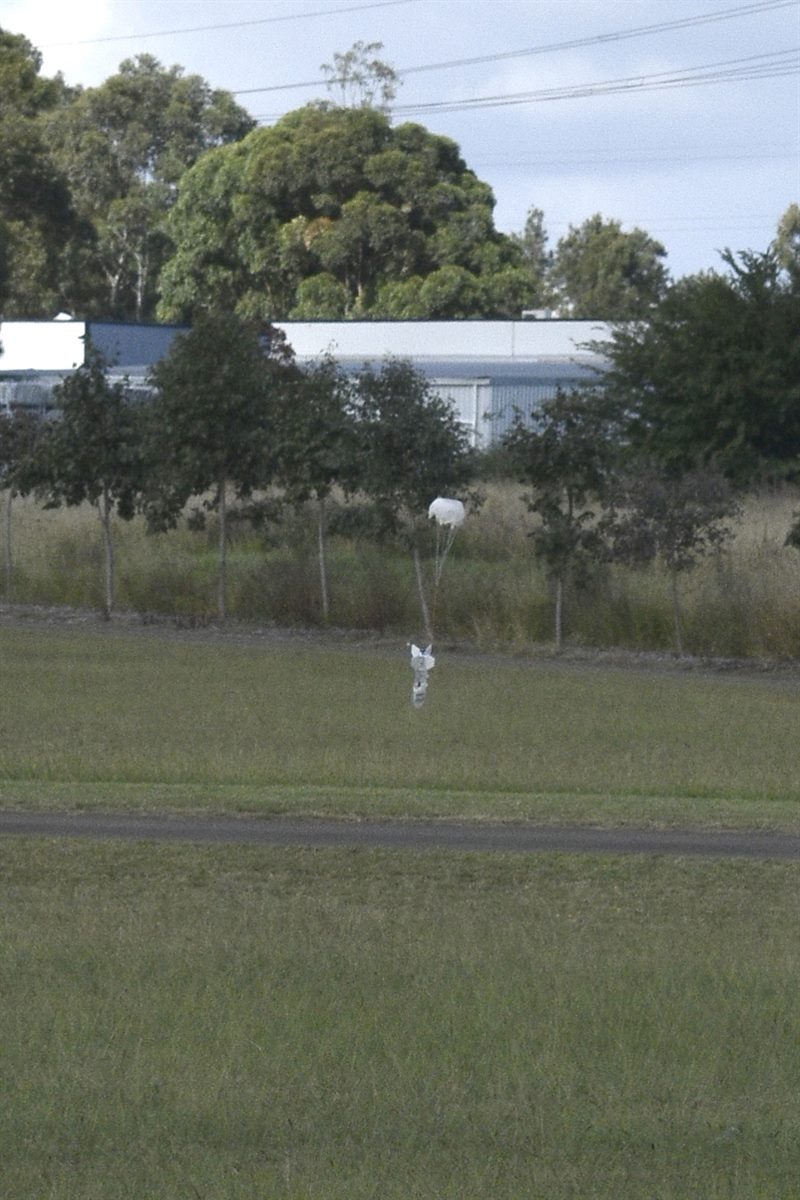
The rocket landed well under parachute without damage. The ejection charge didn't damage any part of the 3D print other than making it a bit sooty.


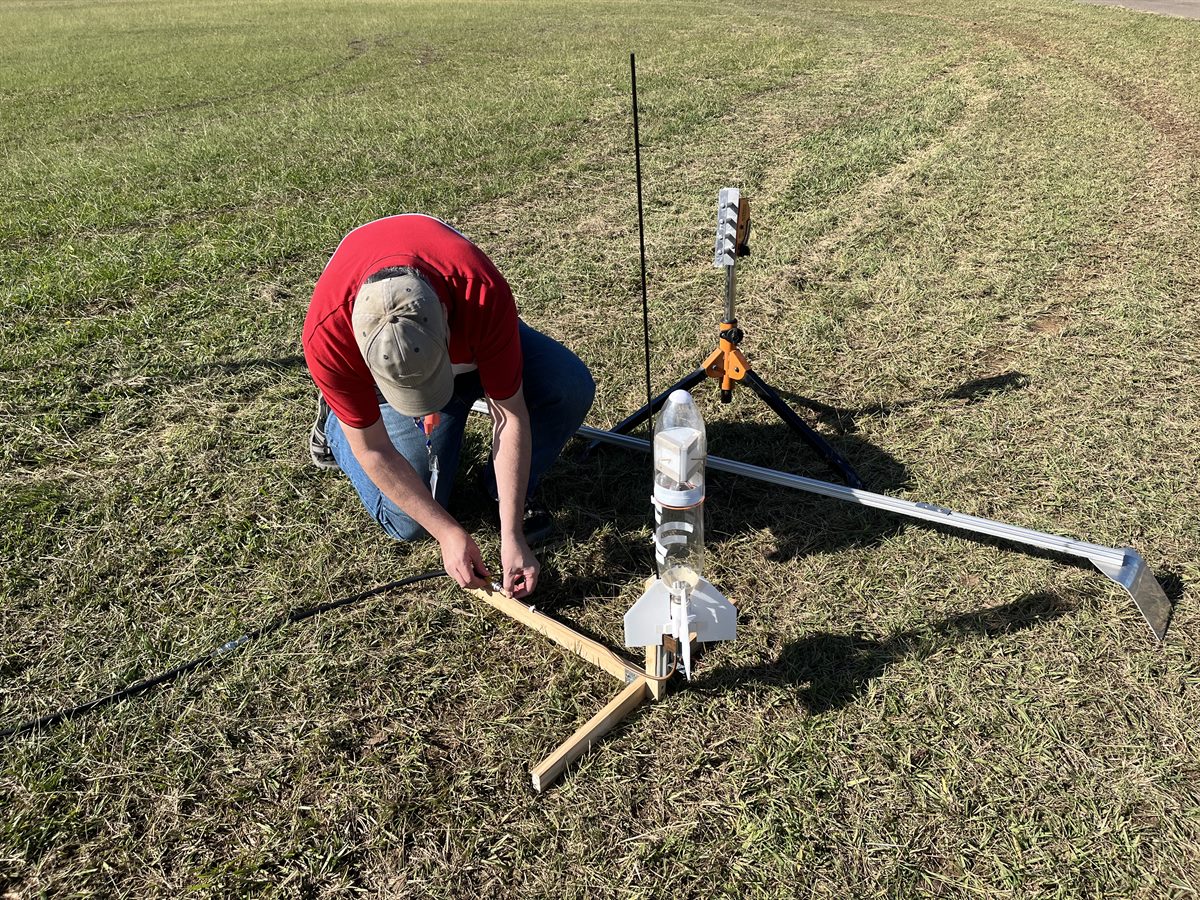
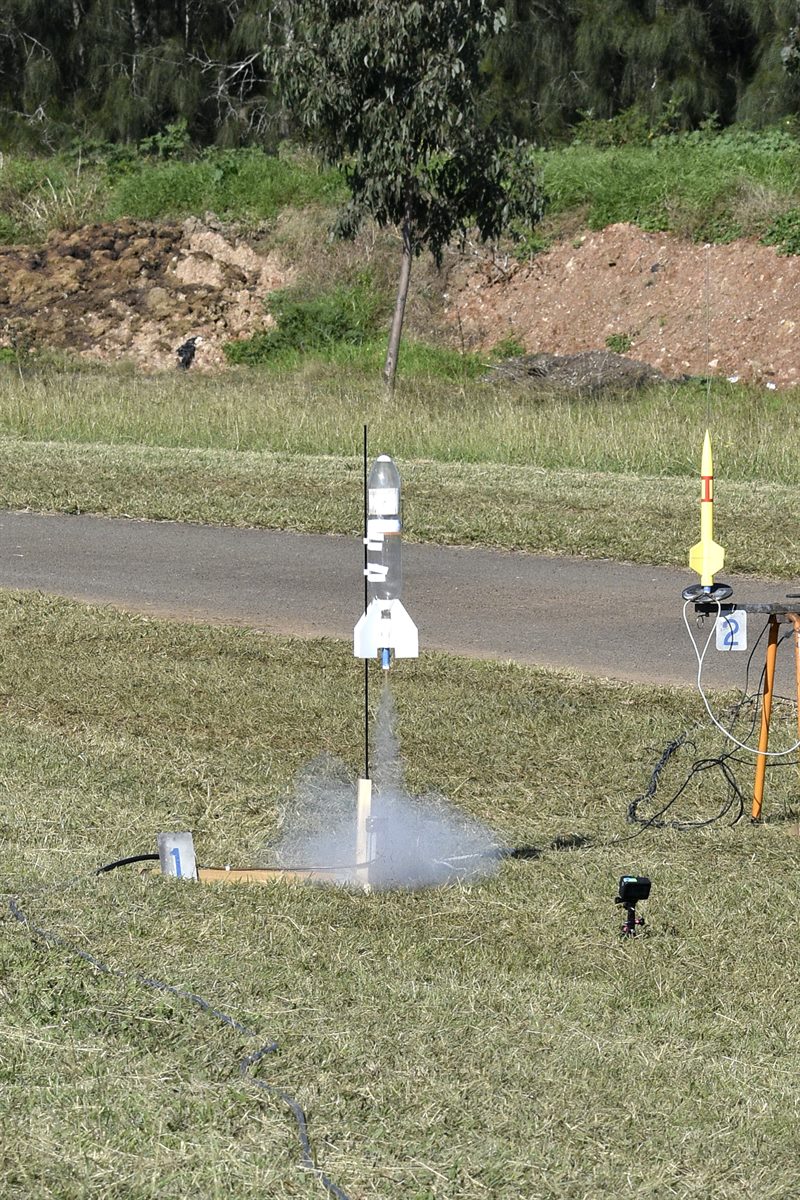
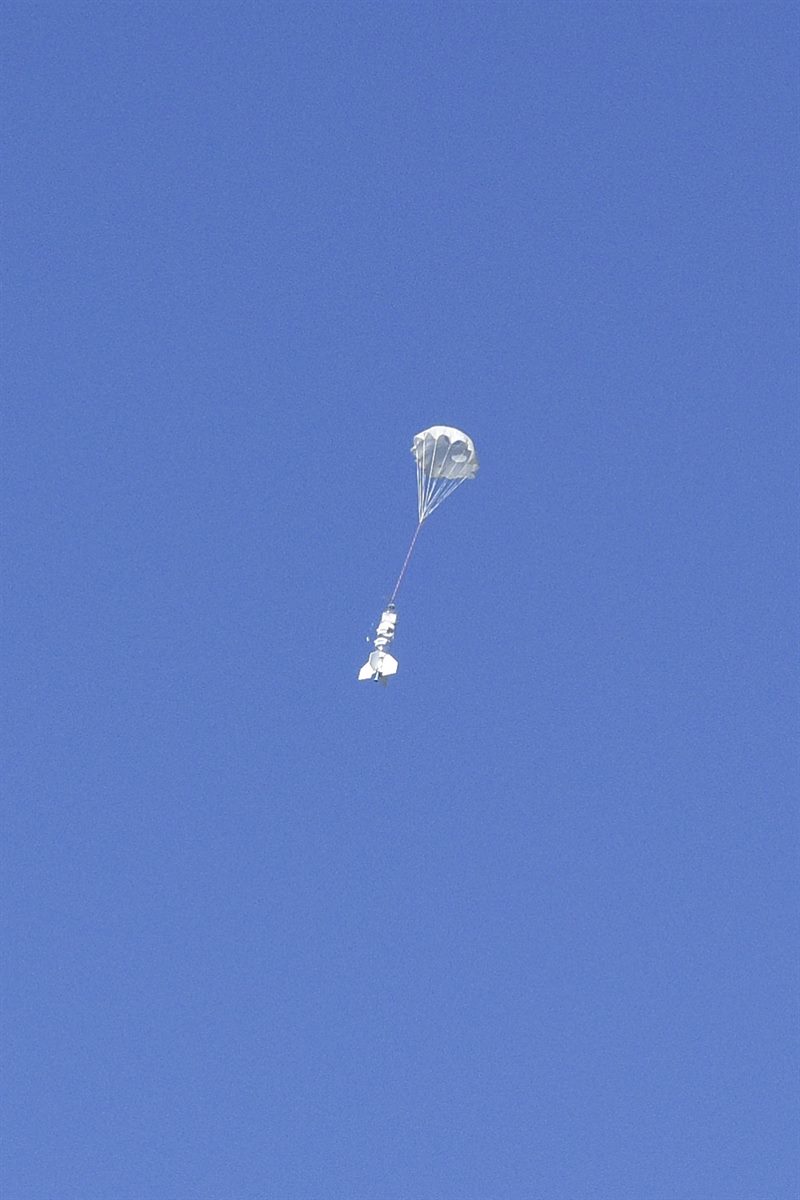
The prep for the second flight was almost identical. This time we taped an altimeter on the side of the airframe to see if we could get at least 1 data point of how this rocket performs. We again pressurised the rocket to 100psi and again the rocket launched well. This time it flew in a much wider arc and not as high. It only went to 142 feet which is less than what we were expecting, but since it flew in a wide arc it was not surprising. The parachute opened about 2 meters above ground but didn't slow the rocket down enough and the top fairing suffered some minor buckling. Everything else was fine.
Both flights showed that the rocket worked as expected, even though we only used fairly low pressure.
We were happy with the proof of concept flights, and I think we can move forward with creating a more powerful version. Perhaps something in the range of 300psi, 2.5L and flying on an E or F motors.
| Launch | Details | ||||||||||||||||||||||||
| 1 |
|
||||||||||||||||||||||||
| 2 |
|
||||||||||||||||||||||||
| 3 |
|