Aim
- To see if VISE glue is suitable for splicing.
- To test how VISE's viscosity can be altered to make it
suitable for splicing.
- To measure the burst pressure of a splice made with VISE
glue.
Experiment Setup
- A normal bottle splice is made with the VISE glue, and
then hydrostatically tested for burst pressure.
- A set of VISE glue and additive mixes are placed on an
inclined plane to see how viscous they are over time. A
control is used to compare against normal VISE.
- The optimal VISE glue mix is then used to make a regular
splice and hydrostatically tested to burst pressure.
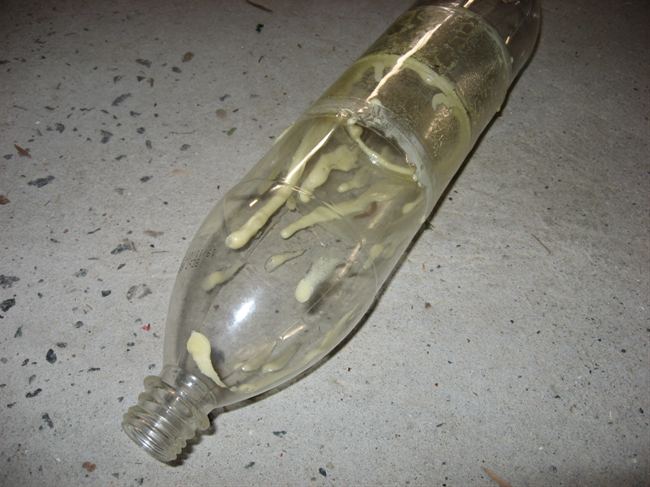
Test #1 - VISE only splice
We spliced a pair of 1.25L bottles using
the
symmetrical splice technique using the
VISE glue only. The glue has the consistency
of honey (also as messy) and remains quite runny for at
least a couple of hours. When the
splice was first made it all looked good for
the first 10 minutes, but then the glue
started dripping from the joints and
continued to do so. This glue slightly
expands as it cures and this expansion kept
forcing the glue out of the joints.
In an attempt to stop the glue from
leaking, water was poured on the inside and
outside to cure it quicker. VISE like PL
cure with atmospheric moisture. This bubbled
up the glue within minutes but did not
solidify it. In the end it became a large
mess with a lot of glue leaking out of the
joints.
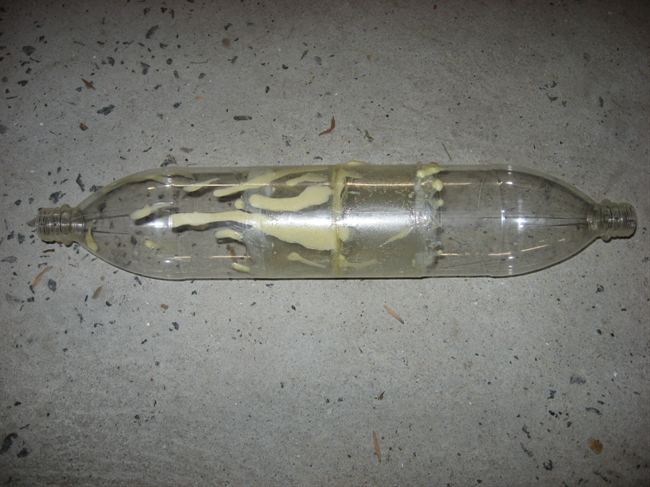
We let the splice cure for a week and
then did a hydrostatic test to see if it
could hold any pressure. The splice began to
leak at 20 psi from a number of "channels"
that developed while it was curing. Because
the leaks were only minor we pressed ahead
with the test and reached 100psi. At this
point the water was leaking too fast from
the bottle that more pressure could not be
applied and so the test was aborted.
Although the splice leaked it held well.
Test #2 - Changing the viscosity of the
VISE glue
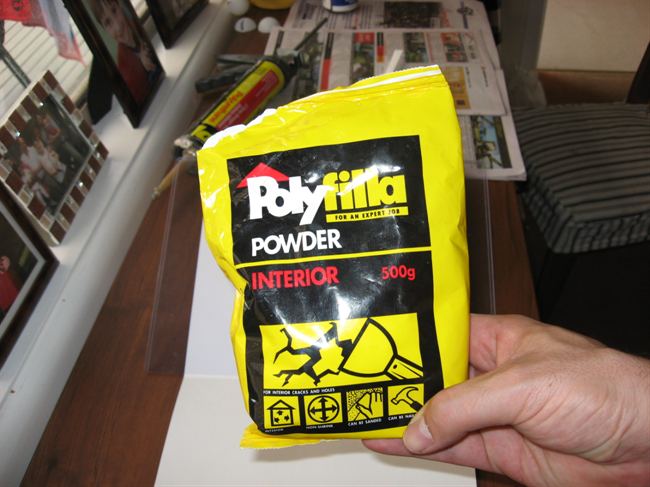
After a number of discussions with Damo,
Trevor, Clifford, Richard and David about
how to increase the viscosity using a very
fine powder we finally chose a material we
had on hand called
Polyfilla. The main website is
here.
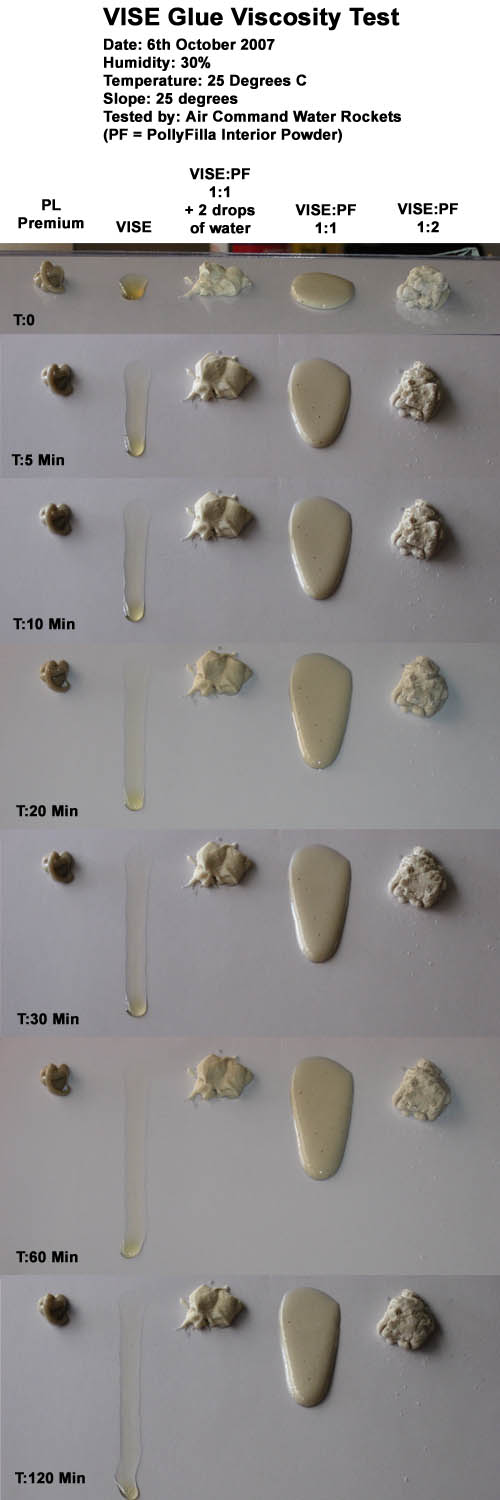
Please refer to the time-lapse diagram
below:
We mixed the glue with the powder in a
1:1 ratio by volume until it was thoroughly
mixed. We then took half of this mixture and
added a couple of drops of water and
thoroughly mixed that in.
We then also thoroughly mixed the glue
and powder in a 1:2 ratio by volume.
Along with a blob of PL Premium and the
VISE glue by itself we placed these mixtures
on a 25 degree incline, and took photos
periodically to see how it flowed.
 |
Pollyfilla powder was used in different
proportions to see if the VISE glue could be
made thicker. |
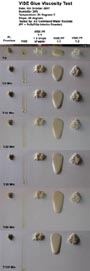 |
Over a period of two hours different
proportions of glue and powder were tested for
viscosity. PL
Premium was used as a control. |
The results
- PL Premium did not flow at all over a 2
hour period. After two hours it was still
soft although had slightly skinned over.
- The VISE glue kept flowing slowly and at
close to the 2 hour mark bubbles started
appearing in the drop. After 2 hours the
glue was still sticky to the touch.
- The 1:1 mix with water added solidified
the fastest but it had also bubbled up the
most. After two hours it was quite hard, but
resembling a meringue. It did not flow at
all.
- The 1:1 mix without water was still
quite runny after 2 hours but not as
much as the VISE glue by itself. The
bubbling was also quite minimal. It was
still slightly sticky after 2 hours.
- The 1:2 mix did not flow but had the
consistency of dough. It also looked
like it didn't have very high adhesion
properties. After 2 hours it was not
sticky but was still soft.
All the samples were left overnight and
by the next day they had all solidified.
Test #3 - Splicing with a 2:3 mix, and
pressure test
Test #2 showed us that it was possible to
considerably thicken up the VISE glue but
the 1:1 ratio was too runny and the 1:2 was
too dry so we chose a 2:3 ratio as the mix
we would go with for a test splice.
We mixed up about 15ml by volume of
polyfilla and 10ml of glue. This turned out
to be about the right amount for 1 splice.
The mixture was very thoroughly mixed into
an almost paste consistency.
 |
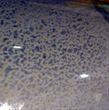
Splice made with 2:3 mix ratio of VISE glue
to Polyfilla powder. The gaps seen here were
filled in as the glue expanded. |
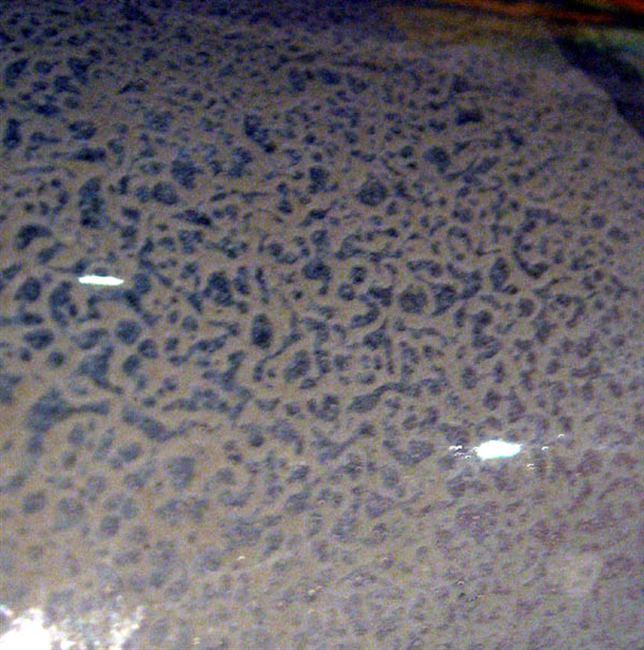
 |
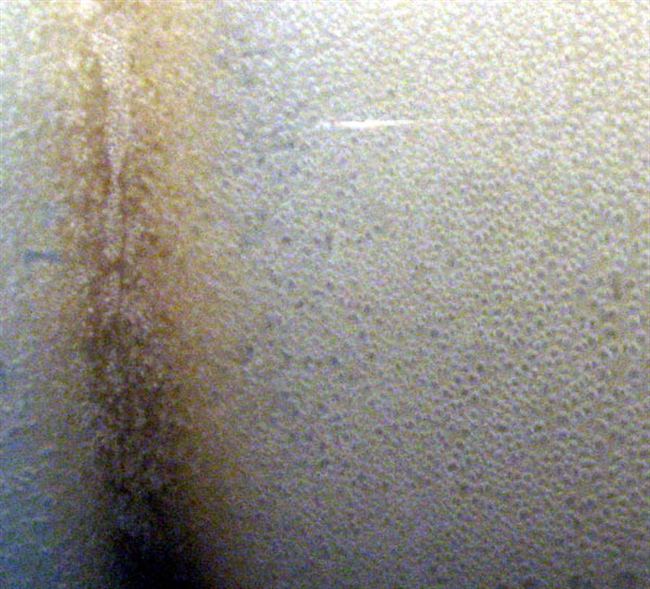
A contrast enhanced view of the cured glue
mix in the splice. |
 |
A contrast enhanced view of cured PL Premium
in a splice. Note the difference in bubble size. |
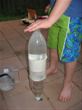 |
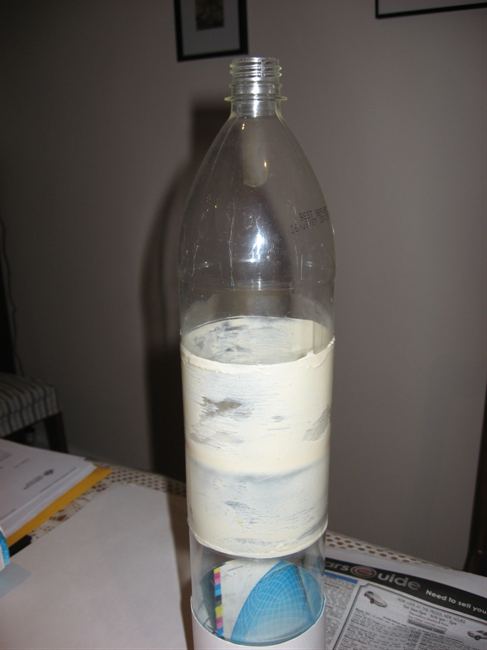
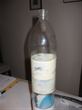
Ready to hydro-statically test the 2:3 mix
splice. Cure time was 5 days. |
 |
After reaching 170 psi the splice still held.
Burst test was aborted due to too much air in
the bottles. These bottles typically burst
at 190 psi. |
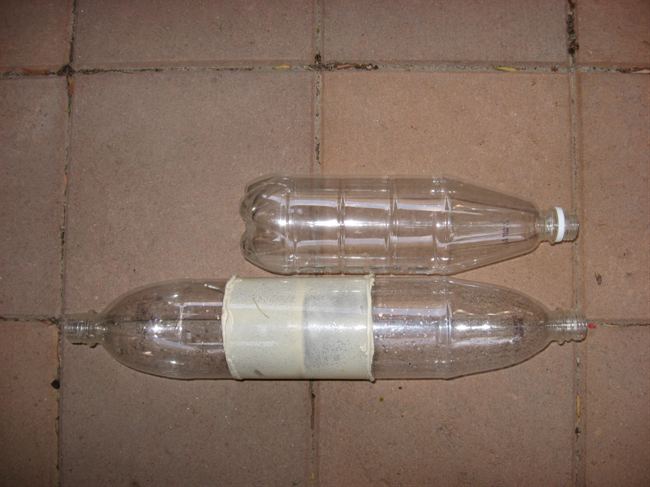
 |
You can see how much the bottles stretched
at the neck while still retaining a good bond in
the splice. |
The splice
Two 1.25L bottles were spliced again
using the symmetrical splice technique. The
splice sleeve was made from a heat shrunk
1.5L bottle. The width of the splice was
around 120mm. All surfaces were lightly
sanded.
The glue paste was easy to apply to all
the surfaces with just a skewer stick. All
the surfaces were completely coated with the
paste before being brought together. Excess
glue was wiped off. We also put a ring of
sticky tape on the inside edge of the curl
of one of the bottles. This was going to
help contain any glue dripping from the
inside joint.
At first there were a number of gaps that
didn't have much glue in the splice, but as
the glue cured it expanded and filled these
gaps.
The final cured glue pattern can be seen
above. Compare that with an identical
splice done with PL Premium. There appear to
be much larger air pockets, compared to PL's
smaller bubbles.
We let the splice cure for 5 days before
testing. As you can see from the photos
there were no drips and only a little
expansion around the edges that can be
easily removed.
Burst Test
After 5 days we set it up on the
hydrostatic test stand and pressurised it.
We went up to 100 psi and held there
for 1 full minute. There were no leaks and
the pressure remained steady.
We then slowly increased the pressure all
the way up to 170 psi! (11.7 bar
) The splice was still holding although
from what I could see from the distance
there might have been an almost
insignificant leak in the splice as a few
drops started to appear on the side. At this
point air started entering the bottles as
they were quite stretched and so the test
was aborted.
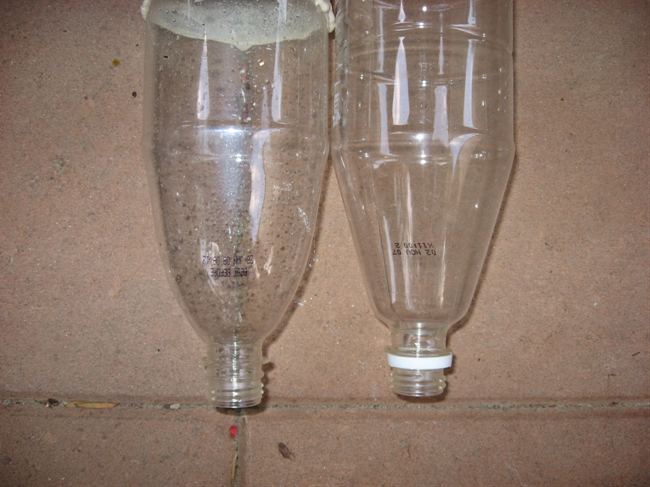
The photos above show how much the
bottles stretched around the neck when
compared to a similar bottle.
Conclusions
- The biggest problem with the VISE glue is
its low viscosity, as it can create quite a
mess of drips as it cures slowly.
- These tests showed us that the VISE glue
is a very effective glue for gluing PET and
at least here in Australia it is a viable
alternative to PL Premium when it is mixed
with a powder to make it easy to work with.
- We would be quite comfortable flying
these splices at 140 psi. The open question
still is what shock resistance the splice
has for rockets returning to Earth.
|