|
|
| WATER ROCKET CONSTRUCTION - BASIC |
 |
|
So you want to build one... The following instructions describe how to build a
simple single stage water rocket capable of flights to altitudes
of around 60 � 80m. (~180 � 250 feet). For simplicity this rocket does
not use a parachute.
For more advanced construction tutorials go to the
Construction Index.
Warning
When cutting PET
bottles with a knife, it is easy to slip and do some damage to yourself,
or the work area. Always reach for scissors first as these are easier to
control and much less dangerous. A rubber chicken is not sharp enough to
cut through plastic bottles.
Tools
You will need at least the
following tools when building the rocket and launcher but a well
equipped workshop is always useful:
- Drill and drill
bits.
- Round or half round
file
- Scissors
- Stanley knife
- Fine sandpaper
- Hacksaw or tin
snips
- Tape
|
|
|
|
| Body |
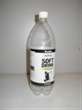 |
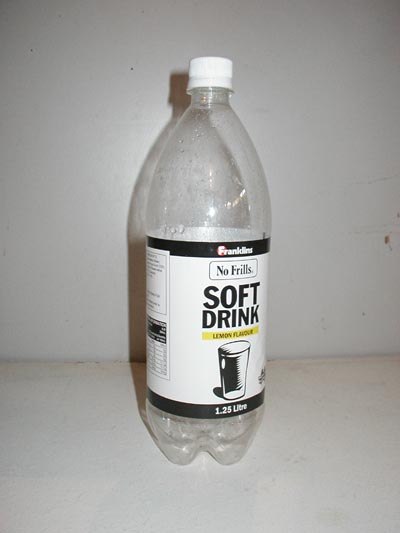
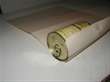
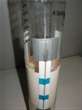
A typical 1.25 L bottle... about to be
transported faster than ever before. |
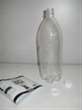 |
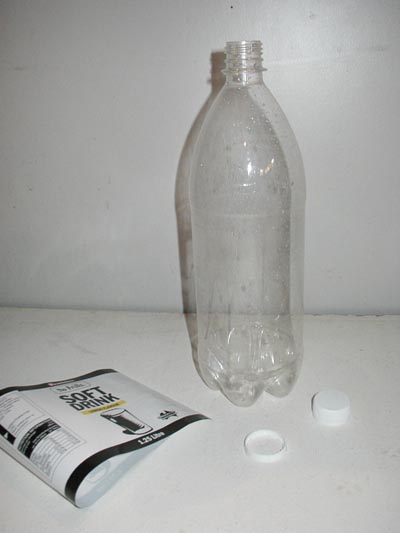
Drink the contents of the bottle and wash it out. Remove the
label, cap and the plastic ring. |
|
A complete bottle will be the fuel tank that
will also hold the pressurised gas.
Bottle Preparation
- Get a 1.25L bottle and wash it out
with dishwashing detergent to get the sticky residue out.
The shape of the bottle can play a role in the aerodynamics,
water flow within it and its center of gravity. For this reason a bottle
with straight walls, no ornate protrusions and a smoothly
tapered neck is a good choice. (Shaped Coke bottles are an
example of an unsuitable bottle)
- Remove the label.
- If the label leaves a sticky residue you can easily
remove it by using a little mineral turpentine on a cloth.
You should then wash the turpentine off with a soap and
water.
- Inspect the bottle for any kinks or
scratches. The bottle may burst at these places when
pressurised to a higher pressures.
- Measure the capacity of the bottle,
don�t necessarily believe the label. Knowing the capacity
will help you determine how much water should be put in.
That�s the end of the bottle preparation.
Storing the contents of the bottle in a
plugged up sink with a note �will drink later� is probably less
than ideal. Make sure you buy bottles with contents you will
drink. Because a bottle looks aerodynamic in the store does not
mean you will want to drink some cheap imitation lemonade. While
making rockets you will need plenty of bottles to make different
components. The best way get bottles is from your friends, that
way they feel they have contributed to the race for the lower
atmosphere. |
|
|
|
Back to Top
| Ring Fins |
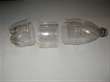 |
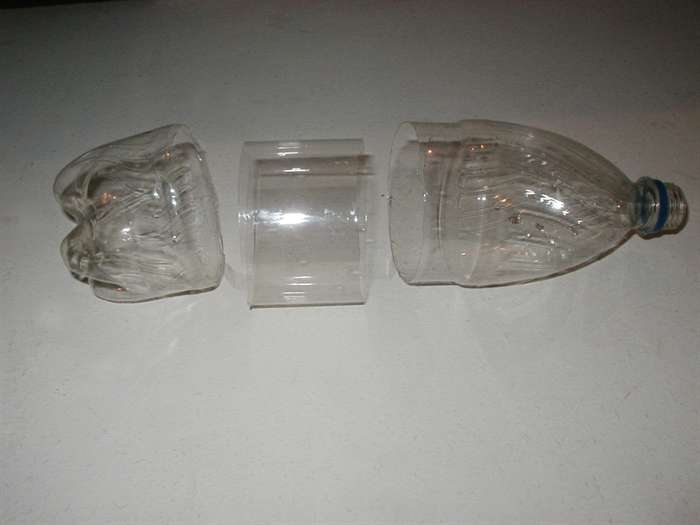
Cut a plastic ring from a bottle. |
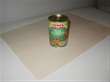 |
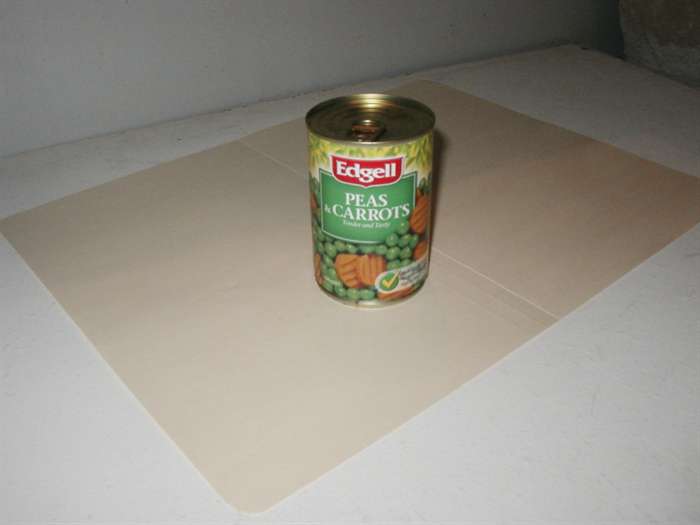
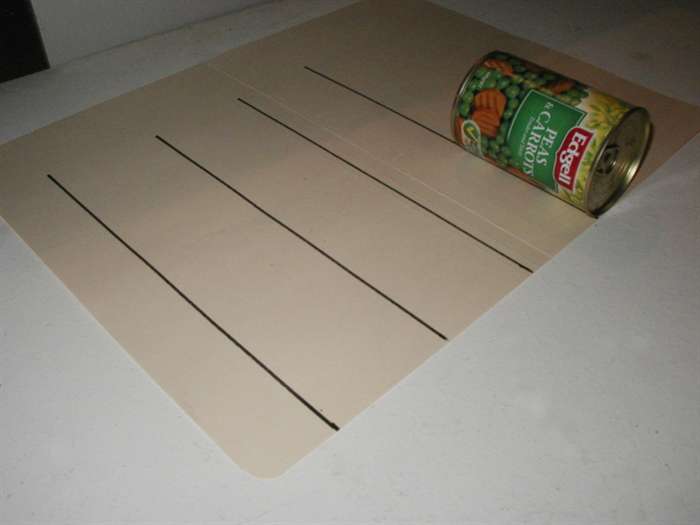
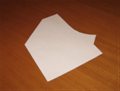
A can with an appropriate diameter and a
manila folder. |
 |
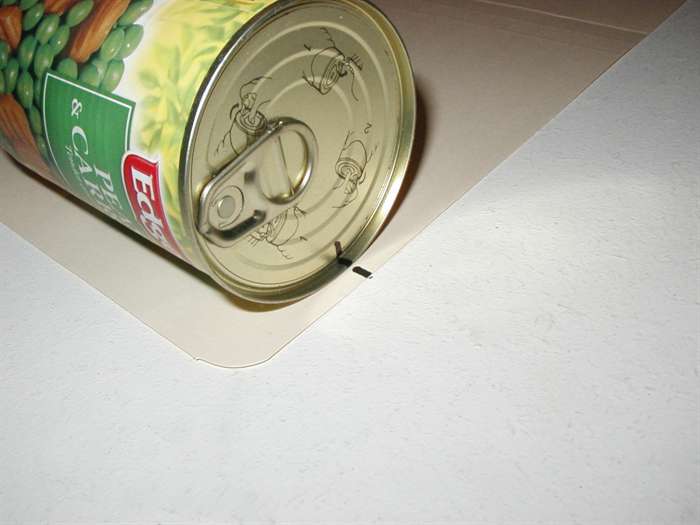
Mark the can and paper. |
 |
Roll the can along the edge and then divide
the length into thirds. |
 |
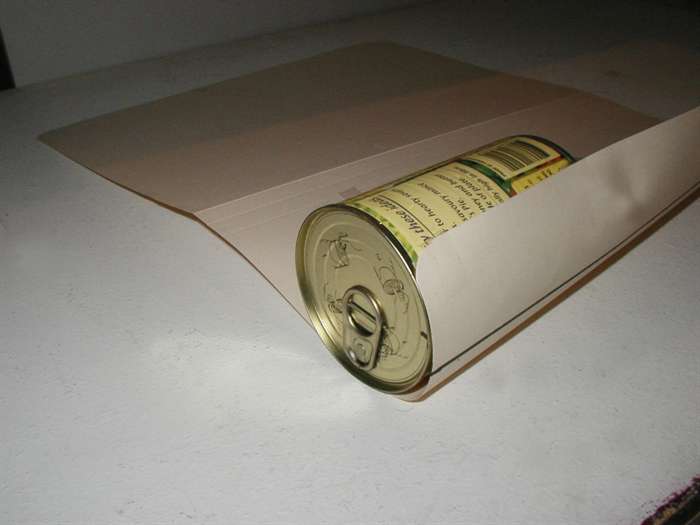
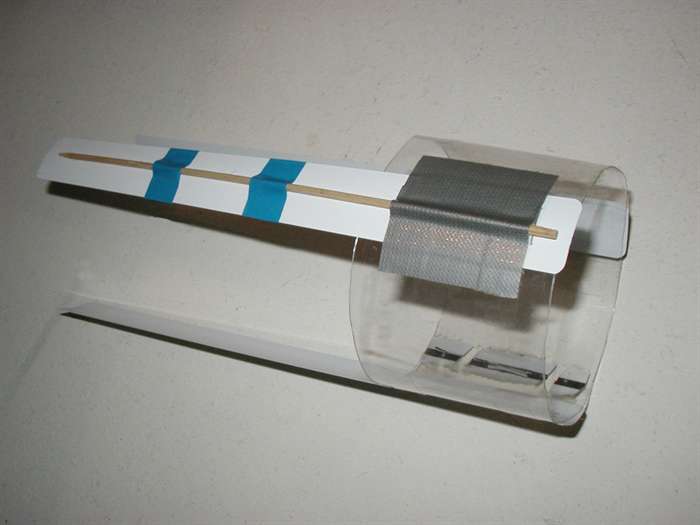
Roll the manila folder around the can
tightly, and tape when finished. |
 |
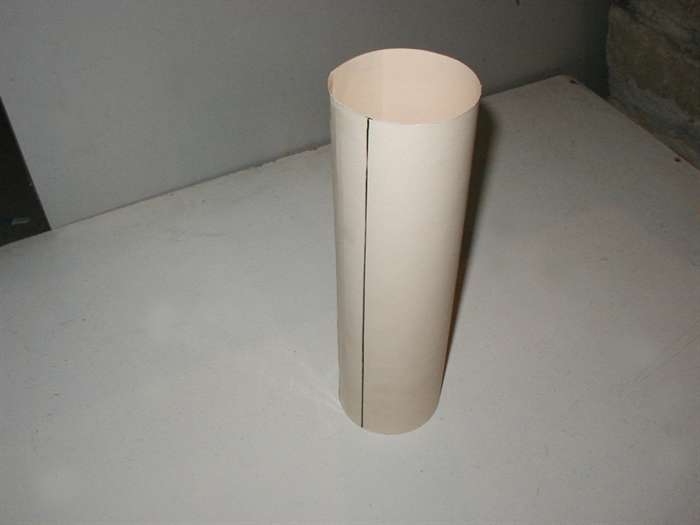
Finished fin jig. Make sure that the can and
folder sit square on the table. |
 |
Slip the ring over the fin jig. |
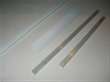 |
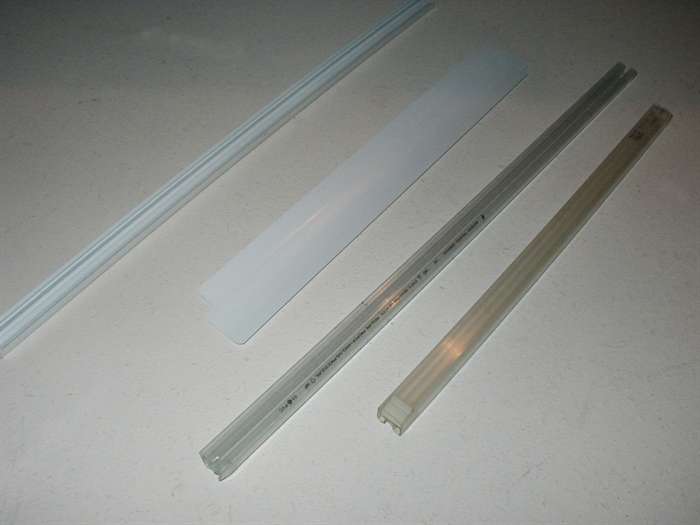
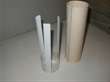
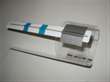
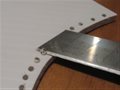
Choose an appropriate strut material. We
will use slimline Venetian blinds cut to length. |
 |
Align the strut along the lines on the jig,
and tape the strut to the ring. Repeat for all
struts. |
 |
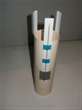
Slide the fin assembly off the jig. |
 |
Staple and or tape the struts securely to
the ring. |
 |
Reinforcing of the struts is recommended if
you are using Venetian blinds. |
 |
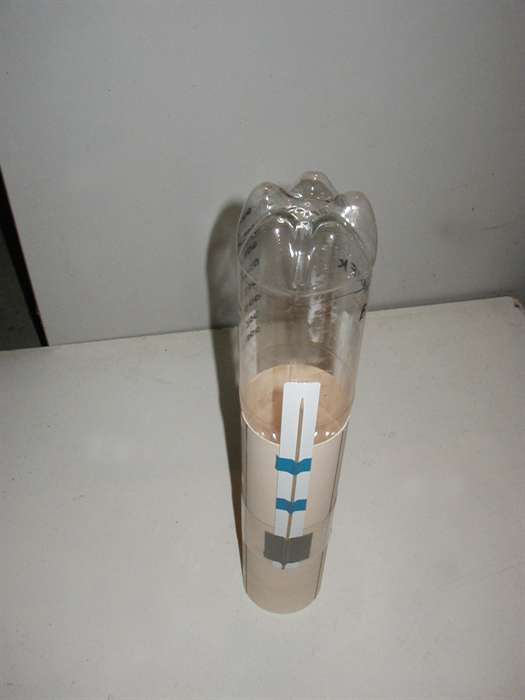
Place the ring assembly back on the fin jig
and leave an overlap at the top. |
 |
Place the main bottle body into the jig.
This helps align the body with the fins. |
 |
Tape the struts to the body and then just
slide the whole thing off. |
|
|
We prefer to make ring
fins for our small rockets. This is because they are easy to
construct, are easily aligned, are very aerodynamic, and fit in
the launcher nicely.
It is very important to
align the fins as accurately as possible so that the rocket
flies straight. Before we make the fins we will create a jig
that will make the whole process easier.
Fin Alignment Jig
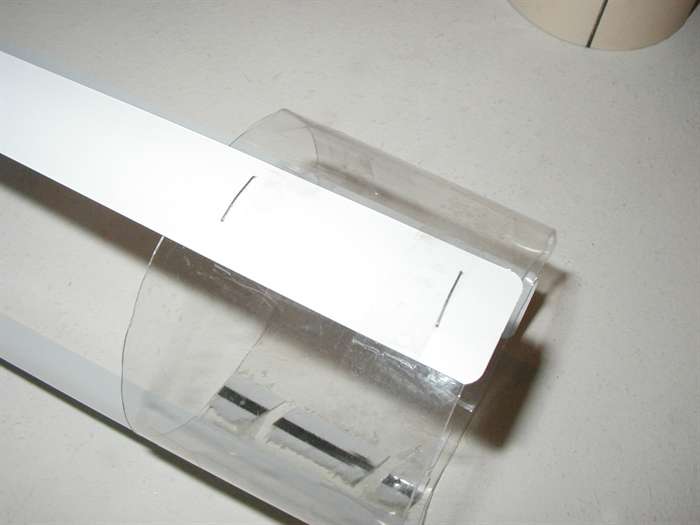
- Get an empty washed-out
bottle that is the same diameter as the bottle prepared earlier
and with scissors cut out a ring of material. You can experiment with the width of the
fin ring, but around 50mm is a good compromise. Making the ring
narrower, reduces the weight of the whole rocket, but also is
less effective.
- Find another bottle with
straight sides or preferably a can of food whose diameter is
about 2mm less than the ring you have just cut out. It does not
matter if it is canned carrots or soup.
- Now get a manila folder
and place the can on top of it aligning the can�s edge with the
edge of the folder. Put a mark on the can and the folder for
alignment.
- Roll the can along the
edge and place a second mark on the folder where the original
mark on the can was.
- Now divide this distance
into thirds, and accurately make 3 parallel lines on the folder
that are perpendicular to the bottom. These lines will be used
for aligning the fin struts.
- Now roll the manila
folder tightly around the can making sure that the lines are
visible on the outside and that the bottom edge of the folder is
flush with the can and sits upright when standing. Use tape to
hold the folder on the can. Leave the can in the folder as it
ensures that proper shape is maintained and provides a stable
weighted base when assembling the fin.
- The bottle ring should
fit snugly on the jig but not too tight.
The fin jig is now
finished.
Before dinner go down to
the grocery store and replace the can of food you used for the
fin jig!
Fin struts
You will need to make
some struts to hold the ring in place. These struts should be as
stiff and as light as possible. You will need three of them.
Some suggestions:
- Slim aluminium Venetian
blinds: These are lightweight and relatively sturdy, they are
very easily attached with a stapler, however, they do
have a tendency to buckle on impact. If you use these, you
should consider reinforcing them with something lightweight like
bamboo skewers.
- Rohan sent in a good suggestion as an alternative to
Venetian blinds and that is to use old tape measures. He
reinforces them with skewer sticks.
- Anti-static IC
packaging: These are very strong, light weight and relatively
indestructible. Use the ones for DIP (Dual In Line) packages.
You should be able to pick some up from a local electronics
store, perhaps for free if it is waste.
- Extruded plastic
moulding: - This tends to not be as stiff as the IC packaging and
also tends to be a bit heavier. If the moulding is
relatively wide, you may be able to just use 2 instead of 3.
- Various plastic tubing or thin
fibreglass rods are also suitable alternatives.
- Bamboo skewers ( see the
D.Y. or Clifford
rockets )
In this example we will use the Venetian blinds as they are
quite common, light weight and provide extra surface area for
the fins.
Procedure
- Cut three 300mm lengths
of the strut material.
- If you are using other materials you
may want to consider tapering the leading edge
of the strut with a knife or scissors for better aerodynamics.
- Place the ring on the
jig and hold in place with a small piece of tape.
- Place one strut along
the line drawn on the manila folder and hold it at the top with a
clothes peg or a piece of tape.
- Now tape the bottom of
the strut to the ring. This is only temporary while everything
is aligned.
- Repeat the steps above
for the remaining two struts.
- Now remove the fin assembly from the jig. This now gives you a
well aligned ring fin with parallel struts.
Design Note: We found that tape was
insufficient to survive more that a couple of impacts when using
IC packaging fin strut material so we
wired the struts to the rings. An easy way to make small holes
in the plastic is to heat a needle over a flame such as the
stove and then simply push the needle through where you want the
hole. Use a pair of pliers to hold the needle � well for obvious
reasons. Also do not try to use a sewing machine to make things
go faster as getting the flame to sewing machine needle it is a
little tricky.
Burning the hole through
as opposed to drilling it, makes sure that the material does not
develop tiny cracks around the edge of the hole that could make
it fail on impact.
After you have made all
the holes, use some wire to hold it together. This
gives a very strong bond. You can now remove the tape that was
used when aligning everything.
- Now staple or tape the struts to the ring for a secure
bond.
- You can reinforce each strut with a bamboo skewer simply
by taping it on. We were surprised at how well this works
without adding too much weight. We have never had a buckled
strut since.
- Place the ring assembly back on the fin jig but leave
the ends of the struts showing over the top.
- Put the rocket body (bottle) upside down into the jig.
This allows you to align and hold the bottle in place while
you are attaching the struts.
- Tape the struts to the body of the rocket and then
simply slide the rocket off.
And you are done with the fins. |
|
|
|
Back to Top
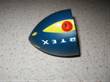
| Flat Fins |
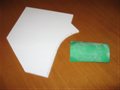
 |
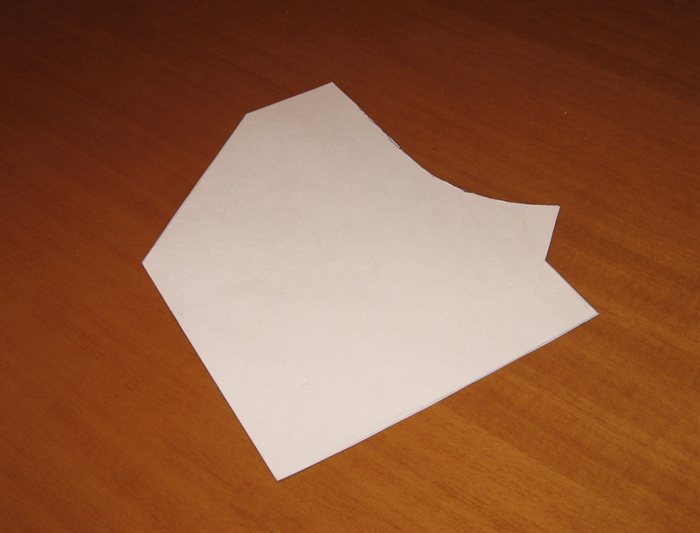
A cardboard fin template |
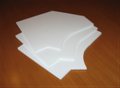 |
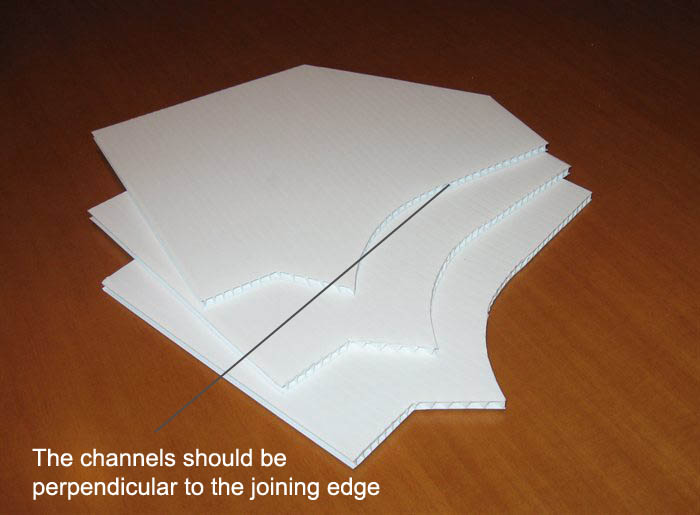
Corriflute cut out to shape |
 |
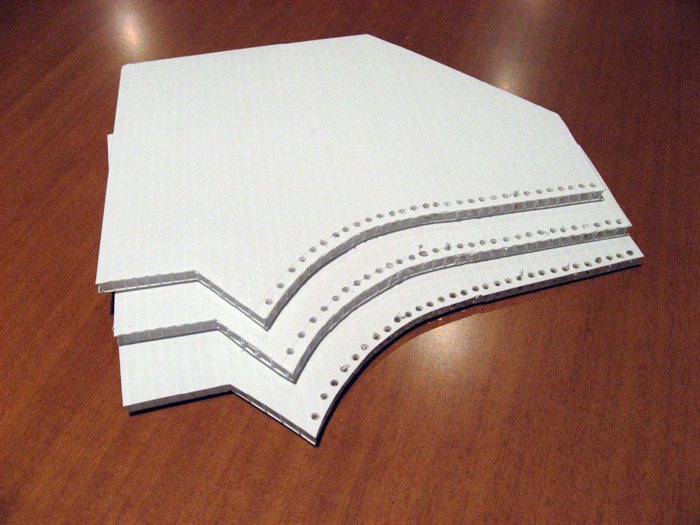
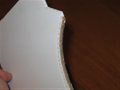
Small holes drilled along the edge to be
joined. |
 |
Trim the left over plastic after drilling. |
 |
Lightly sand the area to be glued. |
 |
Lightly sand the bottle where the fins are
to be attached. |
 |
Fin alignment jig sitting on top of the
rocket. |
 |
Run a bead of PL Premium along the edge
making sure it penetrates up to the holes. |
 |
Place the fin on the bottle. |
 |
Run a bead of glue on the outside to cover
the holes and create fillet. |
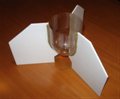 |
Completed fin set that can be fitted to
different rockets. |
|
|
For larger rockets, ring fins are not always practical and so the more
conventional flat fins should be used.
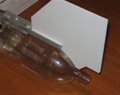
Here we are making the fins from Corriflute (Correx)
corrugated plastic that
signs are commonly made from. These are durable, lightweight,
water proof, nice and flat and above all inexpensive.
One of the most common problems with Corriflute is that it is
made from polypropylene and so is very difficult to glue
with any great amount of strength. Most glues will not stick to
it well . The procedure described below
will ensure a good strong bond to the bottle. In this procedure
we attach the fins to a section of a bottle that can slide over
the top of another bottle which allows it to be reused on other
rockets, but the fins can be glued directly to the rocket body.
Fins need to be attached well because large G-forces and drag
could brake them off or if the rocket lands on them during
descent.
Procedure
- Make a cardboard template of the fin shape you would like to
use. Make sure that it contours the bottle as closely as
possible. As far as the fin shape goes that is up to you.
The main thing to remember about fins is that they need to
be stiff, as far back as possible and lightweight. Always
remember that fins are there to add
rocket stability and so ultimately the surface area of
the fins is important.
- Trace this template onto the
Corriflute material so that the channels
run as close to perpendicular to the
bottle as possible. On curved surfaces
an
approximation to perpendicular is good
enough.
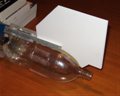
- Cut the fins out with a sharp craft
knife.
- Now using a 2mm drill bit, drill a hole all the way
through the fin in each channel. The holes should be 3 to 5
mm from the joining edge. If you are using thinner
Corriflute, adjust the spacing accordingly. (See photo)
- Clean up the holes with a sharp knife, cutting off any
bits left over after the drilling.
- Clean the surfaces around the holes and lightly sand them.
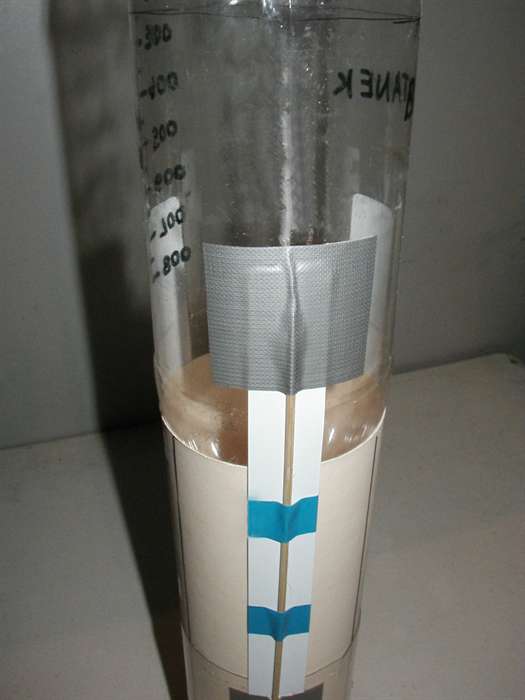
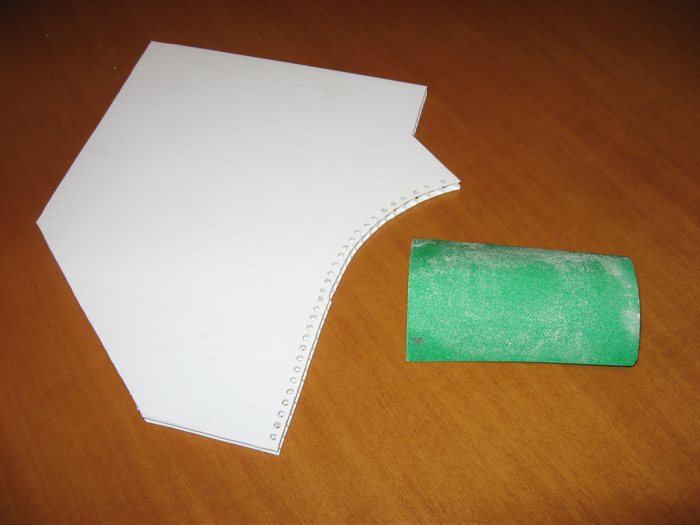
- Now lightly sand the bottle where you are
going to glue the fins. The number of
fins you use is again up to you but anything above 4 is of
little benefit. 3 or 4 fins are the most common. A good way
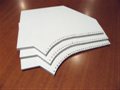
to measure the distances around the bottle is to wrap it
with a piece of paper and then use a ruler to divide it up
into thirds or quarters and mark the positions. Put the
paper back on the bottle and transfer the marks to the
bottle.
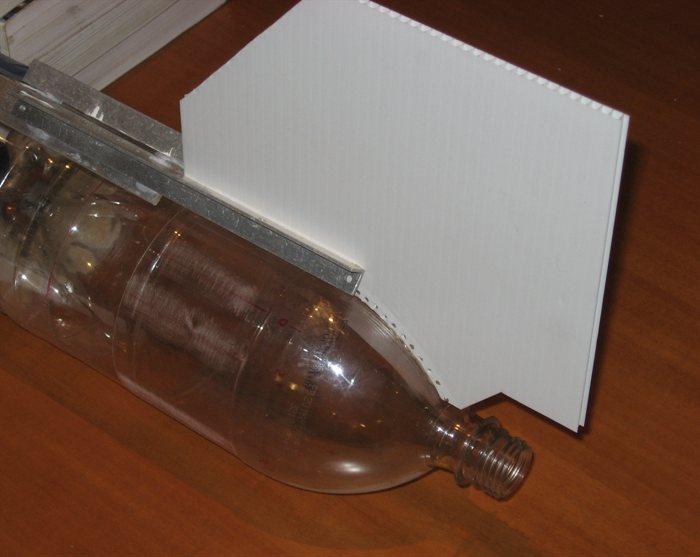
- For the next step we use a simple alignment jig to keep the fins
pointing in the correct direction. You can use a
length of plastic, wood or aluminium angle and simply rest
it on top of the rocket. It will naturally align itself with the axis of the
rocket. We then attach a pair of smaller angle brackets
to it in order to support the fin from either side. This
also allows the aligning jig to keep clear of the glue
fillets. You can tape the jig to the bottle to secure it
further. We wedge the rocket between stacks of heavy books
to keep the rocket steady on the table.
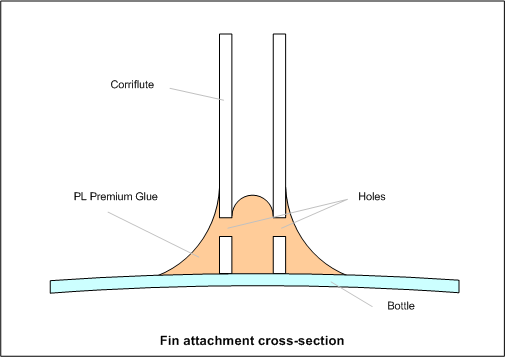
- Run a bead of PL premium into each of
channels so that it penetrates all the way up to the holes.
NOTE: Anytime you use PL premium you should use
gloves and always work in a well ventilated area.
- Place the fin onto the bottle and
align using the jig.
- Now run a bead of PL on the outside between the bottle
and the fin. You can use a gloved finger
to make a nice
fillet between the bottle and fin but
make sure a healthy thickness of glue remains over the
holes. Do this from both sides.
- Let the glue cure overnight before
doing the next fin.
You now have a strong bond between
the fin and the bottle. The holes allow
the glue on the inside and outside to
merge creating little fingers that keep
the Corriflute in place mechanically
even if the adhesion fails in parts.
 |
|
|
|
Back to Top
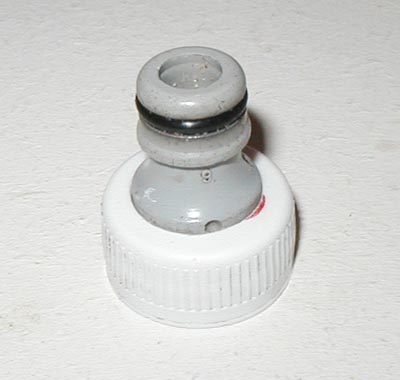
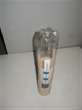
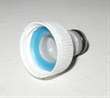
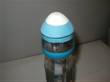
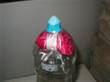
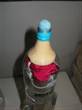
| Gardena Nozzle |
 |
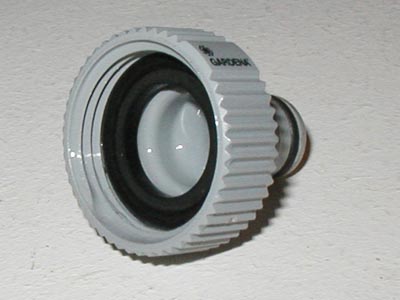
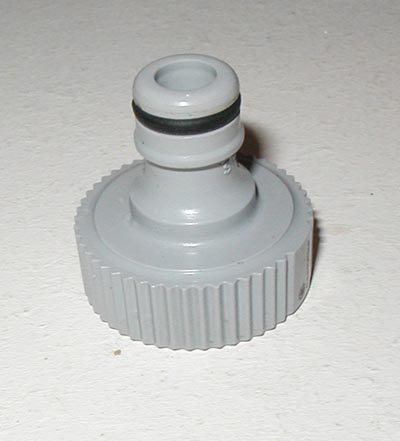
A typical tap garden hose attachment. |
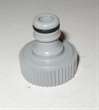 |
Make sure it is of reasonable quality with a
good o-ring. |
 |
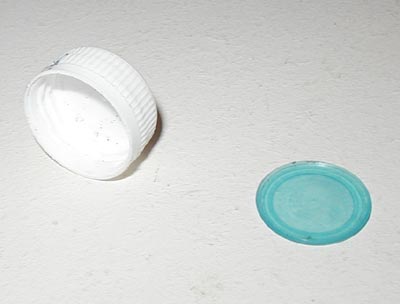
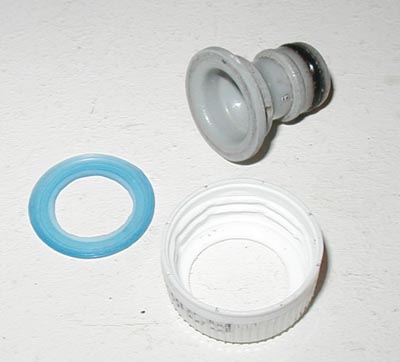
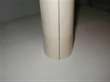
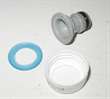
Remove the thread leaving a shoulder. |
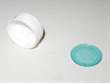 |
Remove the plastic seal from the cap. |
 |
Cut a hole in the cap and the seal. |
 |
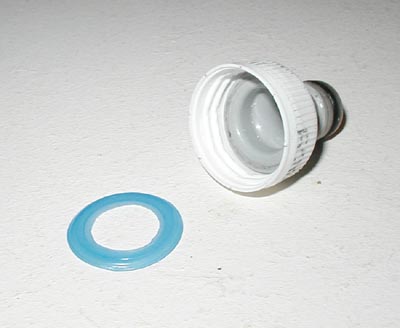
The garden hose attachment should fit
snugly in the cap. |
 |
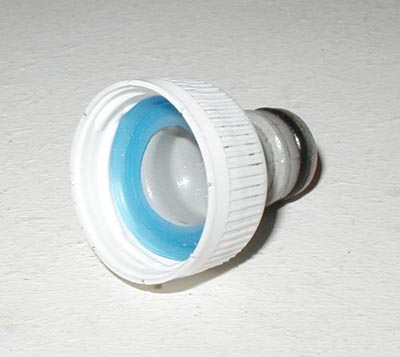
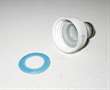
Place the seal against the hose fitting. |
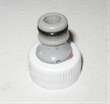 |
A completed nozzle. Notice the tight fit
between the hose fitting and cap. |
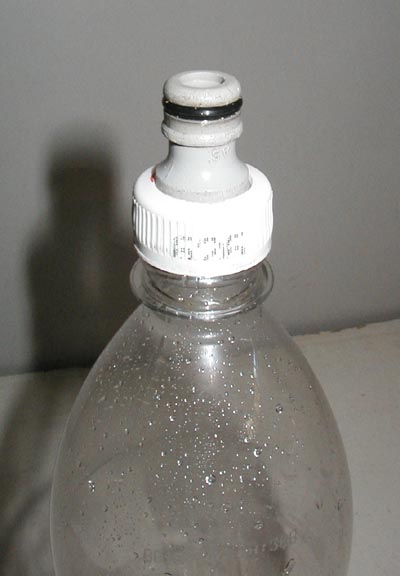
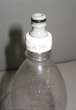 |
Nozzle fitted to the bottle. |
|
|
|
|
Back to Top
| Nosecone |
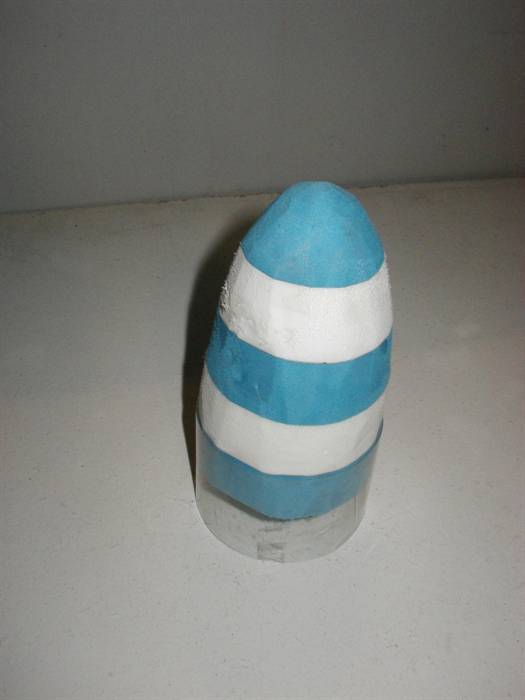
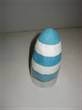 |
Nosecone made from medium density foam.
Shaped with a knife and smoothed with sand
paper. |
 |
Same material as above. Attached to the
bottle using a ring of plastic material. |
 |
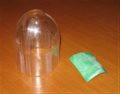
Nosecone made from the top of another
bottle. This one is not designed for impact. |
 |
Same as above but a different shape. Both
are designed to hold a parachute. |
 |
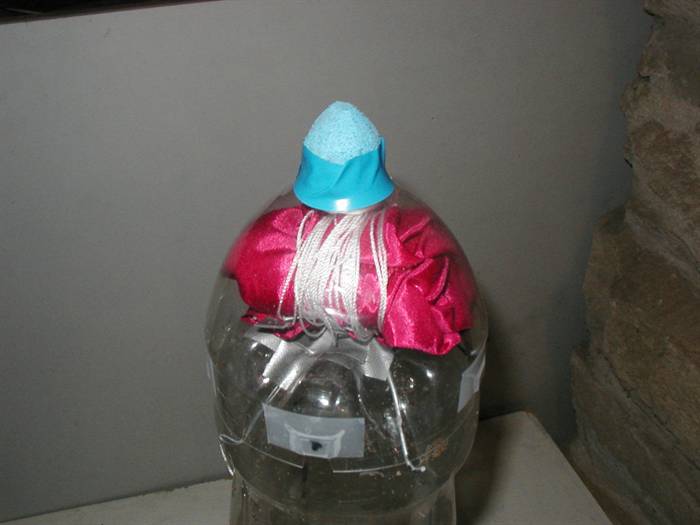
A kids ball with whistles. |
 |
Cutting off the front makes for a very good
strong nosecone. |
|
|
For rockets without a parachute, the
nosecone is perhaps the trickiest to get right so that it
survives multiple landings. You can make it fairly lightweight
and smooth, but it needs to be strong enough to withstand
impact. If it is too rigid it may damage the bottle or the
person it lands on. Make sure that the
nosecone is not too light as in
order to maintain rocket stability.
Experiment with using
different density foams, and the cut off sections from the tops
of PET bottles. Some high density foams are easy to cut with a Stanley knife,
but can be hard to get smooth. You can use coarse sandpaper to
make them more streamlined. A disk sander also works well for
shaping the nosecone.
The way you attach your nosecone will depend on the design that
you use, but typically you can use a ring of plastic from a
bottle to make the transition from the bottle to the nosecone.
We recommend using only tape to attach it as it will have a bit
of give when the rocket impacts, and makes it easy to repair if
needed. Pictures on the left show a variety of nosecone designs we have
used. Some worked better than others. Parachutes:
A full tutorial on how to make a
side deployment parachute mechanism is now available.
 For lots more information and details on how to add a
various recovery system such as a parachute go to the:
Recovery Guide. |
|
|
|
Back to Top
Back to Top
Advanced Construction Techniques >>
|