Each flight log entry usually
represents a launch or test day, and describes the
events that took place.
Click on an image to view a larger image, and
click the
browser's BACK button to return back to the
page.
Day 54 - Splicing Bottles, Testing and Development
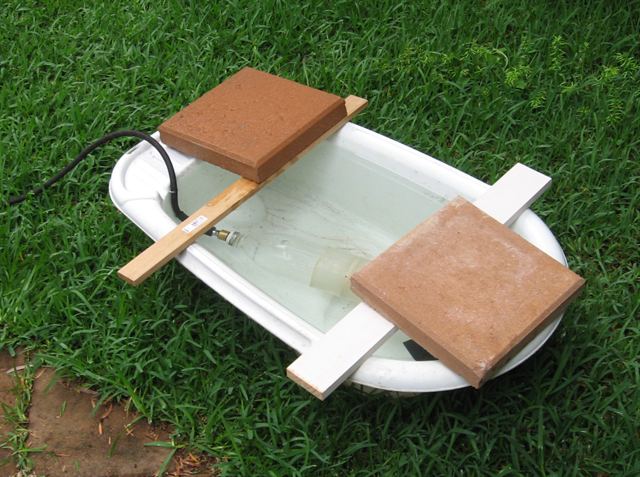
Testing a spliced pair of bottles to
destruction under water. This helps mute any
explosions.
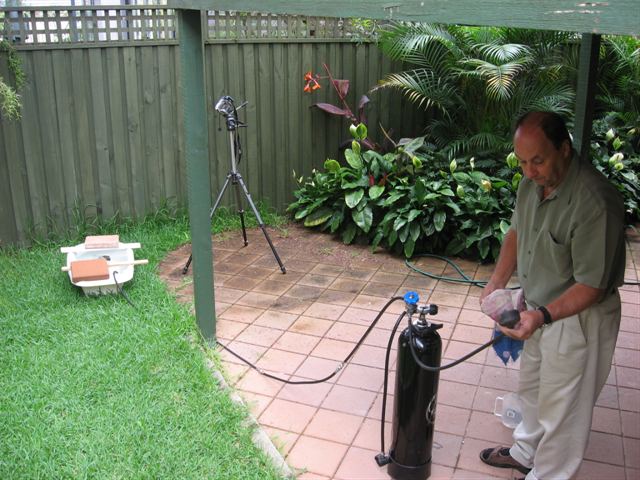
We set the camera up to tape the action.
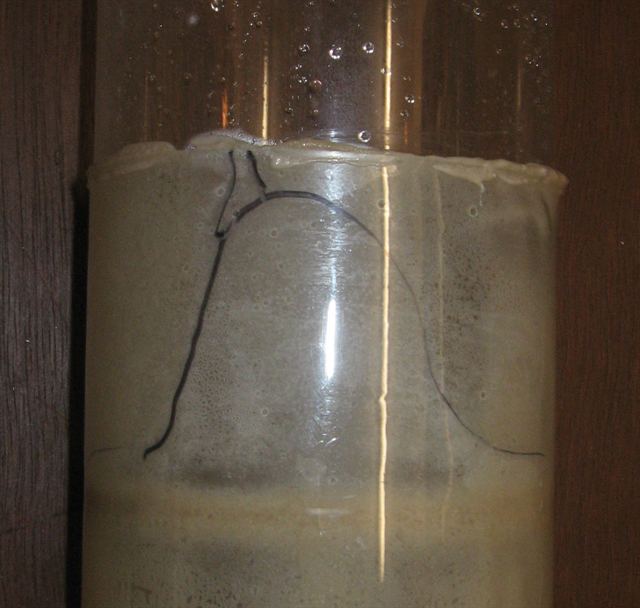
The bottom splice has gone up to 180 psi (
12.4 bar) before springing a leak
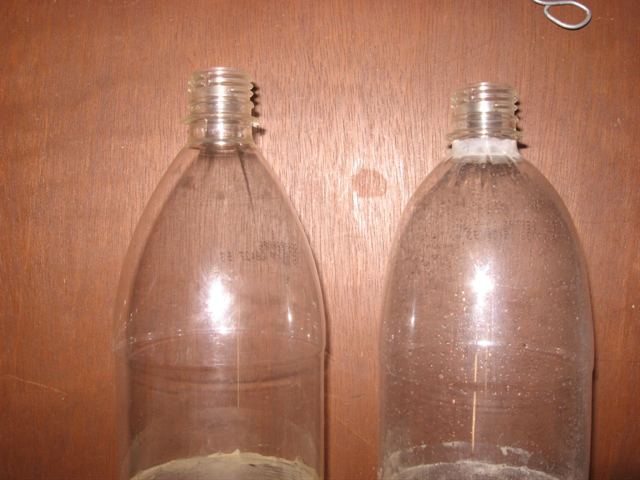
The stress around the neck and the shape of
the upper section is quite evident when compared
to a regular bottle.
The mark here indicates the section that
delaminated and the leak came out on the top
left.
Pressure testing the Polaron IV launcher to
215 psi (14.8 bar)
Detail showing the release head string and
pulley system.
The main stage is attached in this side view.
Top view ... a bit over exposed but you get
the idea.
Front view without the main stage.
Boosters sitting inside their seats. Main
stage not fitted here.
The main stage booster retention components.
Skirt at the top that the blue tubes will be
glued to. The wire "W"s will be attached to the
boosters and slide into the tubes.
One of Acceleron IIIb's booster segments
exploded during a pressure test at 110psi which
was the previous launch pressure. We were
prepared this time and made sure the debris was
contained.
Ditching the unreliable 2 liter bottles, we
built three new booster segments for Acceleron
IV made from 1.25L. Each segment is about 6
Liters.
J4 and Hyperon pressure vessels completed and
tested on the right.
Date: 10th February 2008
Location: Workshop
Conditions:
Humid. Team Members at
Event:
GK and PK.
This week we have
been mostly building and pressure testing
various rockets and launchers. We also
revisited an old friend - Acceleron IIIb and
are preparing the booster for launch again,
although modified.
Splicing Bottles
We have made a total of 8 spliced pairs
of bottles now. We will be using these
bottles to make up rockets and boosters in
the next round of development and so we
thought we'd share how we go about making
these. The video tutorial shows what
materials are required and the process used
to make them. The same technique can be used
to make longer rockets simply by repeating
the splice a number of times.
(If the video does not play, try the latest
Flash player from Macromedia)
Also available on MySpace
here
Testing
We pressure tested a splice pair
yesterday to 180psi (12.4 bar) before a
section of the splice delaminated and sprung
a leak without failing destructively. Since
glue is involved and different amounts end
up being used in each splice the strength
predictability is a lot lower, and the
bottles should always be tested to above the
operating pressure before use.
We were still happy with the 180 psi as
the bottles normally fail at around 190psi.
Both ends of the bottles were quite
distorted and we would normally not operate
at these pressures. It does give us
confidence though that they should be okay
to operate at 140psi (9.7 bar) as the upper
limit.
Polaron IV & Launcher progress
We have now also pretty much finished the
Polaron IV launcher. We have painted all the
wooden sections a bright yellow so it will
be visible from altitude. The release head
mechanism and pulley & lever system for the
string is also complete. The reason for the
lever is to reduce the amount of lateral
force put on the launcher when the string is
pulled as the release head under pressure
needs quite a bit of force. This helps
prevent the launcher from tipping over when
someone pulls the string.
We have also pressure tested the launcher
using the new pressure regulator up to
215psi. This was still well within the
rating limits of the system but since the
first few launches will be in the 110-130psi
range it was enough to satisfy us. We tested
both bleed valves for the main stage and the
boosters with success.
When pressurising, we really have to
think about what valves get open or closed
and in what order.
We made dummy plugs for the booster nozzle
seats for the test. This allowed us to test
that side of things without having to put
the boosters on the launcher. We fitted a
strapping tape reinforced small 300ml coke
bottle to the main stage release head and
used the 7mm aluminium nozzle that the main
stage will use.
We are now working on the booster retention
mechanism. This consists of a skirt that is
slipped over the bottom of the rocket body.
The skirt includes the tubes the boosters
attach to as well as the fins permanently
bonded.
If the weather is good next week we
should be able to test the boosters off the
new launcher with a Polaron IV dummy rocket
to see if the booster release mechanism
works.
Acceleron IV
Acceleron IIIb has been sitting
patiently in the workshop for quite a few
months for us to find a much bigger launch
site. Now that we may be able to fly it at
Doonside, we decided to pressure test it
since a lot of the Robinson couplings had
been tightened for so long. We didn't know
how that would affect stress on the bottles
in the longer term. We disassembled the
booster and decided to test one segment at a
time rather than all at once. We didn't
bother filling it with water since this
wasn't a burst test, but covered it with a
number of towels and a piece of foam held
down by bricks. Dad stood with his back to
it and I had my hearing and eye protection
on. As soon as we got to 110psi (the last
launch pressure) ... BOOM. The segment
exploded. It was a loud boom again, but the
neighbours didn't even come out. They must
be getting used to us.
Pretty much all the debris was contained
under the towel so we found most of the
bits. We didn't even try to find the failure
point. We pretty quickly decided that the 2
Liter bottles just don't cut it, and we
would have to fly with a very low safety
margin to make them effective.
So on the spot we decided to rebuild the
Acceleron booster using 1.25 Liter bottles
instead. We have found that the bottles are
quite happy at 130psi. Reinforcing the 2
Liter bottles would have achieved only
slight improvement in performance due to the
added weight of the reinforcing.
Within 3 hours we had disassembled the
Acceleron booster segments and removed all
the couplings. We then assembled 3 new
segments with new seals. The lowest section
of each segment now is made from a spliced
pair of bottles with three 1.25L bottles
Robinson coupled on top. This configuration
gives us almost 6 Liters per segment. The
spliced bottles give us more volume for
water in the bottom and should also help
reduce the blow-through effect. We don't use
foam in the booster so foam generation is
not an issue.
The new booster segments are a little
taller and so we also extended the central
aluminium pipe. All other aspects of the
booster remain the same. We need to make a
number of spacers out of foam to fit on the
central pipe in order to keep the correct
spacing between the now smaller bottles.
We ran a number of simulations to see
what will happen with the reduced volume,
and we found that we will get approximately
the same performance as with the 2L bottles
simply by increasing the pressure from
110psi to 130psi. In the extreme case we
could possibly fly at 140psi but we will
wait with that.
The one added advantage of the increased
pressure (from 110 to 130psi) is that the
sustainer will also be able to launch at the
higher pressure since it is also based on
the 1.25 Liter bottles, and so go higher.
The sustainer is at the same pressure as the
booster.
We will extend the launcher filler tubes
to allow more water to be put into the
lowest section, but other than that, no
other changes to launcher or rocket are
necessary.
Miscellaneous
Tornado Couplings
We experimented with making
some Tornado
couplings this week out of bottle caps
and gluing them together inside a short
length of T8 FTC with PL Premium glue. We
let it cure for a number of days, but on
pressure testing we found that the coupling
let go at around 110psi which is not very
good. The main problem is the adhesion to
the polypropylene caps. It came off cleanly.
The glue held well to the FTC. We are
looking at some alternatives.
PCBs for Flight Computer
V1.5
Rather than continuously
building our flight computers on prototyping
board we have designed new compact PCBs for
the next iteration of the flight computer.
We are now in the process of having a small
run of those manufactured and will be
testing them shortly. When the flight
software is finalised we will publish the
full design details again.
J4 and Hyperon
We have rebuilt the J4 and
Hyperon pressure vessels since the crash
landings and have pressure tested them up to
120psi. They are now ready to have the
nosecone's fitted.