This week is only a short update. We have
spent quite a bit of time in the workshop
working on a number of projects.
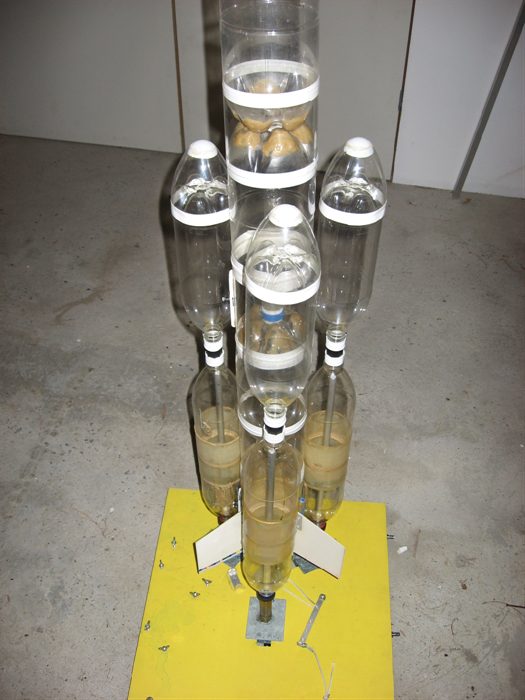
Polaron IV - upgrade
Polaron IV is currently getting a
capacity upgrade. Each of the boosters is
getting an extra 1.25L for a total of 3.35L
each and the main stage is getting an extra
2L bottle added to the stack for a total of
~10L. Eventually all the bottles in the main
stage will be replaced with spliced 2L
pairs.
Because of the new longer boosters we
will have to add additional pin supports to
each to keep them in place during ascent. At
the moment the boosters are based on the
90mm 1.25L bottles, but as we get more of
the 2L spliced pairs made up, we will
replace the boosters with these larger
capacity ones. The launcher was designed for
this capability so there won't be any need
to change it.
Because the boosters are now getting a
bit too heavy for just regular tumble
recovery, we will be adding small parachutes
to each of the boosters. The parachutes will
be released shortly after separation. The
parachute release mechanism will be very
similar to how we do our side deployment
except the door will be just a strip of PET.
Instead of the pin, we will use either
tiger-tail or just fishing line threaded
through the latch to keep the strip held
down. The parachute is just held under this
strip against the booster. The other end of
the fishing line is attached to the main
stage. As the booster drops away, the
fishing line slides out of the latch and the
parachute is released.
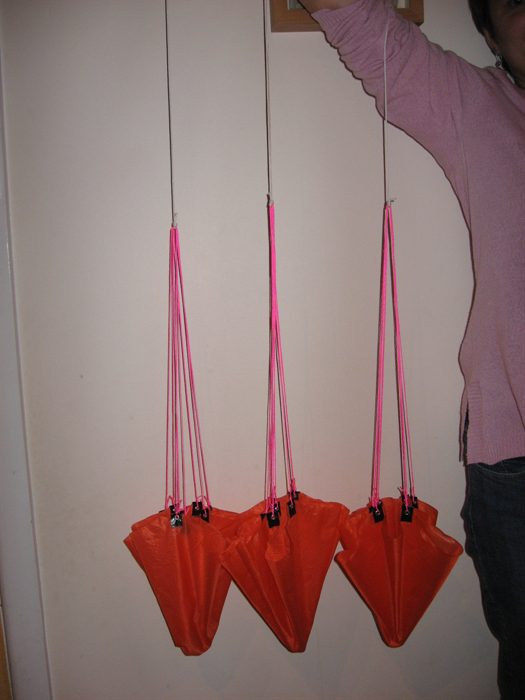
The booster parachutes have been made
from the lightweight rip-stop nylon we got
from the UK a few weeks back. The parachutes
really wrap up into a tiny space.
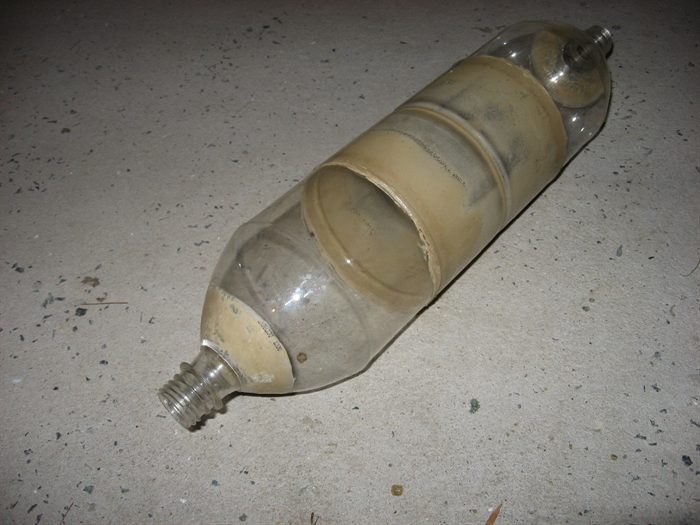
2L Splice Tests
We tested a spliced pair of 2L bottles as
we wanted to know if they can withstand
higher pressures than when they are Robinson
coupled. We've had 2L Robinson coupled
bottles fail at pressures as low as 110psi,
which didn't instill too much confidence in
using them for larger rockets. We have
launched with them at 130psi before but we
knew we were close to the limits. (Burst
pressure of a unmodified bottle is around
170psi)
The 2L bottles fit exactly into a sleeve
made from a 2.25L bottle (Thanks Damo for
pointing this out) which simplifies things
with shrinking the sleeve, otherwise the
splice procedure is exactly the same as
described
here.
We also added a little reinforcement to
the necks of the bottles where typically
stress marks appear when pressurised above
120psi. These were made from a conical
section of another PET bottle and glued in
place with PL premium.
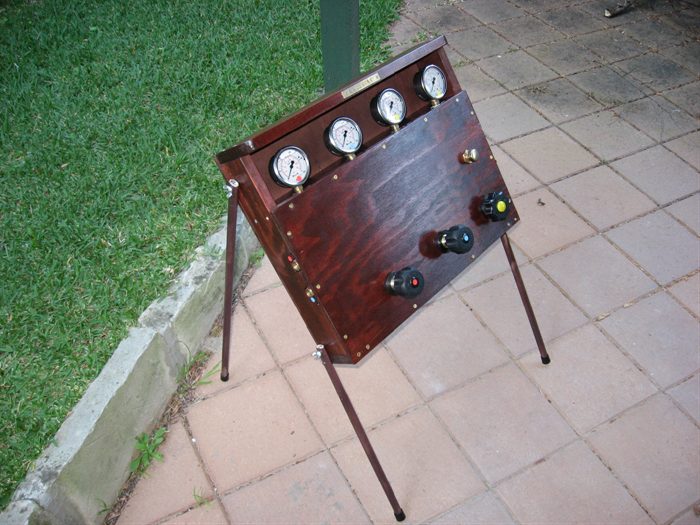
We hydro-statically tested the spliced
pair using our new control panel up to
140psi and held it there for a couple of
minutes. Over that time the pressure dropped
by ~10psi which may have indicated a tiny
leak somewhere but not wanting to approach
it we weren't sure where it was. We couldn't
hear anything because we were testing it
outside during a storm. It may have been a
hose connection or something. In any case it
was still a successful test because the
bottles held the pressure and upon
inspection showed no signs of stress. The
neck reinforcements seem to be working well.
We will now make up a number of these 2L
spliced pairs for new rockets. We intend to
go back and re-replace Acceleron's booster
segments with these spliced pairs to get
back to the higher capacity. Each spliced
pair has 3.6L capacity. They will be joined
together with the new tornado couplings.
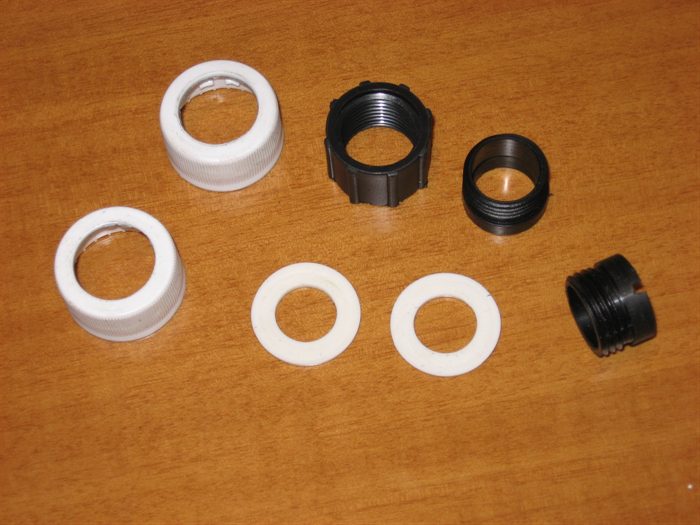
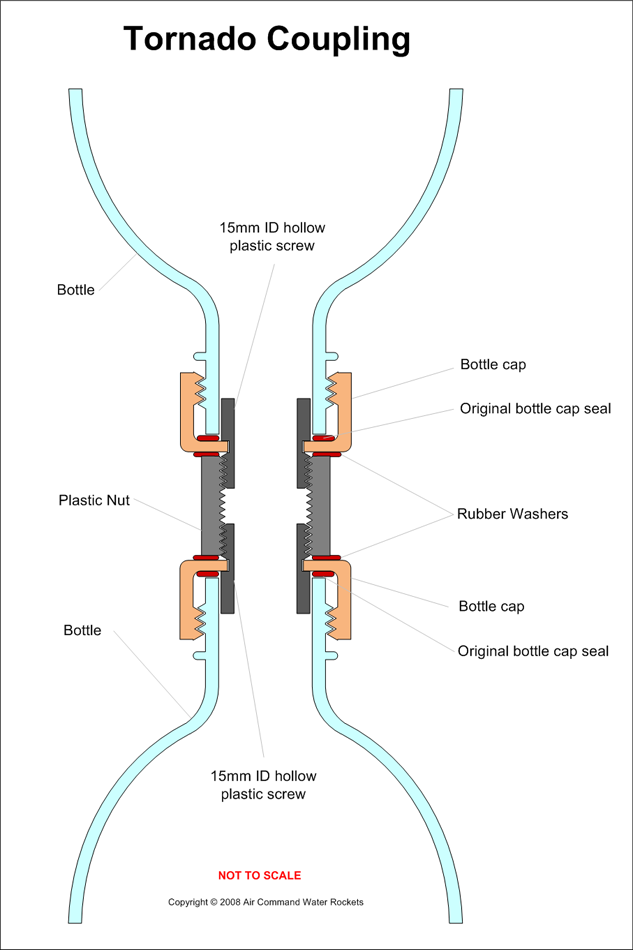
Tornado Couplings
Last weekend we finally managed to
produce a number of good Tornado couplings.
Tornado couplings connect bottles neck to
neck. These ones are easily made out of
gardening supplies from the local hardware
store. We modify a couple of different
fittings for the purpose. Although we used a
lathe for trimming the pieces to make life
easier, they can be made with just a
hack-saw and some files.
Some features:
- They have a 15mm hole
- Weigh 13 grams
- Require no glue
- Have been tested to 130psi, but can
most likely hold more.
- Require no special tools
- All plastic construction - no metal.
The plastic fittings are normally used
for garden irrigation purposes. From one of
them we just make a nut by cutting off the
hose adaptor, and the others we simply use
as the hollow screws that fit within this
nut. We trim off the hose adaptor on these
and sand down the outer diameter so that it
fits inside the neck of the bottle. We also
file a slot into this section to allow us to
tighten it once it is in the cap. We cut a
hole in a couple of regular bottle caps
including the internal seal. This hole is
just a little bit smaller than the thread of
the screw. This allows us to get a maximum
grip on the small lip.
We then take a couple of soft rubber
washers and sandwich them between the lids
and each side of the nut.
Miscellaneous
We are also working in the background on
a couple of projects involving an
all-mechanical staging mechanism as well as
our first FTC rocket.
These are coming along slowly, but will
feature in future updates. We started
building the prototype of the staging
mechanism yesterday, but half way through we
realized that the integrated non-return
valve was in the wrong place. *Doh* But all
was not lost, as it can be easily moved up
in the mechanism so we didn't loose any work
there.
The FTC rocket will be made from a 6' T8
FTC tube. The nozzle will be 15mm in
diameter. We haven't decided what kind of
reinforcement it will have yet, but we will
most likely start with a couple of wraps of
the glass fiber strapping tape. This is low
priority at the moment. The plan is to
eventually use it as a second stage on an
Acceleron derivative. Further down the track
we may also make a very small FTC dart to go
on top of a Polaron like rocket, but this
again is very low priority.
We started a small production run of 90mm
payload nosecones that will be ready to be
swapped in should we have a crash on the
day. They will all use V1.5 of the flight
computer. These will be utilized for all
future 90mm rockets.
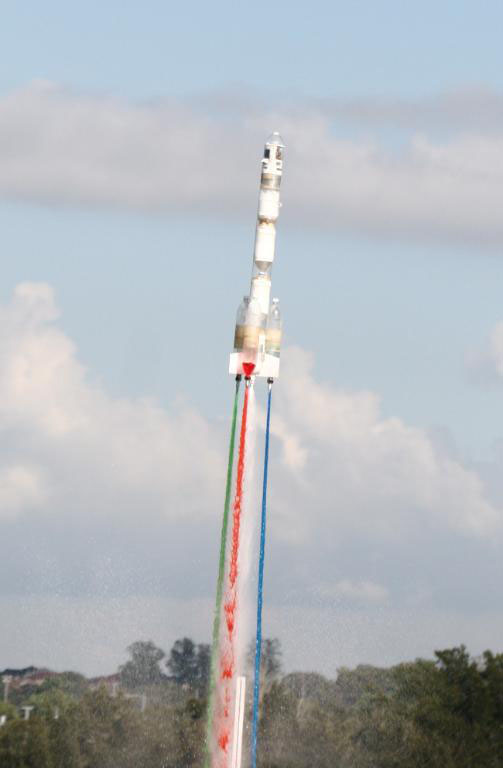
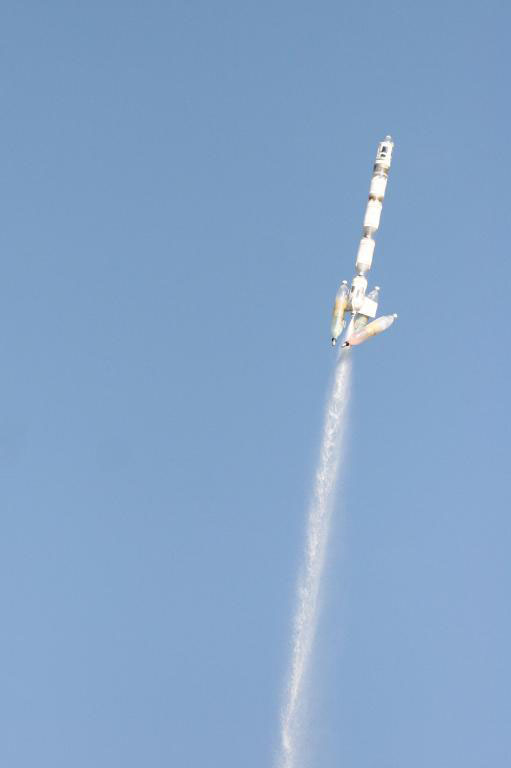
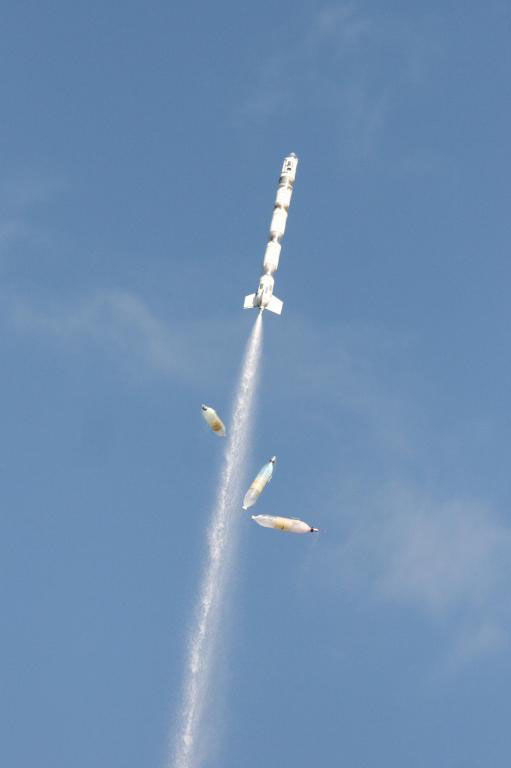
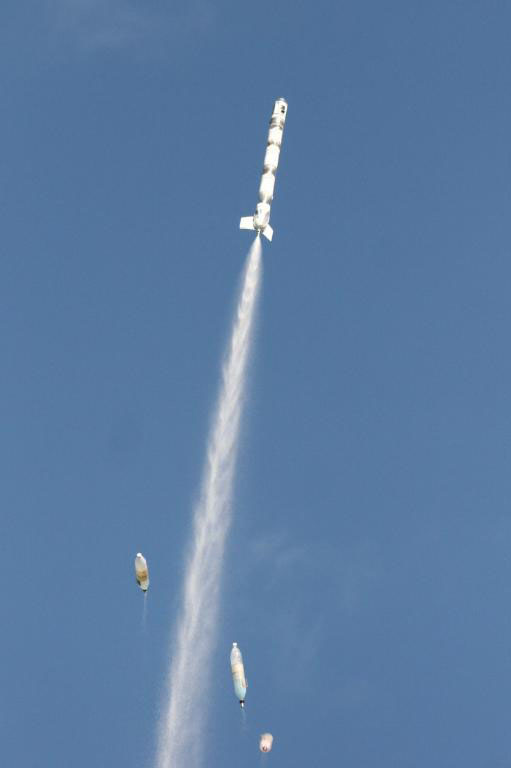
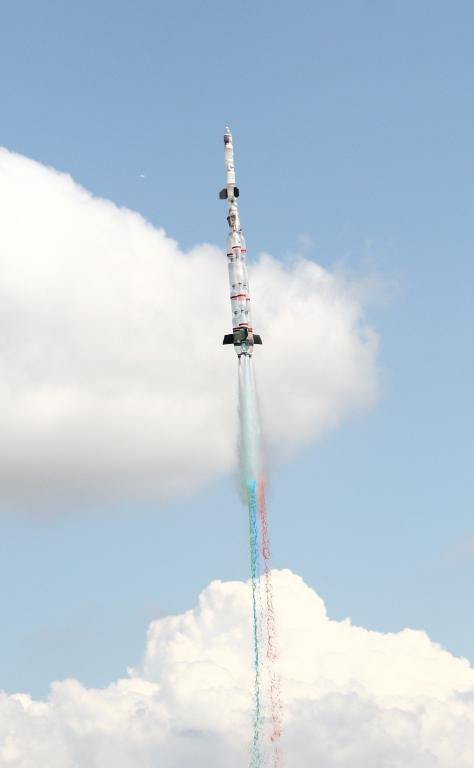
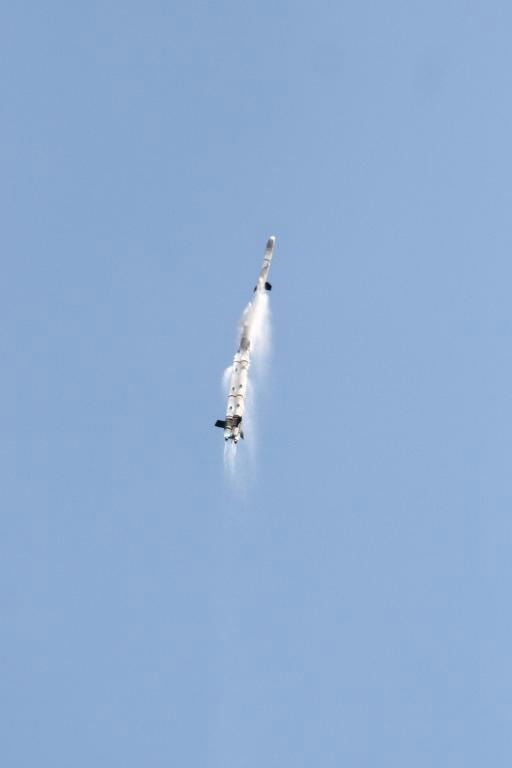
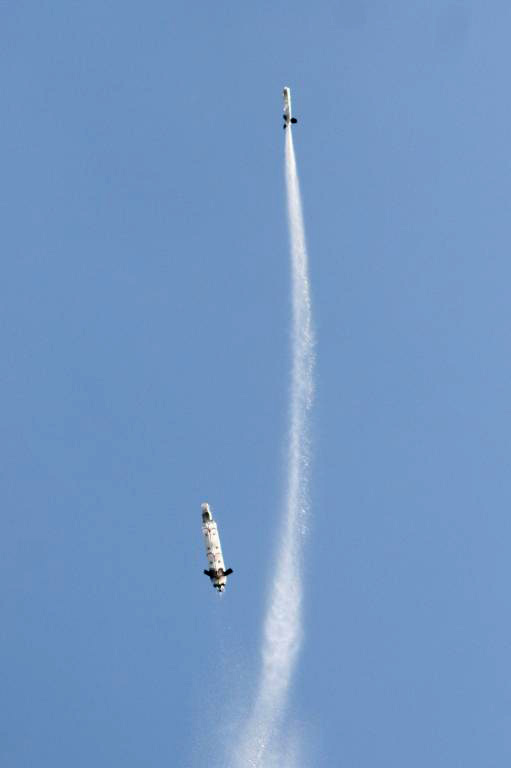
Included are a number of pictures from
the last launch event taken by Andrew E.
from NSWRA. He has a much better camera and
took some excellent pics of the staging in
progress of both the Polaron and Acceleron
rockets.