|
Date: 21st
February 2009
Location: Workshop
Conditions:
Pleasant
Team Members at Event:
GK and PK
This update covers a number of projects we
have been working on over the past few
weeks. As we gear up for fiberglassing body
tubes we have done a few small fiber glass
projects as well.
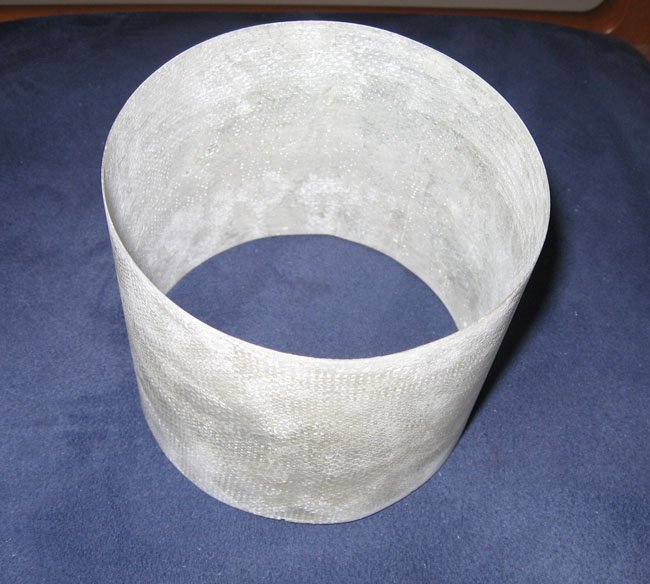
Ring Fin
Our first fiberglass projects was
a ring fin. We wrapped 3 layers of
fiberglass matting on a 2L bottle, and just
used polyester resin on it. It was quite
simple to make and hopefully will be a bit
tougher than a regular ring fin made from
PET plastic. We used glad bake baking paper
wrapped on the 2L bottle to make it easy to
remove. The ring fin is quite strong and
lightweight.
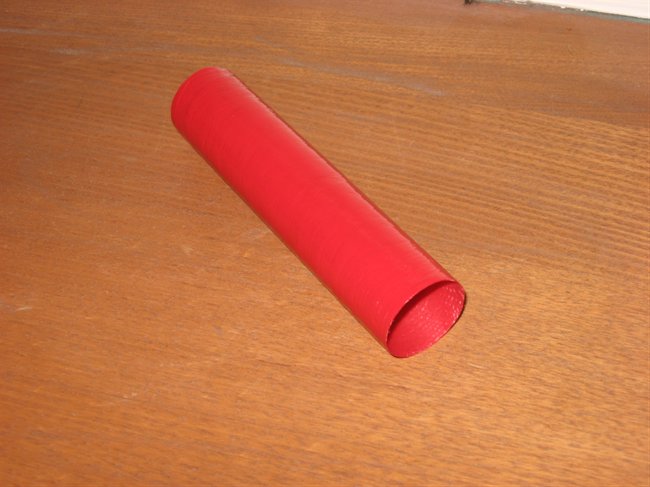
FTC Payload Shells
Since we are rebuilding the FTC payload section,
we decided to make the splitting nosecone
shells from fiberglass as well. This was
mostly because when you cut the FTC in half
it partially curls in on itself, and makes
it harder to fit to the nosecone and over
the FTC. The fiberglass shells are strong
and light and are much more dimensionally
rigid than the FTC.
The procedure was very similar to the ring
fin, but this time we used more resin and
also wrapped the whole tube with electrical
tape to help the resin penetrate all the way
through and give a smoother external finish.
This worked out quite well.
We then sanded and painted it.
FTC Nosecone
We tried several different techniques in
building a new nosecone for the upgraded FTC
payload section. We wanted a more
streamlined nosecone compared to the Kinder
Surprise half egg we used in the earlier
version. I machined up the nosecone mold
from a solid piece of plastic and polished
it.
Attempt #1 - Heated the base of a
small PET bottle and forced it over the
nosecone mold and tried to heat shrink it
over the top. Heat gun was too close and the
base started crystallizing. The nosecone
ended up flying quite nicely into the
rubbish bin.
Attempt #2 - Heated the base of
another small PET bottle more gently this
time. This was only a slightly better result
than the previous one. Before long he joined
his friend in the bin. It just could not be
shrunk down enough to the 30mm diameter.
Attempt #3 - Coated the mold with
release agent and impregnated fiberglass
matting with resin and then started wrapping
it on the mold, but as you can imagine a
nosecone isn't easy to round off with flat
matting. Before long I had a nice mess on my
hands with lots of bubbles, folds, and the
rounded front was anything but. After
another 5 minutes of trying to correct it, I
finally pulled the whole mess off the mold
and guess where it went?
Successful nosecone attempt
I realised that a stretchy material was
needed, and having looked through the kids
sock drawers I drew a blank. So I went to
the local supermarket and bought a couple of
pairs of pantyhose (nylon stockings). Okay I
did get a few strange looks at the checkout
counter as they were the only things I
purchased. Little did they known those
stockings would do over 200km/h one day.
Nosecone build procedure
- We stretched the thumb section of a
disposable rubber glove over the mold
and tied it off. It was stretched
sufficiently so there were no creases
anywhere.
- We then proceeded to stretch 8
layers of pantyhose over the top of that
again tying it off at the bottom. Making
sure there were no creases. The stocking
material stretches well but inevitably
ends up being thinner in the very tip
section compared to the base. Hence the
reason for so many layers.
- We poured the fiberglass resin all
over it and worked it in with a brush
and gloves.
- After the resin was fully cured we
cut the nosecone off around the base
with sharp knife and pulled it off.
- Once it fully cured we gave it a
light sanding. At this stage the
nosecone was still a little more
flexible then regular glass, this was
probably due to the nylon and the lower
strength polyester resin. So we coated
the outside with 5 minute epoxy.
- After the epoxy had cured we sanded
it back to a smoother finish.
- The last few bumps and divots we
filled in with spray on putty and again
sanded it back to a smooth finish.
- We then gave the whole nosecone a
couple of coats of gloss spray paint.
- We trimmed the bottom portion with a
Dremmel tool.
The nosecone turned out quite well, but
will use proper epoxy glue next time instead
of the polyester resin. Pressure Testing
We have pressure tested a 2L spliced pair
of bottles that only used Sikaflex as the
glue. The splice held up to 130 psi before
giving way. There was no damage done to the
bottle or the sleeve. The glue simply let
go. Based on those results we would not
recommend using it for splices that need to
hold more than 100psi. Polaron
VIb & Polaron VII
We've started rebuilding the Polaron VI
rocket after the crash last year. The setup
is going to be almost identical, and some of
the parts are being reused. We are building
a second Polaron VII that will have an extra
spliced pair, and will have a
slightly different deployment mechanism. Everything else will be a standard
size so it will be interchangeable for spare
parts with Polaron VI. Due to the last
crash of Polaron VI we are changing a couple
of things to try to prevent that from
happening again. We have drilled out the
nozzle so that it is now 9.45mm diameter
instead of the 8.9mm it had previously. This
gives the nozzle a 14% larger cross
sectional area. This was done in order to
empty the water a little faster reducing the
amount of weight near the tail, helping to
improve stability. We have also created a
new fin set that almost doubles the fin
surface area. The fin set build procedure
has been added to the
construction section. For Polaron VII we also redrilled our old
aluminium CD nozzle and converted it back to
a straight through nozzle with a hole of
10.5 mm. This gives a 44% larger cross
sectional area compared to the original
Polaron VI nozzle. This was done in order to
generate more thrust, and still allow us to
use the standard 9mm Gardena quick release.
This was possible because we use a thinner
o-ring and hence the o-ring groove can be
shallower allowing for the greater internal
diameter.
We have also been splicing 2L bottles
like there is no tomorrow. These will be
used on the Polaron rockets, their boosters
and the new Acceleron Rocket. Each spliced
pair requires 5 bottles.
Miscellaneous
Following are small snippets of other
things we have been working on:
- We added lever arm extensions to our
medium launcher to enable us to launch
the FTC rocket at higher pressures.
During the last launch day, the release
mechanism was having a hard time
releasing the rocket at higher
pressures.
- The fins for the FTC rocket have now
been replaced with smaller ones that
weigh only half of the previous ones.
That saved about 10% weight of the
overall rocket.
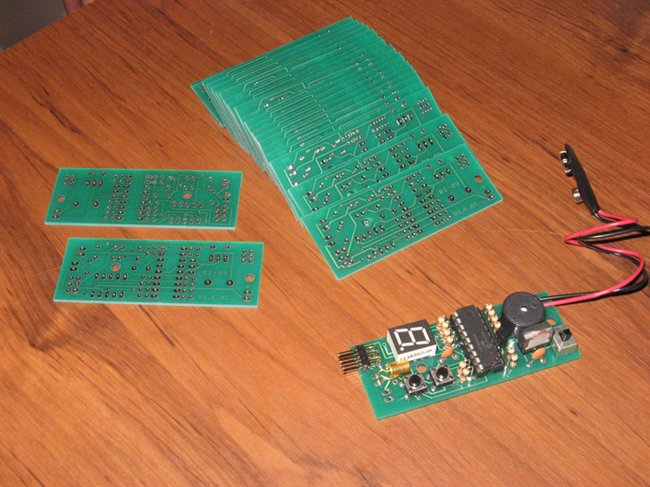
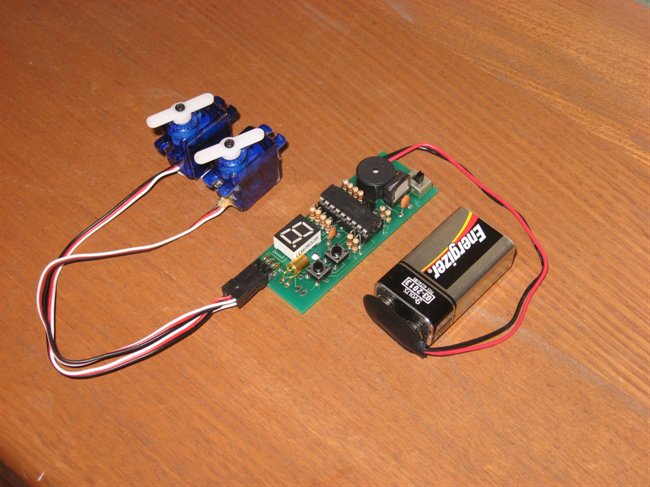
- I've been spending a bit of time
soldering up the flight computers as
time allows. It's taking about 30
minutes to make each.
|