Each flight log entry usually
represents a launch or test day, and describes the
events that took place.
Click on an image to view a larger image, and
click the
browser's BACK button to return back to the
page.
Day 13 - Development
- Getting More Serious
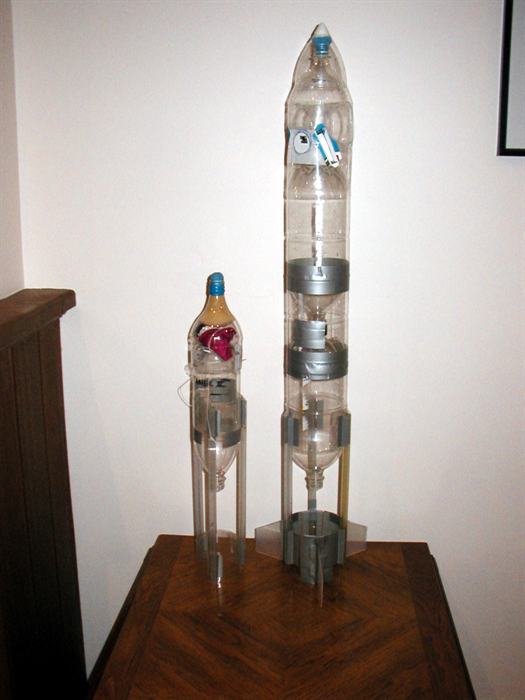
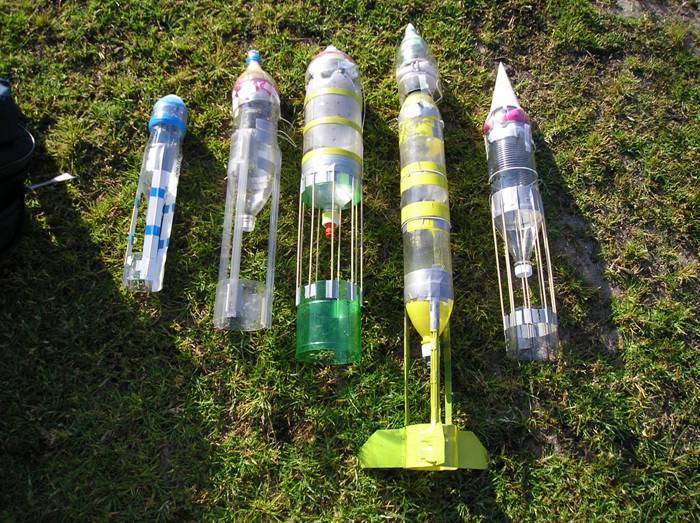
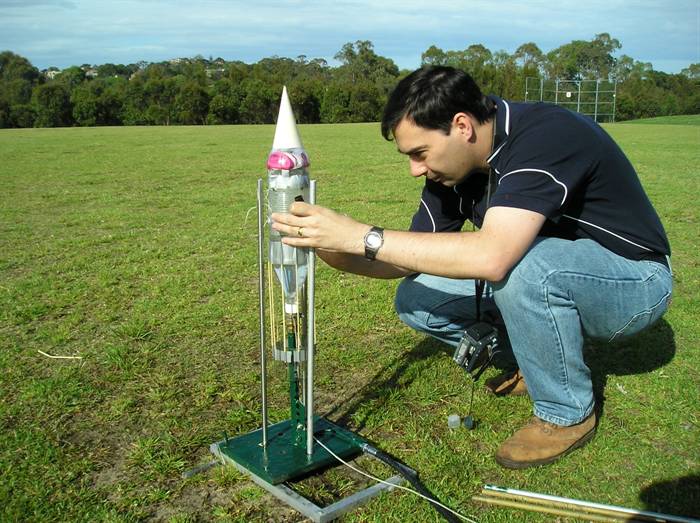
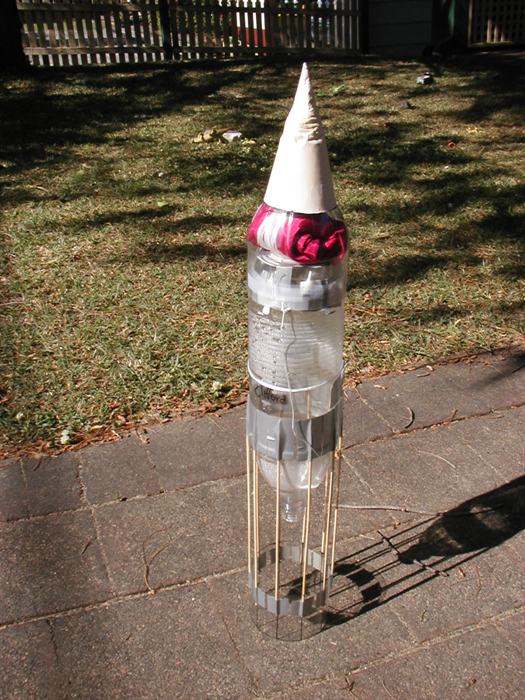
The new rocket under development: 4L rocket
to be equipped with flight computer, camera and
side ejecting parachute. Next to Brotanek II for
size comparison.
Our old 7.2A SLA battery mounted inside an
old PC power supply case with a convenient
handle, switch and connector.
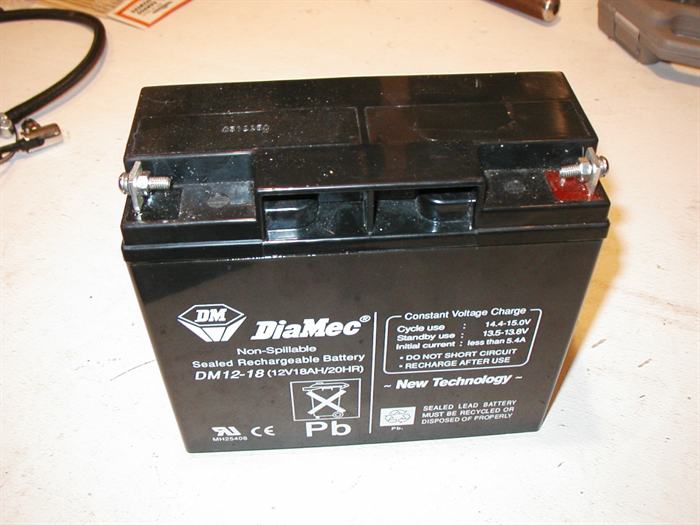
New 18Ah 12V SLA battery.
We mounted a thick piece of plastic on top
to again support a handle, switch and connector.
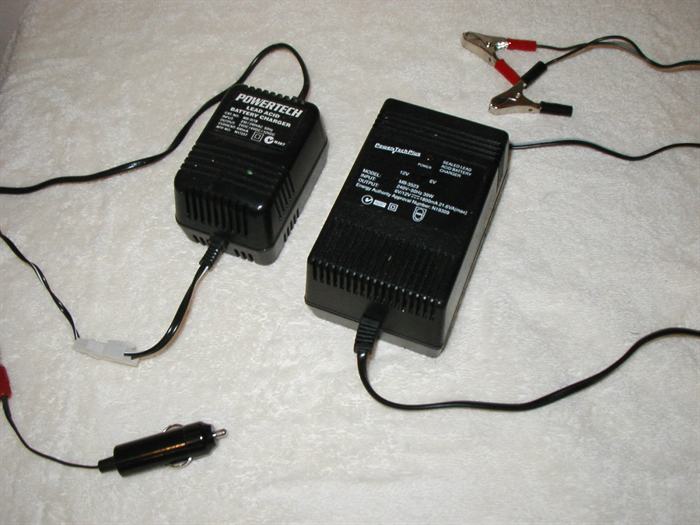
The chargers for the two batteries. Two
chargers allow us to charge both batteries
simultaneously.
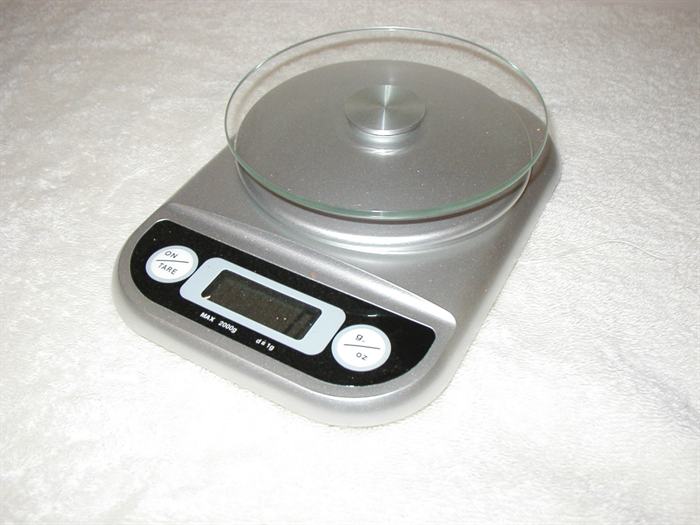
The digital scale measures down to the 1
gram.
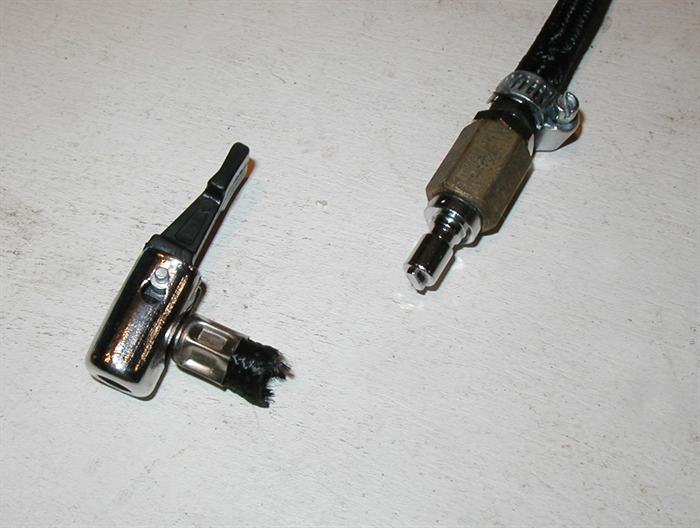
The new compressor supposedly for up to 250
psi.
We chopped off the normal attachment, and
connected a quick release connector to fit our
launcher.
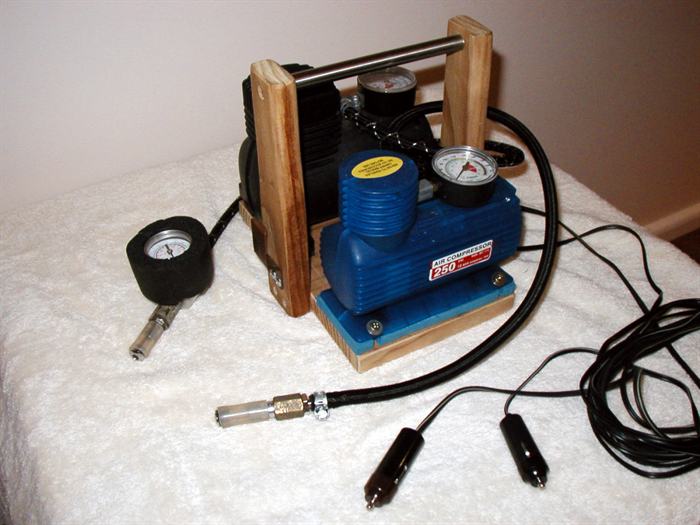
The compressor is now mounted on foam on a
portable platform. The old compressor is mounted
next to it.
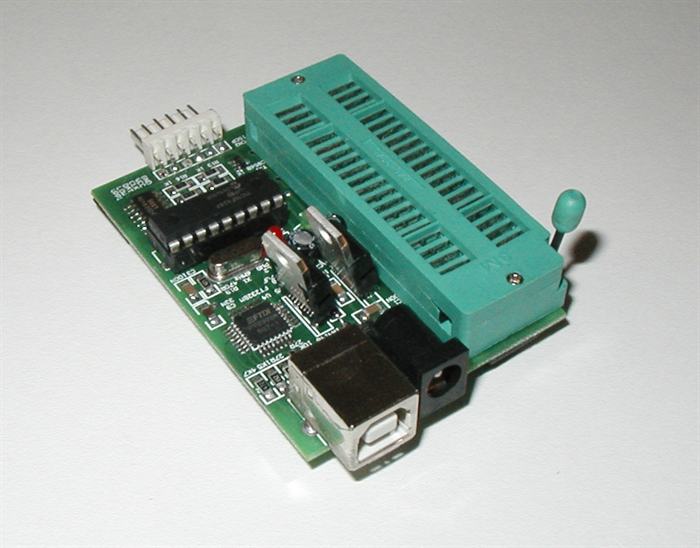
The new PIC programmer for the Flight
Computer.
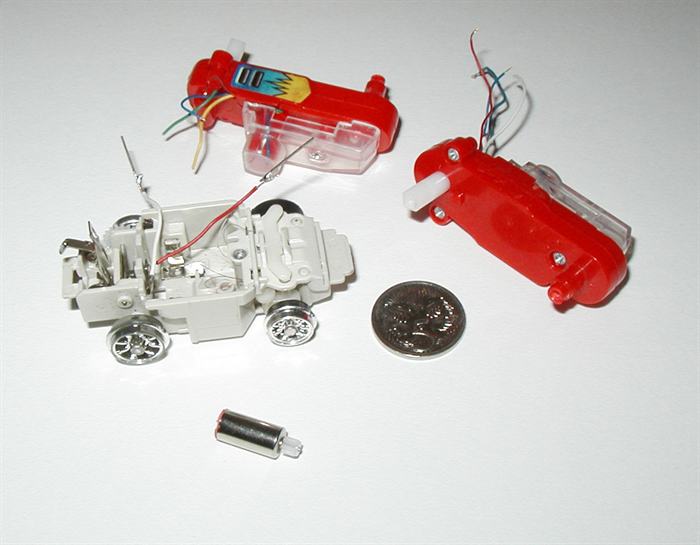
The useful parts of small toys to be used
for parachute deployment. Tiny 3V motor lower
left.
Date: 25th
September 2006
Well it has been a
few weeks since the last update.
Currently we are on a hold in launches while
we are on holiday and also do further
rocket developments. We will start launching
again next week.
Since the last update the following
events have taken place.
Events
We bought a new 12V SLA (Sealed Lead
Acid) battery for the compressor. This
one has an 18Ah rating, the old one only
had 7.2Ah. This should take care of
running out of power during the later
part of the launch day. We will also
bring along the old battery as backup
just in case. With higher volume rockets
and higher pressures the rockets take
longer to pressurise.
We bought a new compressor. This
compressor is pretty cheap (AUD$20 at
Bunnings Hardware Store), but says it
can go up to 250psi. We haven't tested
it yet to this pressure but we will get
there.
We bought a new digital scale
(AUD$29) for accurately measuring the
weight of rockets in order to determine
the optimum fill volume.
Although we are spending money on
these items, they are multi-purpose and
the batteries are great for camping.
A lot of consideration has been
given to the problem of reliable
parachute deployment. As the rockets get
bigger and carry payloads such as
cameras and altimeters it is important
to have a reliable deployment if we want
to reuse the rockets and payloads. The
nosecone-off-at-apogee approach has been
relatively successful, but the rate of
failures for us, either too early or not
at all is too high. So we decided to go
with a horizontal deployment system.
The horizontal deployment system shoots
the parachute out of the side of the
payload section, allowing the nosecone
to permanently be fixed in place.
While the ejection mechanism is
relatively simple to construct the
detection of when it should release and
having enough force to release the pin
holding the door on the chute is a
little tricky.
We wanted to stay away from air-flaps as
we see these as causing unnecessary drag
as well as the potential for asymmetric
airflow around the rocket.
Chemical reaction based release
mechanisms have also been used often by
others, but we wanted something a little
less messy especially with kids around.
From what we hear balloon in the
nosecone type release mechanism also has
a number of limitations.
Fixed timer based systems can work quite
well, but parachutes are likely to
deploy at less than ideal altitude and
at potentially high speed.
So we have decided to design and build a
lightweight flight computer (FC) and some
sensors that will detect launch and
apogee.
Some reasons for going
down this path: a) Repeatability of
function; b)
Configurable; c) The parachute will
not deploy until computer is operating,
can turn rocket upside down while
working with it on the launch pad; d)
Quick turn around time for the next
launch;
e) An excuse to do more electronics.
Here is a typical flight profile of what
the flight computer will do:
It will detect a launch and start an
inhibit delay. This delay will disable
the apogee sensor (due to its
sensitivity) for a fixed period of time,
this will ensure the parachute is not
accidentally deployed during the boost
phase, the air-pulse phase and the
immediate deceleration due to air
resistance just after the air-pulse.
During this time the rocket forces can
be
quite violent and can interfere with a
sensitive sensor. After this delay, the FC starts
listening to the apogee sensor, and any
trigger from it will cause the parachute
to deploy. After a further delay, if the computer
did not get an apogee sensor reading (as
we can see that that could happen) The computer
will trigger the parachute anyway. This
is a redundancy feature to ensure that
the rocket always attempts to deploy the parachute.
After 3 minutes the FC will start
emitting a loud noise to assist in
rocket recovery should it fall in bushes
where it is hard to locate.
The FC will also measure the time
between launch detect and the apogee
sensor firing. Upon landing, the FC will
beep out the time in a similar manner
the some altimeters report altitude.
These values can then be used on the
subsequent flights and averaged by the
FC to assist in adjusting the inhibit
and safety delays.
The computer timing will be adjustable
on the launch pad via a simple push
button interface.
Some functions
that the FC will also be able to support
in the future are:
a) Touch down sensor
to measure total flight time, b)
Initiate other events such as cameras or
drogue chutes, wings etc. c)
It may emit IR signals on launch with a
particular delay to trigger still
camera's on the ground.
When we started designing the FC we were
going to build it from a few discrete
components, perhaps a couple of 555
timers or a 556, but as we though about
other functionality, the component count
grew, and so it was a natural
progression to use a microcontroller. We
have chosen the
PIC16F628A as the micro of choice.
This is a very capable processor in an
18 pin package that requires minium
external components, and can handle all
the functionality we need and then some
all for about AUD$3.
We bought a PIC programmer from
Modtronix Engineering
for ~AUD$70 and set it up on the computer.
They had very good service and quick
delivery.
The pull pin will be activated by a
tiny motor from a toy. These motors run
from 1.5 - 3V. These can also be found
in mobile phone vibration motors. We
decided to use this option because of
the low voltage requirements when
compared to direct solenoid driving
using high voltages and currents or
capacitive assist discharge. The
tiny motor when geared can generate
quite a bit of force and a lot more
travel than a solenoid. Overall the
mechanism is around half the weight of a
solenoid solution.
The battery is a lightweight
6V alkaline battery.
We are building a new 4L rocket with
a Robinson coupling that will
utilise the flight computer and carry a
video camera payload.
When the FC is fully developed and
tested I will provide full details as
well as the .ASM files for the PIC.
In the next update I will discuss
the apogee sensor and progress on the
FC.
Day 14 -
Experiments
Rockets flown today - left to right: John
John, Brotanek II, D.Y., OO, Clifford.
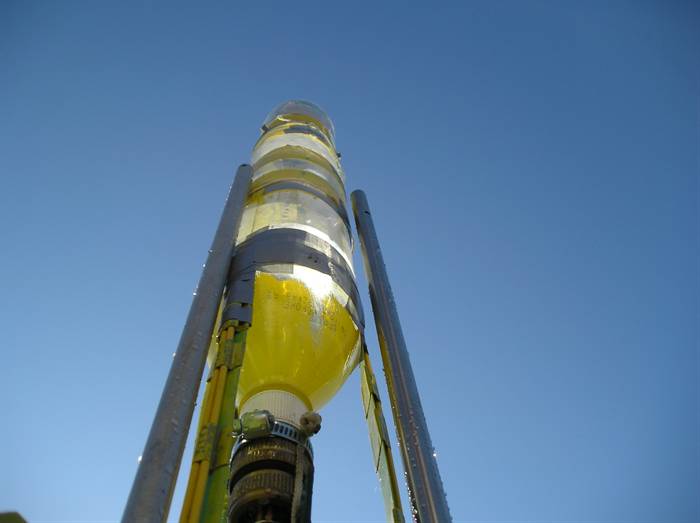
OO - larger than life.
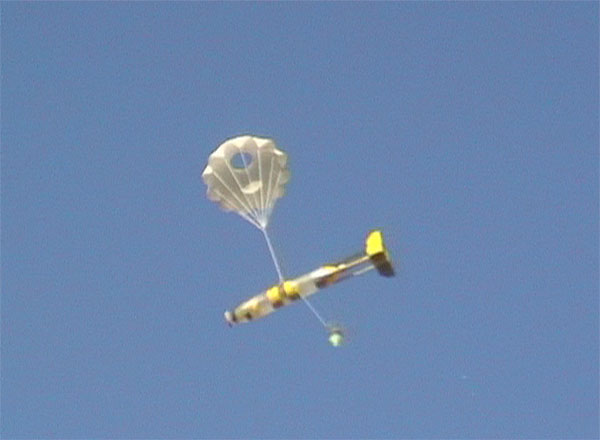
"OO" returning to earth on new parachute.
A good action shot, OO is just centimeters
above the ground.
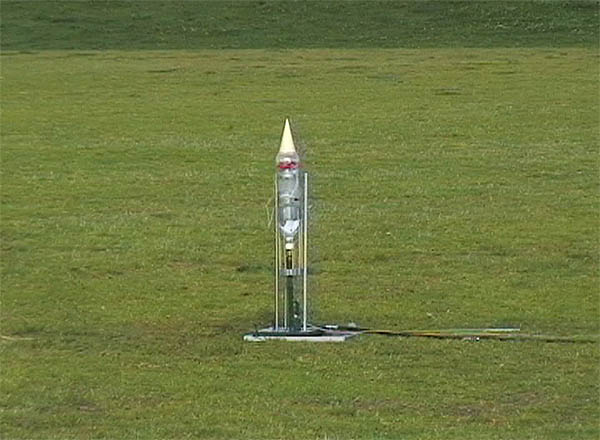
Clifford set to go high.
Last minute preparation, making sure
nosecone is seated correctly.
Detail of Clifford with crumpled nose after
the parachute failed to deploy.
Cardboard nose removed showing the
electrical wire used as the nosecone weight.
Detail of the new simple and inexpensive
ring fin struts. Bamboo skewers and tape.
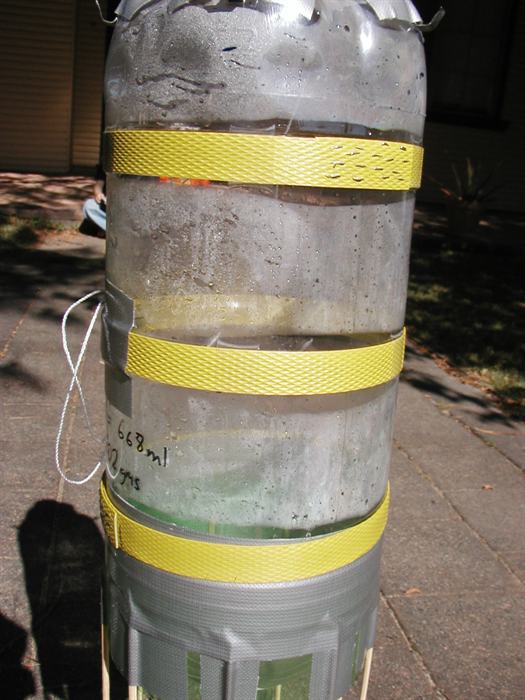
Re-enforcement bands on D.Y. rocket. The
staples provide a strong bond.
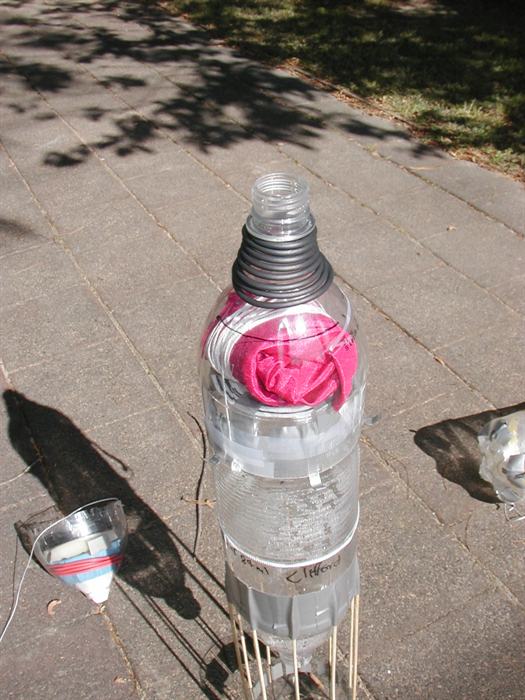
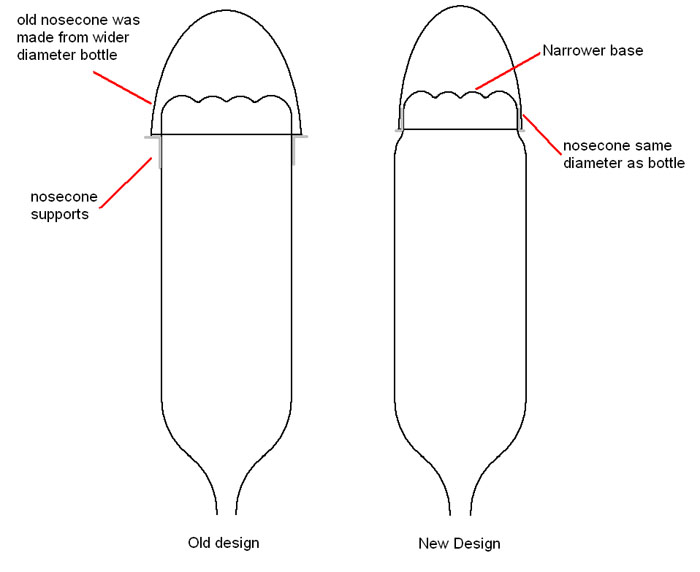
New modified bottle design for narrower
nosecones for less drag.
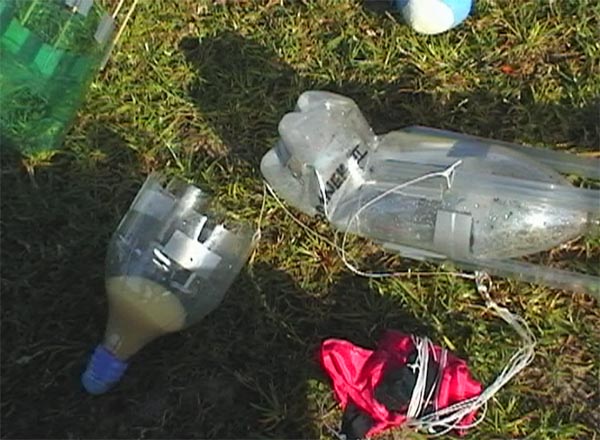
Brotanek II didn't do too well on this day.
Nothing a little air pressure won't fix.
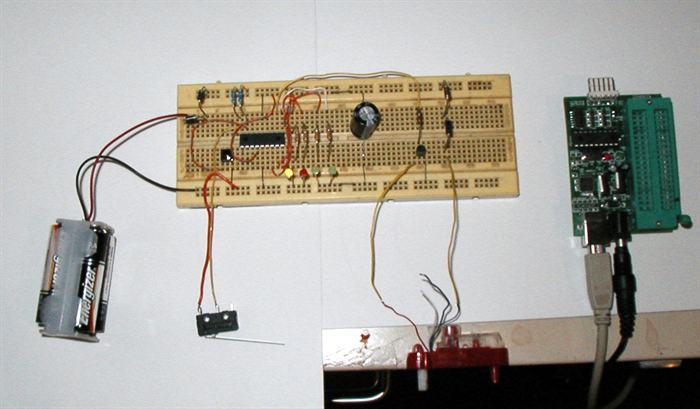
V1.1 prototype of the flight computer
undergoing tests.
The weather started closing in a little.
Date:
2nd October 2006 7:00am - 9:15am
Location:
Denzil Joyce Oval. (launch site #4) Where exactly is that? Click the
above link to see a Google Earth
place mark. What is
Google Earth?
Conditions:
Mostly sunny, light breeze, 24 degrees C.
Rockets:
Name
Capacity
Notes
D.Y.
2.25
L
A new rocket with re-enforcing
straps, new ring fin strut design,
new parachute and weighted nosecone.
Clifford
1.5 L
A new rocket with new ring fin
strut design, a weighted nosecone
with a sharp cardboard cone shape.
John
John
600
mL
An older rocket that survives
most impacts without a parachute.
"OO"
2 x 1.25
L
This is a 2 bottle rocket joined
at the base, with a parachute
recovery system. The rocket remained
in the same configuration since the
last launch day, with a new
parachute and the nosecone weight
was placed elsewhere in the
nosecone.
Brotanek II
1.25
L
This rocket has also been around
for a while. This rocket remained in
the same configuration since last
time.
Team Members:
PK, GK, Paul K, John K and Jordan K.
Number
of launches: 14
Today was a great day for flying with
very good conditions. It had been about a
month since we last launched (we were on
holidays), so we wanted to try a few new
things before the big rocket and flight
computer are finished.
Flight Day Events
First off the launch pad was a new
rocket called D.Y. (named after the suburb
where we are launching) This new
rocket was built to test a number of
design ideas including a new strut design
for a ring fin, re-enforcing bands around
the widest part of the bottle to allow for
higher pressures, a weighted nosecone and
lastly a new parachute obtained from
surplus flares for illuminating battle
fields. The rocket performed very well. It
was our first single 2.25L bottle rocket.
The weighted nosecones worked well in
all instances (except one) and actually
often deployed on the way up near apogee,
with the parachute deploying, but the nose
cone kept flying considerably higher than
the rocket.
"OO" flew 5 missions today with very
good successes. This is a good rocket with
consistent performance.
We also probably achieved our own
personal altitude record. On "Clifford's"
second flight, the parachute failed to
open, so we were able to measure the total
ballistic flight time of the rocket. On
video replay this was 9.92 seconds. Using
Clifford Heath's simulator and the
rocket's parameters the best fit flight
time gives an apogee between 105 and 120
meters (350 - 390feet). The rocket was
named after one of the kids favourite
toys.
Brotanek II hadn't flown for a while
and had its parachute and the foam in the
nosecone compressed for about a month.
There wasn't enough spring in foam for the
nose cone to easily separate near apogee
and the air pressure was enough to prevent
the nosecone from separating. The rocket
had a good flight but sustained
considerable damage on impact.
We had the new compressor going for
quite a few launches, but with the higher
rocket capacities and higher pressures the
compressor runs much longer. I think we
over cooked it towards the latter part of
the day. At the start of the day we had no
problem going up to 140psi although at
that pressure the amount of air going into
the rocket had slowed to a trickle that
achieving much higher pressures would have
taken a considerable amount of time.
The rate of launching rockets didn't give
enough opportunity for the compressor to
cool down sufficiently.
At the end of the day the compressor would
get up to about 90psi and then an awful
stalling noise would come from it. We
quickly shut it down. Luckily the pressure
lines going to the rockets have a
quick release mechanism with a return
valve so we were able to swap the line
under pressure to the other compressor and
finish filling the rocket.
On the next launch attempt we filled with
the old compressor and let the new one
cool down. On the following launch we used
the new compressor again and again it made
that awful noise so we swapped the line
again to the old compressor but the
compressor's return valve looked like it
failed and water started frothing from
somewhere in the compressor. You can
imagine we weren't terribly impressed and
may have used the odd 4 letter word. That
was 2 compressors basically stuffed in one
day. Luckily they are fairly cheap to
replace.
We will use a SCUBA tank with a pressure
regulator on the next launch day, before
we can figure out a good way to fill the
rockets. The tank should allow us to fill
the rockets quicker and to higher
pressures. A tank refill should last for a
few days of launching and we have a
convenient access to refill the tanks so
it should not be too bad. The only
reservation I have is that it is big and
bulky and cumbersome to carry around.
The new battery worked well and lasted
the full two hours of launches without
trouble.
Flight Record
Launch
Rocket
Pressure (PSI)
Notes
1
D.Y.
100
Good straight
flight. The parachute opened just
before apogee. New parachute worked
well.
2
D.Y.
120
Good flight again,
due to the nose cone's weight the
extra momentum separated it (line
broke) from the rocket when the
parachute deployed.
3
John John
80
Good flight, with
the nozzle making an unusual noise
on take off. The nozzle also leaked
on the launch pad. Likely due to a
deformed seal.
4
Brotanek II
130
Very good high
flight, but insufficient foam in the
nose cone caused the parachute not
to deploy. The rocket buckled quite
badly on impact.
5
OO
130
This was a very good
flight, with parachute deployment
near apogee. New parachute worked
well. (700ml of water)
6
OO
140
Again a very good
straight flight, with good parachute
deployment. We used 800ml of water
for a slightly lower speed take off.
7
OO
140
Another excellent
flight. This time the rocket went
straight up and landed near the
launch pad.
8
Clifford
135
Maiden flight of
this new 1.5L rocket. It flew nice
and high but the parachute opened
before apogee, causing the weighted
nosecone to again separate from the
rocket and flew considerably higher
than the rocket.
9
Clifford
140
This was probably
our highest flight to date. The
nosecone failed to separate so the
rocket flew a nice ballistic path.
Total flight time was 9.92 seconds.
(see notes above) The rocket
sustained some damage, but was
repaired for another flight.
10
Clifford
140
Very good flight
nice and straight. Parachute
deployed well.
11
OO
128
Good flight with the
nosecone separating from the rocket.
rocket landed well.
12
Brotanek II
130
Good flight with the
parachute opening well after apogee.
The parachute had been packed for
quite a while so it didn't unfurl
quite as quickly as we like.
13
OO
80?
Low launch pressure.
the compressor started failing so we
launched with what was in the
rocket. It was a good flight and
parachute deployed well.
14
D.Y.
90
Again due to the
failing compressor we launched with
a lower launch pressure. It was a
good flight and the nosecone
separated at the right time, but the
parachute didn't unfurl properly so
the rocket crashed, but because the
rocket is very light it sustained
very little damage.
Design and Development
The first prototype of the flight
computer (V1.1) was built and tested (not
flight tested yet). This
prototype does not have an apogee sensor yet but
uses the launch detect sensor and a simple
time based deployment. This was basically
used to understand the PIC development
environment and debugging process. As a
result of the prototype it was discovered
that while running from a 6V battery pack
made from 4 x AA batteries there was enough
current to run the PIC and the chute deploy motor,
however, running from the tiny 6V battery
that is rated at 150mAh, the noise ripple
from the motor (even with 2200uF capacitor
across the rails) was far too big, and was
causing the PIC to reset itself. We measured
the noise ripple under load on a CRO and
it was about 0.5V. A quick test to
see if doubling the capacitance would help,
met with the same result.
The motor draws about 75mA unloaded. We
run it only for 250ms which is enough to
activate the release mechanism. The PIC
itself draws about 8mA with 1 LED on.
The design was modified to run the motor
from a separate power supply. This
might sound like going a little overboard, but the
second battery (identical to the one
powering the PIC) is quite light and the
circuit only includes an extra opto-coupler.
Using this second battery also allowed us to
remove the big capacitor which is the same
size as the battery.
This will allow us to run other motors or
actuators from a different voltage to the
PIC in the future.
The idea behind the weighted nosecone
was to add much of the rocket nose weight
to the detachable nosecone. The idea was
to design the nosecone's shape to have
less drag and fall faster than the rocket.
The weight was to help dislodge the nose
at or near apogee. The theory here isn't
based on ideal calculations for drag, but
is based on experience as to what happens
to the rocket at lower air speeds near apogee
and how wind forces buffet the rocket.
The weight was provided by winding a heavy
copper electrical wire around the nose
cone. The total weight of the nosecone was
around 40 grams.
Another new design idea was to reduce
the diameter of the base part of the
bottle (where the nosecone fits) in order
to provide a looser fit for a narrower
nosecone. This allows the nosecone to be
made from the same diameter bottle. Using
a smaller diameter nosecone reduces the
drag on the rocket. From experience we
have found that the nose cone has to
overlap the bottle somewhat otherwise it
falls off too easily.
To reduce the diameter of the bottle
simply put a cap on the bottle and
submerge the base about 3 cm in boiling
water. That part of the bottle will shrink
quite quickly. As the air heats up inside
the bottle it provides a little pressure
that helps keep the base forming a nice
shape. You may have to practice this a
little but it is easy. As always be
careful with hot water ... yadda yadda.
We used this technique with the Clifford
rocket. At some stage I want to work out
at least mathematically if the reduced
drag on the rocket is worth the slightly
reduced volume.
We are always looking for the cheapest
and lightest way to construct the rockets.
The ring fin is supported by 9 bamboo
skewers held at each end by a single piece
of tape. This design provides a very light
structure (~40 grams) that is very robust.
This design was used in two rockets and
flight tested on 6 launches.
One rocket hit hard from over 100
meters without a parachute causing no
damage to the fin structure. We will
probably use this design in the future for
small rockets.
Cost of fin: ~$0.10 (tape and
skewers)
We obtained 6 parachutes from old
flares. These have a reasonable size hole
in the parachute which makes it fall
faster, but still very acceptable. These
parachutes are well made with strong
lines. We may sew the holes closed if we
want to set a flight time record, but for
now they are fine the way they are.
The re-enforcement bands we tested are
just made from recycled plastic box ties
(see picture). I tried to weld a band
together in the workshop by squeezing
the overlapping ends of the band between
two pieces of metal held in a vice and
heating them with a blow torch (The metal
not the ends). This was unsuccessful as it
was too hard to control the temperature,
and it was either too much or not enough.
Using ten staples from an ordinary stapler
instead worked just fine and gave a really
strong bond.