Each flight log entry usually
represents a launch or test day, and describes the
events that took place.
Click on an image to view a larger image, and
click the
browser's BACK button to return back to the
page.
Day 105 - Polaron G2 flight, Axion G2 first
flight
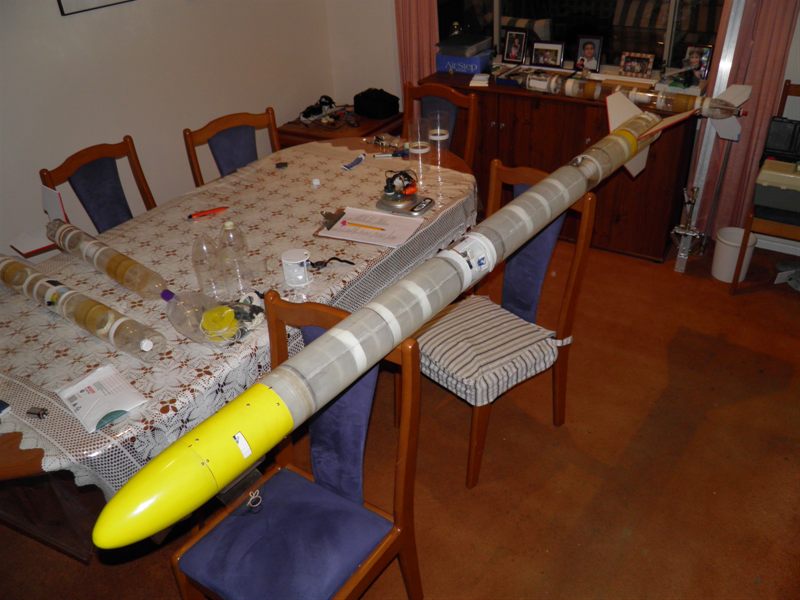
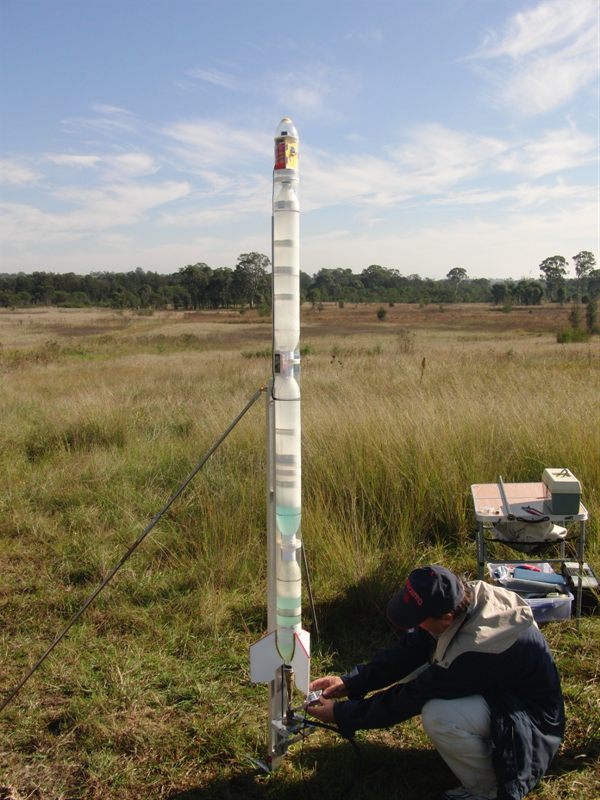
Repaired Polaron G2 being prepped the night
before.
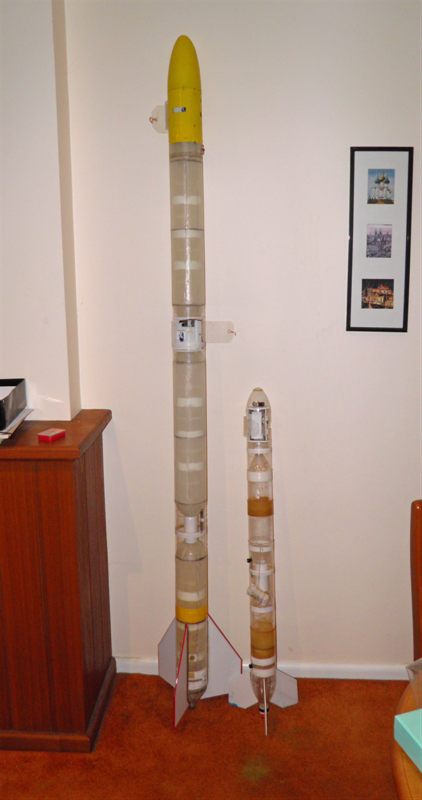
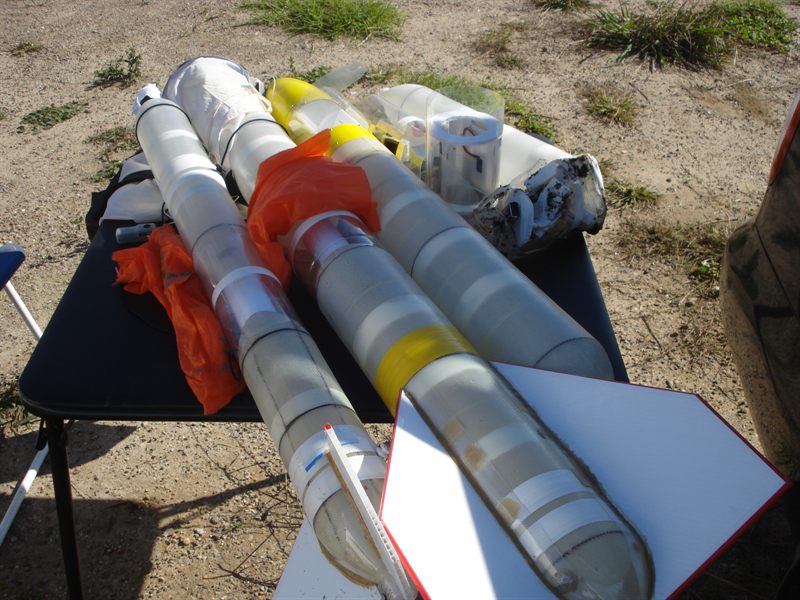
Little Axion next to big cousin.
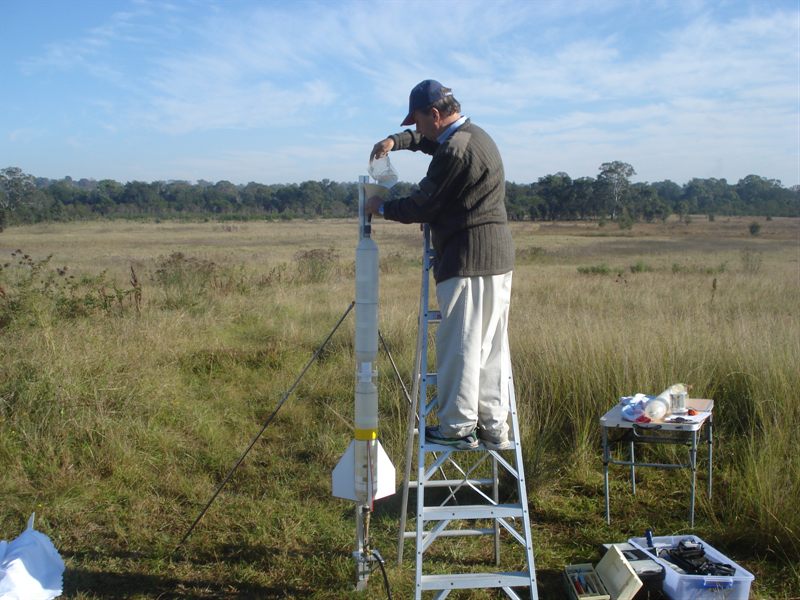
3.8L of water is poured into the lower half
of the rocket.
The top section of the rocket is screwed to
the lower half already on the pad.
My pirate impersonation... has anyone seen
my leg?
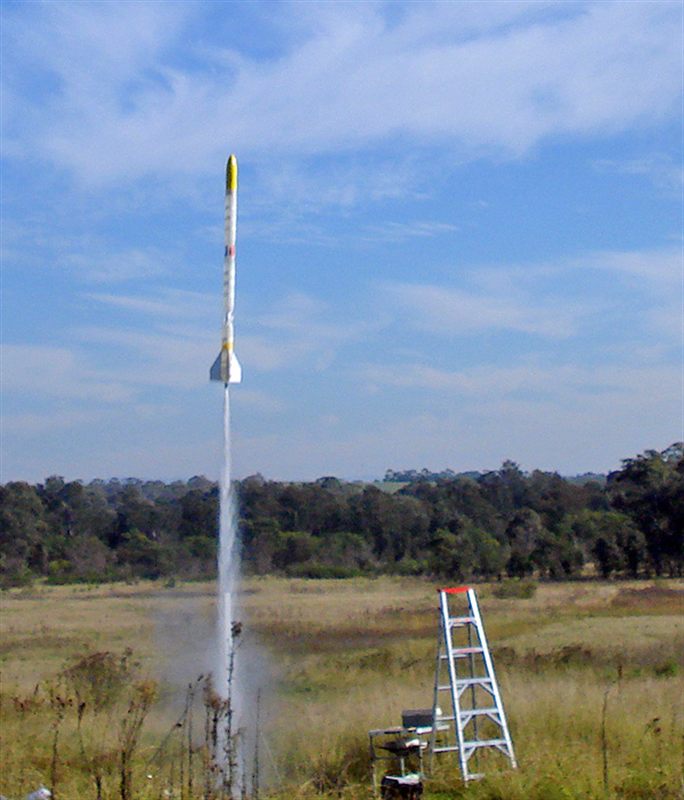
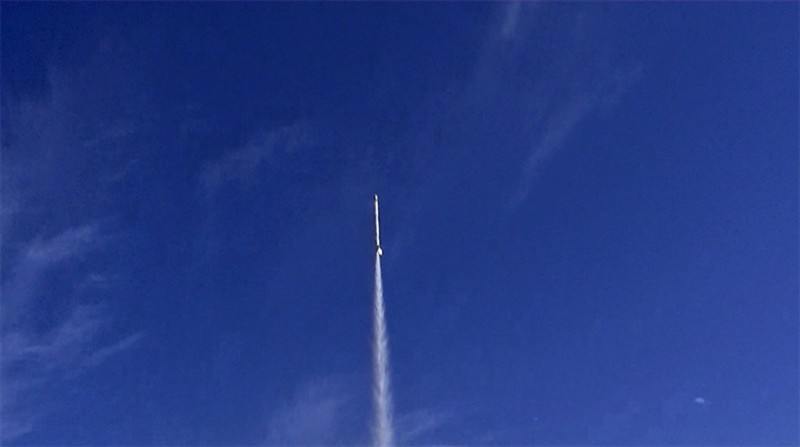
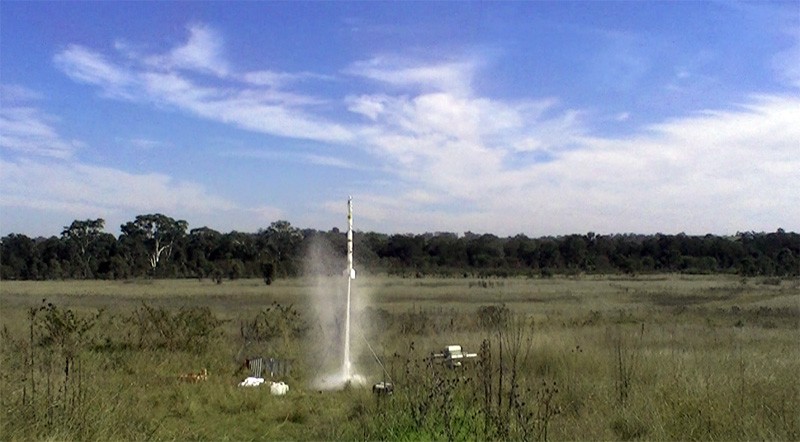
Launched at 210psi.
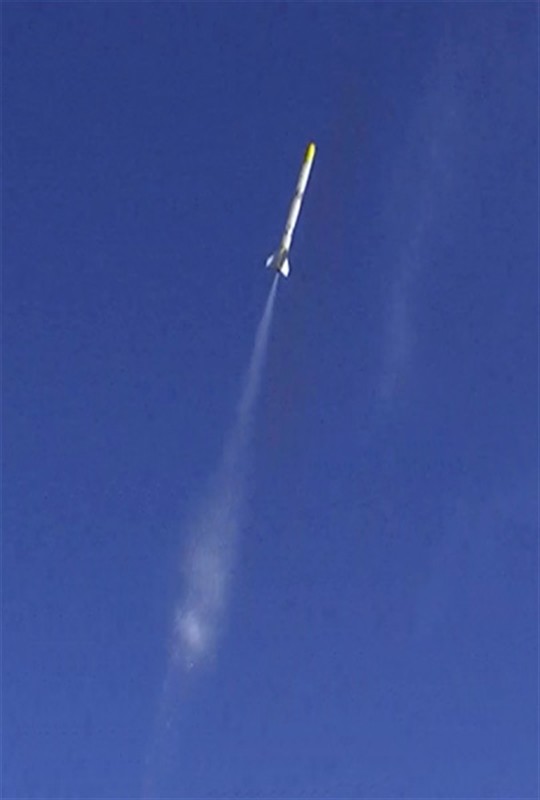
Frame captured from video. Shortly after
burnout as rocket reaches maximum velocity of
~269km/h
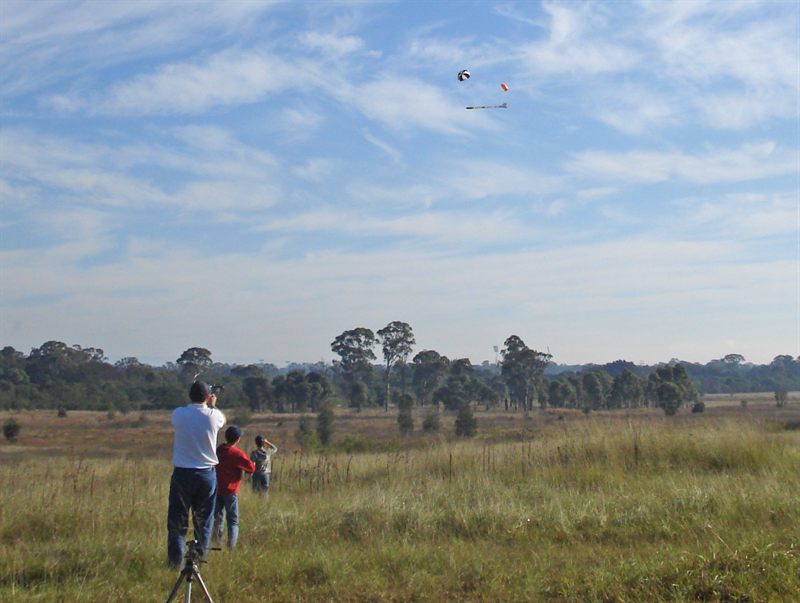
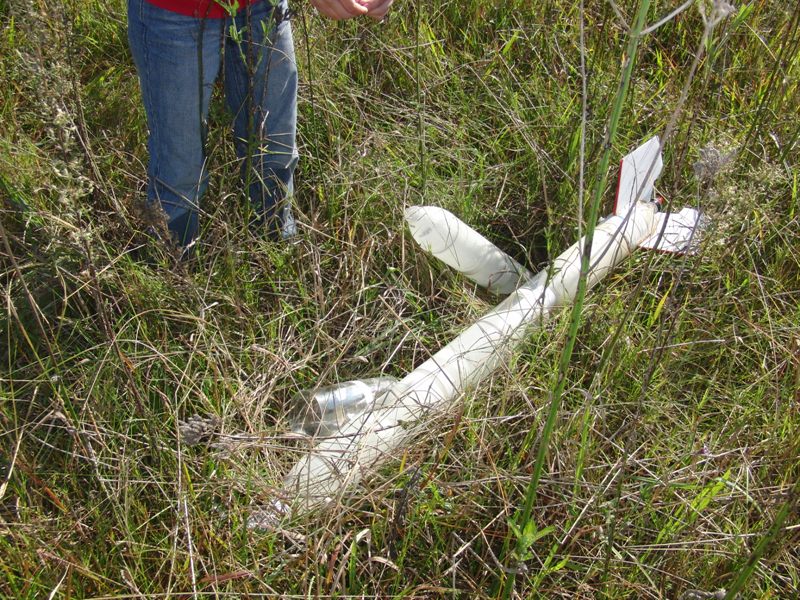
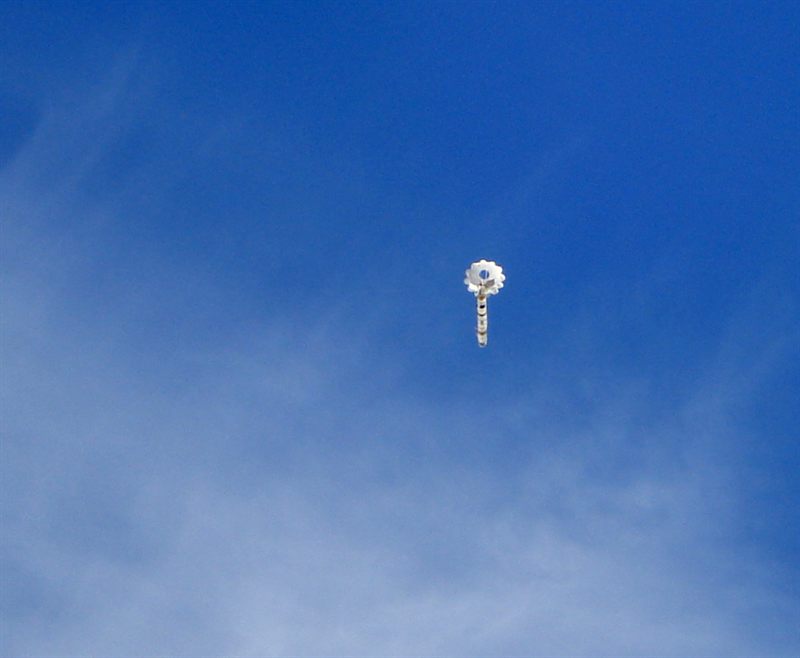
Coming down under both back up and main
chutes.
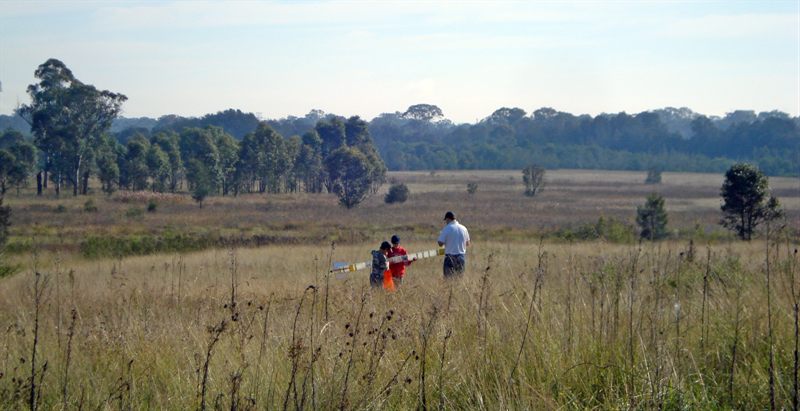
Rocket landed gently on it's side in the
tall grass.
Recovery crew is quickly on the scene.
We download the flight data after each
flight just in case we loose it on the next
flight.
Axion G2 has an 8L capacity
Here you can see the Jet foaming spacer at
work.
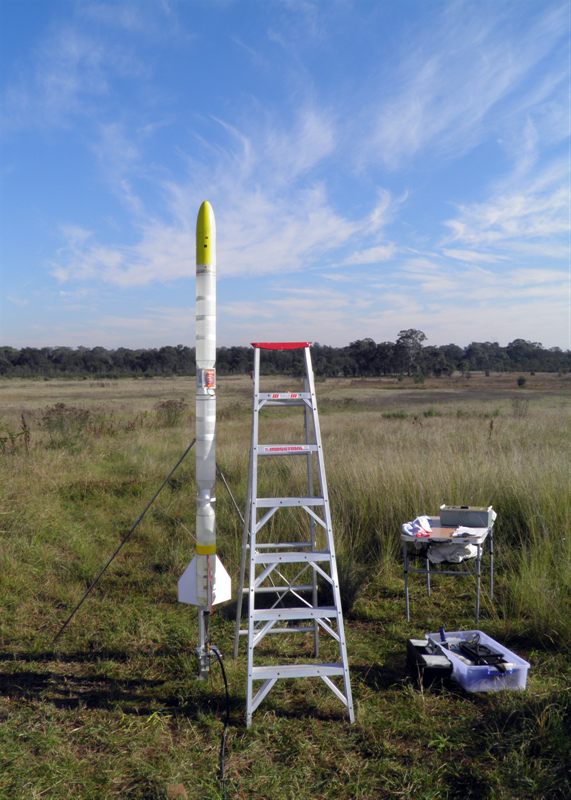
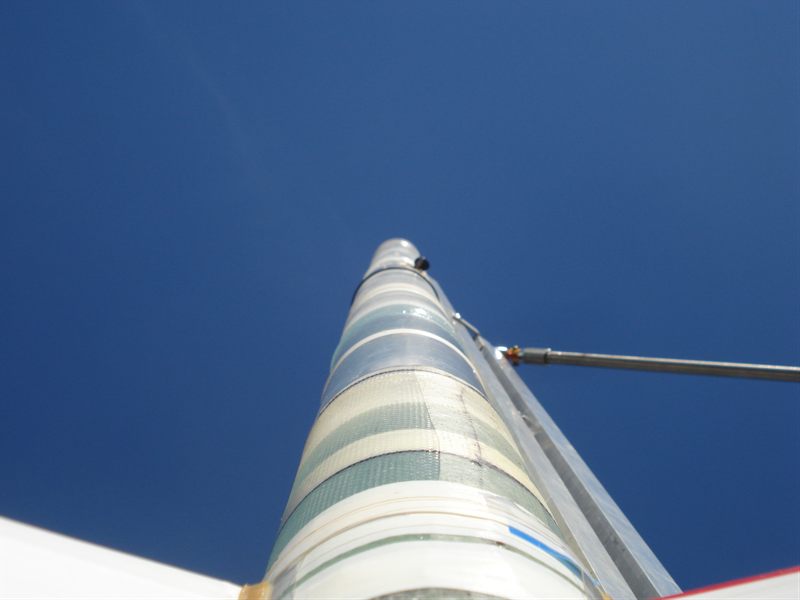
Pointed in the right direction.
Launching rockets is not very much fun.
Frame captured from video.
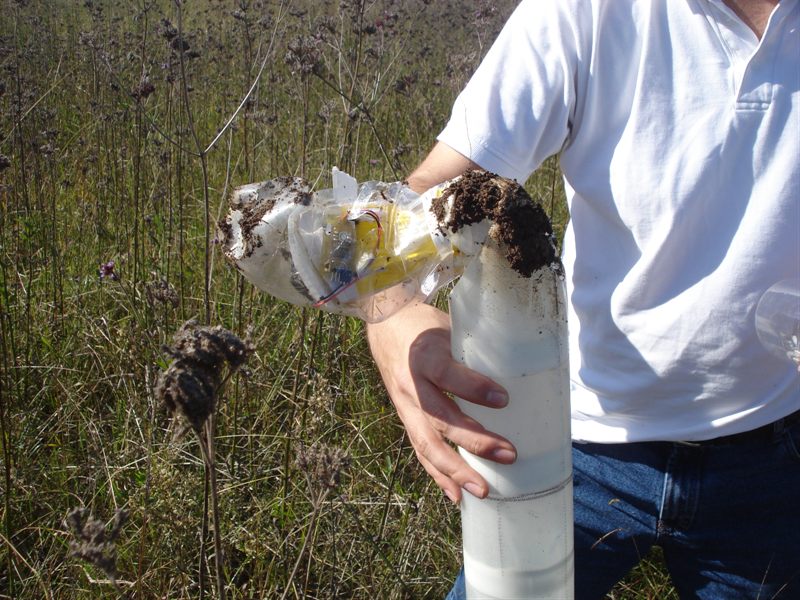
Axion G2 post landing. It dug a 15cm hole in
the soft ground.
Shhh!... don't tell your mum
We need a bigger table.
Axion IIc launched at a modest 125psi.
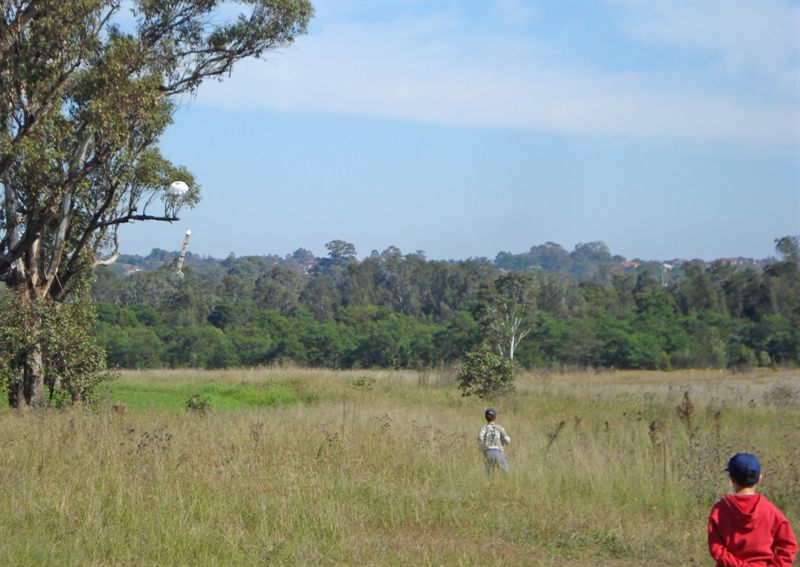
Axion IIc coming in for a nice landing ....
....almost on top of the trees.
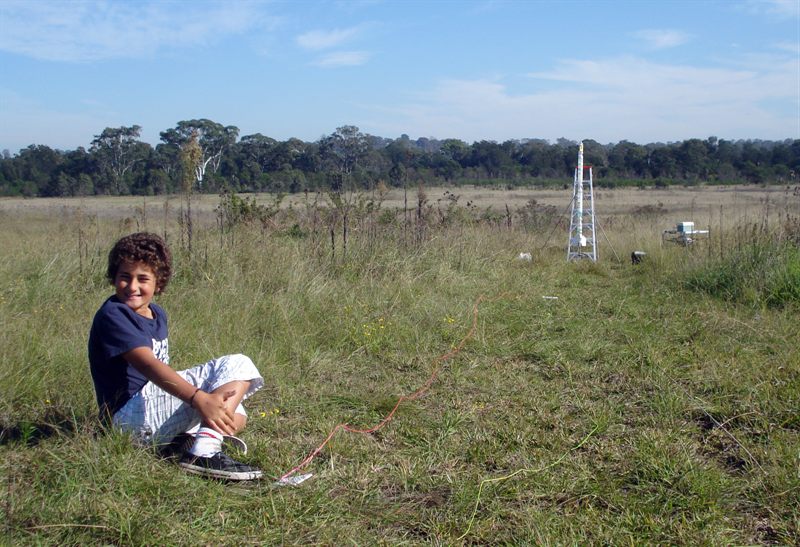
A photo for the boys to take to school for
their weekly "news".
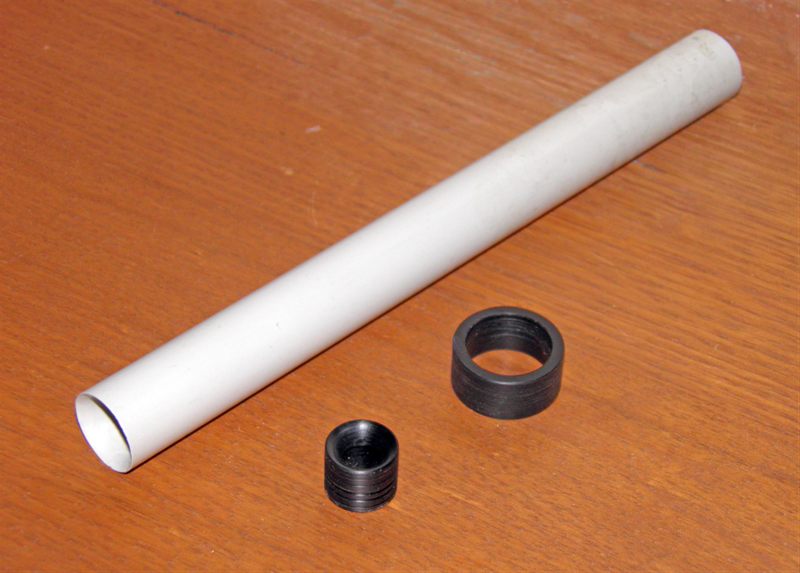
Jet foaming spacer components. The end of
the PVC has been reamed out for smoother flow.
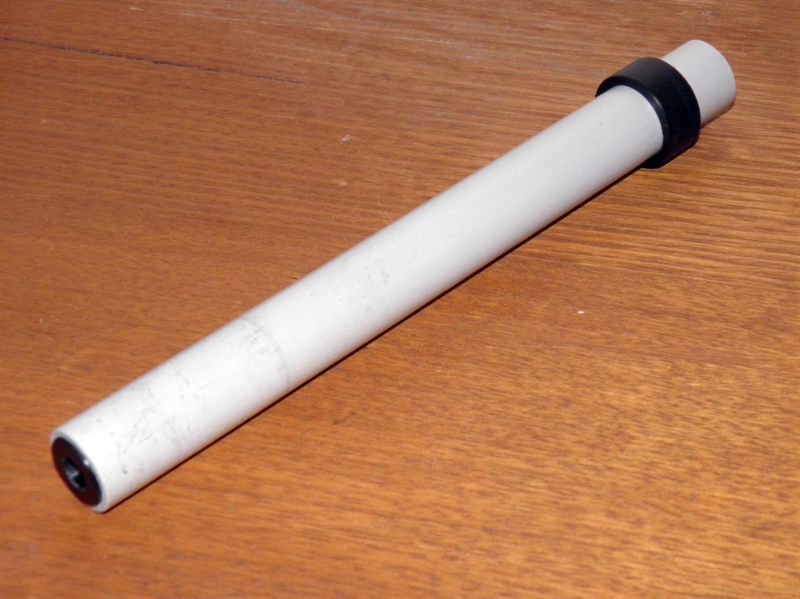
Spacer components assembled and glued into
position.
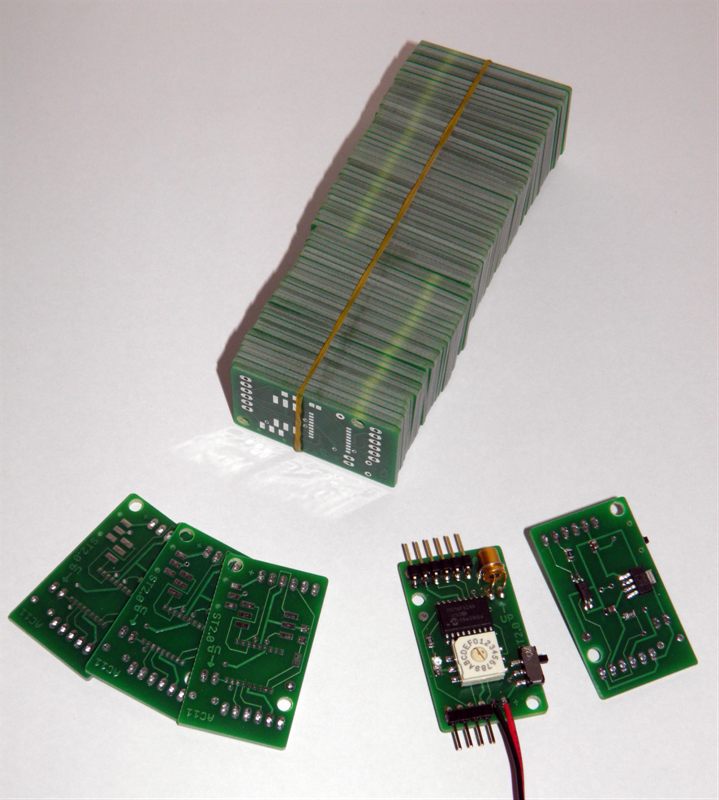
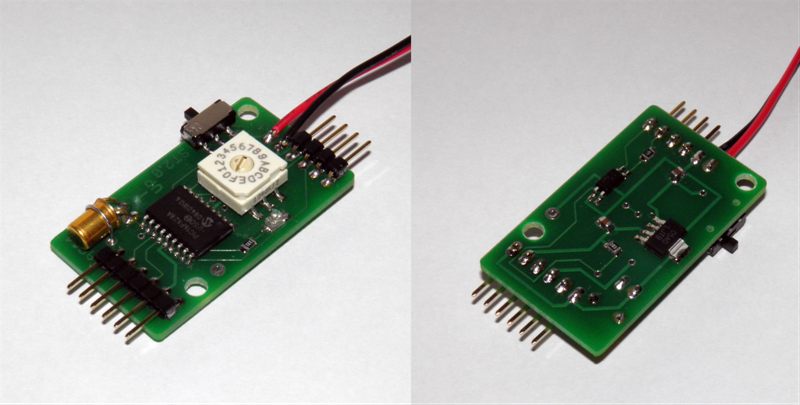
PCBs have arrived for the servo timer II.
Top and bottom views of the timer. The
rotary switch will be smaller on the production
run.
Date:8th
May 20118:15am - 12:00pm
Location:
Doonside, NSW, Australia
Conditions:Mostly calm, with light breeze
later in day, little cloud, temp ~21C
Team Members at Event:PK, Paul K, John K, Jordan K and
GK
Launch Day Report
Dad had to repair the pressure regulator
inside the control panel the day before
because it was slightly corroded from the
water we keep pumping through it during
hydro tests. It wasn't adjusting the
pressure smoothly.
The weather was great for launching
rockets this week. Mostly blue skies and
very little wind. We were going to attempt
to launch the G2 rocket again after repairs
from the last CATO. The only thing we
changed on the rocket was the addition of
the rail buttons for the new launcher.
This time we also doubled the length of
the hose and the launch string so we were
further back just in case the rocket decided
to misbehave again.
Polaron G2 flight
The launcher was quick to setup and we
again placed the lower half of the rocket on
the pad and filled it with water. We then
screwed the upper section into the lower
half, and tightened the parachute cords.
This time we pressurised the rocket a
little bit first perhaps to 20-30psi and
checked for leaks. The camera and altimeter
were started and all other electronics
armed. This gave the air inside the rocket
some time to cool. We then pressurised the
rocket to 210psi slower than last time.
The rocket took a bit of effort to
release. I guess the higher pressure just
makes things stick a bit more, but Paul put
his shoulder into it and the rocket
launched. It was quite evident from the
noise it made that it had more power than
normal. It nicely accelerated to apogee with
a slight roll. We had also angled it away a
little from the spectators and the trees so
that if the parachute failed again it would
fall away from people. You could almost feel
the stress on the rocket when it hit peak
velocity. We could see the backup parachute
released just after apogee as was designed,
and we could see the main fully open within
a second or two after the backup.
The rocket landed safely on its side in
the tall grass. The only damage was one
broken shroud line out of 12 on the backup
parachute. The altimeter read out 789'
(240m) which was pretty close to what
both Clifford Heath's and Dean Wheeler's
simulators said it would go up to. This was
a good result because we can continue to use
the simulators for this rocket to predict
expected performance.
The top speed was approximately: 245
feet/s...(269 km/h or 167mph)
this was calculated from the ascent rate.
Polaron G2 flight
This is the highest single stage rocket
we have flown to date. This rocket was also
more than twice as heavy as any of our
previous rockets we have flown to this
altitude. With
this flight we have also successfully
reached Phase I of the project, and will be
starting on the next phase soon. We will try
to fly the rocket in this configuration
again a number of times to better
characterise it's flight performance. I'm
really looking forward to the next phase as
the rocket will use boosters and Jet foaming
to produce a really long burn.
Axion G2 flight
Because of a shortened launch day we
decided to go ahead and launch the Axion G2
with foam next. This time we only
pressurised it to 200psi because the bottles
were only hydro tested to 200psi the day
before. (They should hold around 300psi).
The take-off was quite slow but a great foam
trail was produced all the way to apogee.
Again the rocket was noisier than normal.
The parachute, however, failed to open and
the rocket crashed heavily in the soft
ground. All the electronics survived and
it looks like only the top bottle and
nosecone were damaged.
We're not sure what caused the deployment
failure but I suspect that it was the slow
take-off, and the timer just didn't detect
launch. The parachute was still wrapped in
the parachute cord, and the servo though
damaged was still in the stowed position.
The timer was verified before launch to be
armed, and on the ground the power was still
in the ON position. I plugged the timer into
the same battery with a new servo and the
timer still worked correctly. The time
setting was also correct.
We had the original MD80 camera on board
as well as a Z-log altimeter. Both were
mounted under the first bottle and were
thrown clear on impact. The video camera was
still recording when we found it. The alloy
case really protects the camera. The
altimeter's power supply was severed, but it
still recorded the entire flight.
So overall not bad damage, we just need
to replace the servo and make a new bottle.
The Jet foaming spacer (see below) seemed
to work quite well.
The simulator vs actual results were
interesting too. Both simulators predicted
an altitude of around 550', but the
altimeter gave us 664' which is
considerably higher. We have seen this on
previous foam flights at higher pressures.
The foam really looks like it is producing
measurable improvements in performance with
ordinary nozzles.
Axion G2 flight - No,
the rocket did not bounce that high!
Axion IIc flight
The last launch of the day was a low
pressure (125psi) Axion IIc rocket. Though
it wasn't setup for Jet foaming we still put
bubble bath in the water and some foam was produced
during pressurisation. This made a longer
lasting water phase with the trail visible
about half way up. This rocket was also
equipped with the newly build Servo Timer II
board. So this was a good test of the timer.
The parachute deployed soon after apogee and
the rocket landed without damage. We were
very lucky as the rocket just missed the
tallest trees.
Day 105 - Highlights
Axion G2
Because of the rain delay from last week,
we had time to assemble a second high
pressure rocket made from the 90mm spliced
quads. This rocket used standard Axion
components such as fairings, nosecone and
fins, so was quite easy to put together. The
rocket also was intended as a test bed for
the Jet foaming spacer.
Jet Foaming Spacer
One of the biggest
variables with Jet foaming is the amount of
water that is trapped in the upper chamber.
This always varies depending on how much
water makes it up there when pouring it in
and then how long the rocket sits on the pad
before launch giving the water a chance to
drain into the lower chamber.
The other issue that makes jet foaming
work effectively is a pocket of air trapped
in the upper part of the lower chamber. This
allows the air to be mixed with the water in
the lower chamber. If the lowest bottle is
completely full then
very little air and
water end up mixing. When we used to use a
Robinson coupling on the bottom of the lower
bottle the bottle lobes in the penta-claw
stored a certain amount of air that would be
mixed in. When we switched to spliced-pairs
the shape of the bottle allowed all air to
escape to the upper pressure chamber through
the tornado coupling resulting in no air
pocket.
The Jet Foaming Spacer is a piece of PVC
pipe that extends about 15cm below the
tornado coupling. It's purpose is to create
a pocket of air in the lower chamber. During
pressurisation the air goes to the top of
the lowest chamber and starts forcing the
water up the spacer until the water level
reaches the bottom of the spacer and then
the air starts flowing up the spacer tube to
the upper pressure chamber.
Jet Foaming Spacer
This creates a pocket of air of known
volume in the lower chamber and also the
volume of water in the lower chamber is
fixed. This will allow us to do more
accurate jet foaming comparison flights.
When the rocket stops being pressurised the
water in the lower chamber remains fixed as
the end of the pipe is level with the
water level in the lower chamber.
At the bottom of the PVC pipe is an 8mm
jet foaming nozzle. We opted for a wider
pipe going to the nozzle rather than an 8mm
pipe from the tornado coupling to reduce the
amount of friction in the tube as air and
water pass through it.
You can vary the size of the air pocket
simply by changing the length of the tube. A
plastic ring is glued near the top of the PVC pipe
that fits inside the tornado tube and
prevents the tube from being ejected. The
nozzle is just made from a piece of plastic
and glued into the end of the pipe.
We also use an o-ring on the outside of
the tube to stop air going up past the
outside of the tube, though a small amount
of leakage is not that critical.
Servo Timer II Update
We received the PCBs this week from
PCBCart. They were recommended by some of
the other rocketeers and we definitely had a
good experience with them.
I've soldered up a couple of the timers
and will continue to do more flight testing
in the coming weeks. I'm currently placing
an order for all the components
Backup parachute
deployment with ST II and MAD, Zlog
altimeter, MD-80 clone camera.
Altitude / Time
789' (240m) / 50.4
seconds
Notes
Very good and
mostly vertical flight, with slight
roll. Backup parachute opened just
after apogee, with Main opening soon
afterwards. Good landing without
damage. 1 shroud line broke on the
backup parachute. Nice and noisy.
Maiden flight. Good
takeoff and good foam generation all
the way to apogee. Parachute failed
to deploy and rocket crashed
heavily. All electronics survived.
Good video and altimeter data.
Suspect low-G takeoff failed to
detect launch.