last updated: 21st october 2023 - Day 226 to Day 230 - Various Experiments

Safety First

Search

Site Index

Tutorials

Articles

Rocket Gallery

Labs

Where To Buy

10 Challenges

Links

Blog

Glossary

Contact Us

About


Construction - Basic

Body

Ring Fins

Flat Fins

Nozzle

Nosecone

Construction - Advanced

Robinson Coupling

Splicing Bottles #1

Splicing Bottles AS#5

Reinforcing Bottles

Side Deploy #1

Side Deploy #2

Mk3 Staging Mechanism

Multi-stage Parachutes

Fairings

Construction - Launchers

Gardena Launcher

Clark Cable-tie

Medium Launcher

Cluster Launcher

Launch Abort Valve

Quick Launcher

How It Works

Drop Away Boosters

Katz Stager Mk2.

Katz Stager Mk3.

DetMech

Dark Shadow Deployment

Articles

Recovery Guide

Parachutes

How Much Water?

Flying Higher

Flying Straight

Building a Launcher

Using Scuba Tanks

Nozzles

Video Taping Tips

MD-80 clone

Making Panoramas

Procedures

Burst Testing

Filling

Launching

Recovery

Electronics

Servo Timer II

V1.6

V1.5

V1.4

V1.3, V1.3.1, V1.3.2

V1.2

Deploy Timer 1.1

Project Builds

The Shadow

Shadow II

Inverter

Polaron G2

Dark Shadow

L1ght Shadow

Flight Log Updates

#230 - Tajfun 2 L2

#229 - Mac Uni AON

#228 - Tajfun 2 Elec.

#227 - Zip Line

#226 - DIY Barometer

#225 - Air Pressure Exp.

#224 - Tajfun 2

#221 - Horizon Deploy

#215 - Deployable Boom

#205 - Tall Tripod

#204 - Horizon Deploy

#203 - Thunda 2

#202 - Horizon Launcher

#201 - Flour Rockets

#197 - Dark Shadow II

#196 - Coming Soon

#195 - 3D Printed Rocket

#194 - TP Roll Drop

#193 - Coming Soon

#192 - Stager Tests

#191 - Horizon

#190 - Polaron G3

#189 - Casual Flights

#188 - Skittles Part #2

#187 - Skittles Part #1

#186 - Level 1 HPR

#185 - Liquids in Zero-G

#184 - More Axion G6

#183 - Axion G6

#182 - Casual Flights

#181 - Acoustic Apogee 2

#180 - Light Shadow

#179 - Stratologger

#178 - Acoustic Apogee 1

#177 - Reefing Chutes

#176 - 10 Years

#175 - NSWRA Events

#174 - Mullaley Launch

#173 - Oobleck Rocket

#172 - Coming Soon

#171 - Measuring Altitude

#170 - How Much Water?

#169 - Windy

#168 - Casual Flights 2

#167 - Casual Flights

#166 - Dark Shadow II

#165 - Liquid Density 2

#164 - Liquid Density 1

#163 - Channel 7 News

#162 - Axion and Polaron

#161 - Fog and Boom

#1 to #160 (Updates)


FLIGHT LOG

Each flight log entry usually represents a launch or test day, and describes the events that took place.
Click on an image to view a larger image, and click the browser's BACK button to return back to the page.

Day 35 - Acceleron III Booster with staging mechanism - development progress
Pressure testing Acceleron III booster segments.
We add a small solid plastic slug to the new tube to prevent it collapsing at the thread during hard landings.
The new tube gets screwed into the support bracket.
These are the components that make up the air supply line to the staging mechanism.
The components that had to be machined for the air supply line.
Air supply connector assembled. Includes the non-return valve inside the bottle ...
... and the swivelling hose attachment to allow the cap to be removed without twisting the hose.
The payload pod with a slot cut in for the parachute. The black fitting on the end is the Gardena release mechanism.
Date: 13th May 2007
Location:
Workshop
Conditions:
Pleasant since it was indoors.
Rockets:
(click the name for rocket details)
 
Name Capacity Notes
Acceleron III 24.75 L A new rocket expanding on Acceleron II's capacity. It is also our first two stage rocket booster.

Team Members at Event: GK and PK

Development

Now that Acceleron (I and II) has successfully flown 16 missions we are ready to start adapting it to its intended purpose - adding a staging mechanism so that it will be able to release a sustainer to reach higher altitudes.

Booster Upgrade

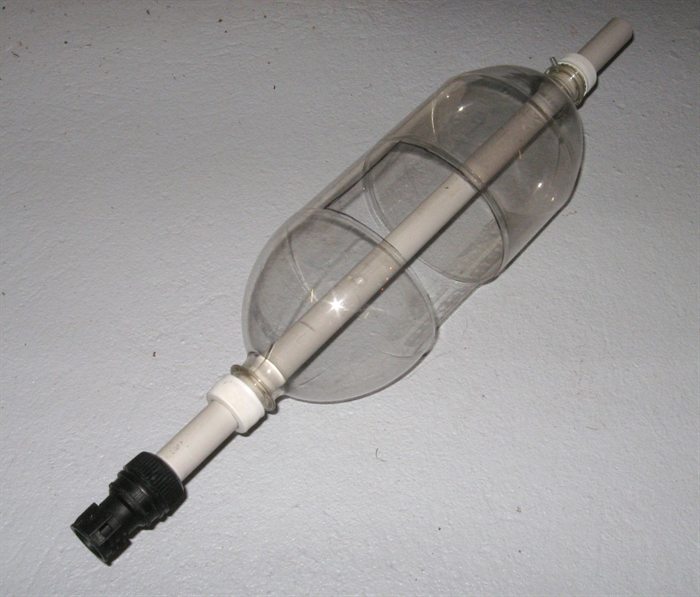
We disassembled Acceleron II this week and extended each of the segments by another 2L bottle. This makes the total capacity of the booster around 25L.

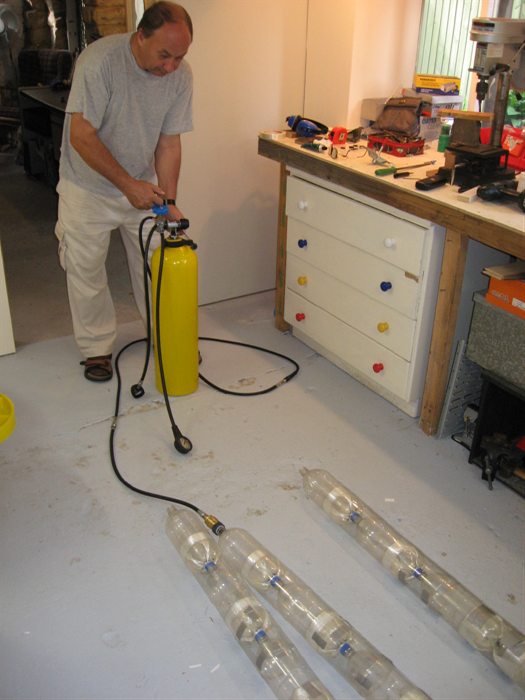
As always we pressure tested each assembled segment to make sure all the new joints were sealing well. The first segment held just fine, but when we were filling the second segment, the segment let go at one of the couplings at around 40psi. There was a pretty loud boom in the workshop but luckily only the nosecone got a little crushed.

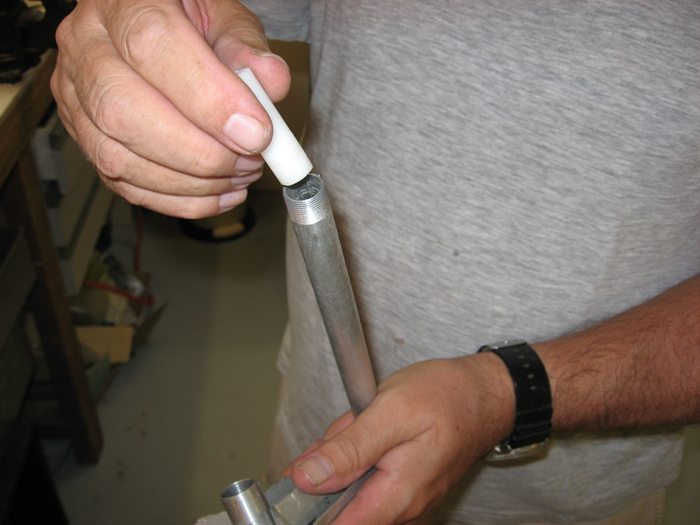
We've seen this once before, and we had kind of suspected it because we only used normal bottle caps, instead of the longer thread ones. Due to the coupling and washer there just isn't enough thread left with a normal cap. We will go back and replace the caps for the new extensions so that does not happen again.

The dummy payload will be replaced by a new payload pod that will house the flight computer, camera, parachute and staging mechanism actuator. The staging release is mounted just above the pod. The pod will also be used to support the sustainer and protect the payload contents from the spray during separation.

We have also replaced the central pipe with a longer one to account for the extra bottle and the 
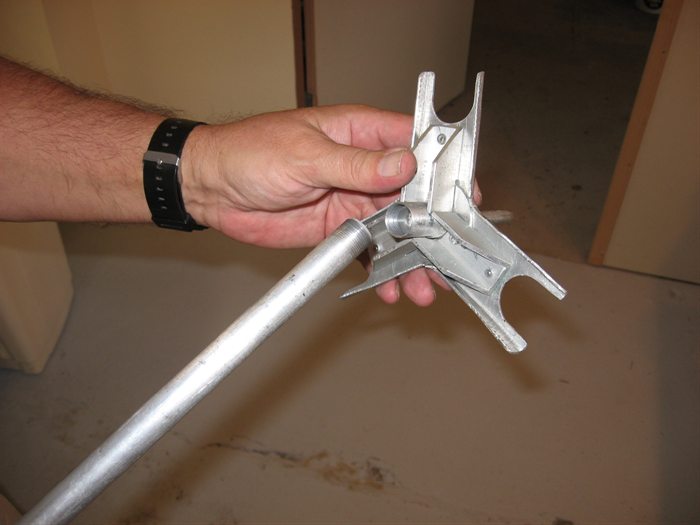
new pod being attached.

Staging Mechanism

After much consideration we decided that the staging mechanism will be based on a Gardena release mechanism rather than a crushing sleeve.

The reasons for going with the Gardena mechanism are:

  • The sustainer can be released exactly when needed, rather than when the pressure drops inside the main booster as with a crushing sleeve.
  • All our existing nozzles will fit the sustainer.
  • We know that the Gardena mechanism can hold relatively high pressures up to at least 220+ psi. We want to be able to retain the design once we start reinforcing the bottles.
  • The crushing sleeve method doesn't lend itself very well to the construction of CD nozzles, which we plan to revisit especially with the sustainer.

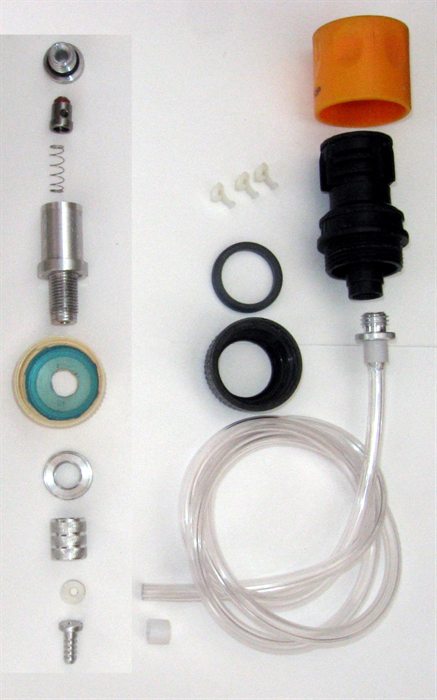
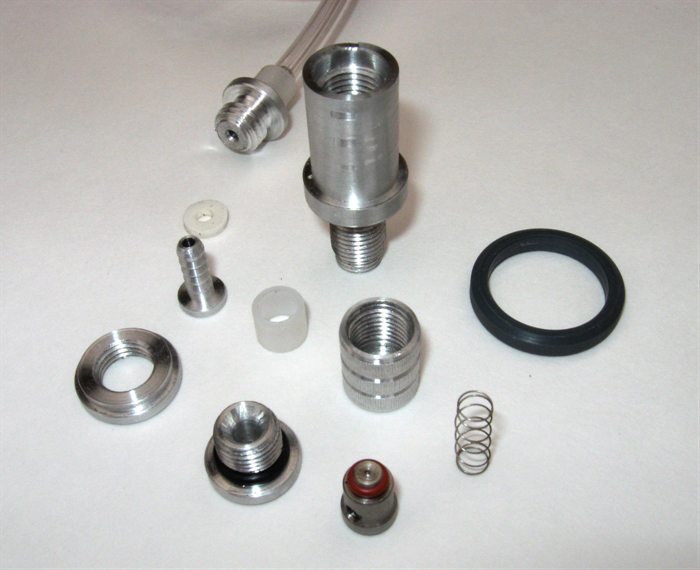
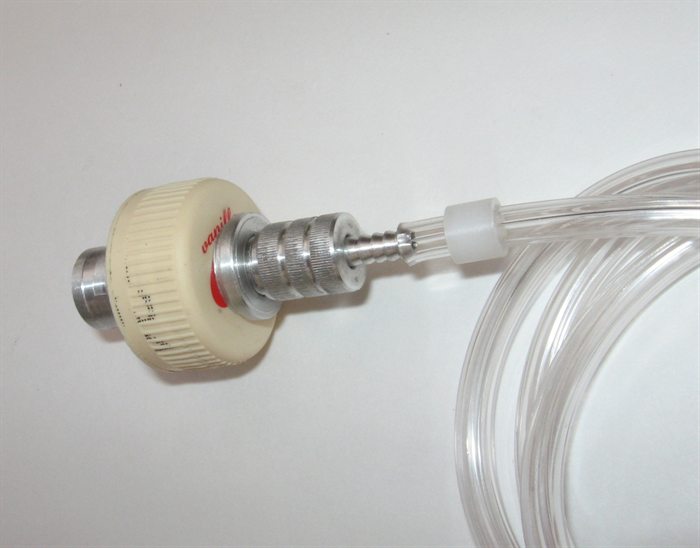
We have manufactured most of the air supply components of the staging mechanism that allows pressurised air to go from one of the booster segments into the sustainer. The air hose fitting in the bottle cap looks a little complicated, but it includes a non-return valve, as well as allowing the air hose to swivel so it doesn't twist when we need to take the cap off to fill the segment with water.

We removed the spring from the Gardena mechanism and we will add a small latch that will keep the release closed until the flight computer determines when the best time is to release it. The release will be actuated by a small RC servo motor. The force to pull back the Gardena attachment will be provided by a number of rubber bands. 

We will publish the full technical drawings once the system is completed and we know it works.


<< Previous       Back to top      Next >>


Copyright © 2006-2023 Air Command Water Rockets

Total page hits since 1 Aug 2006: