Each flight log entry usually
represents a launch or test day, and describes the
events that took place.
Click on an image to view a larger image, and
click the
browser's BACK button to return back to the
page.
Day 65 - Baryon II booster and Tachyon V sustainer
and Variable Nozzle
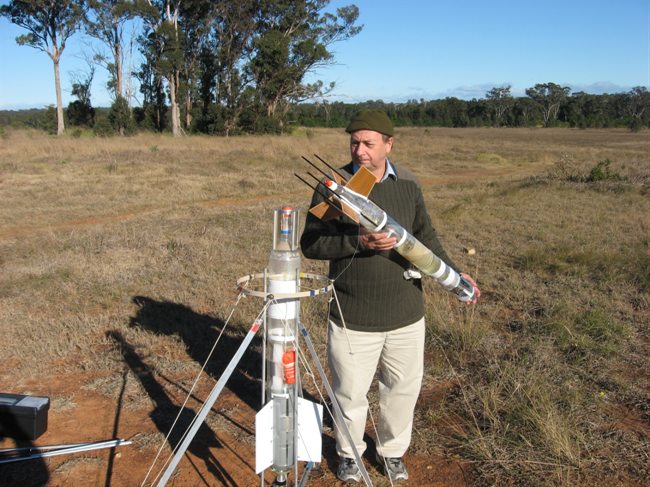
A collection of rockets ready for the next
day's launch.
Tachyon V on the left and Baryon II on the
right.
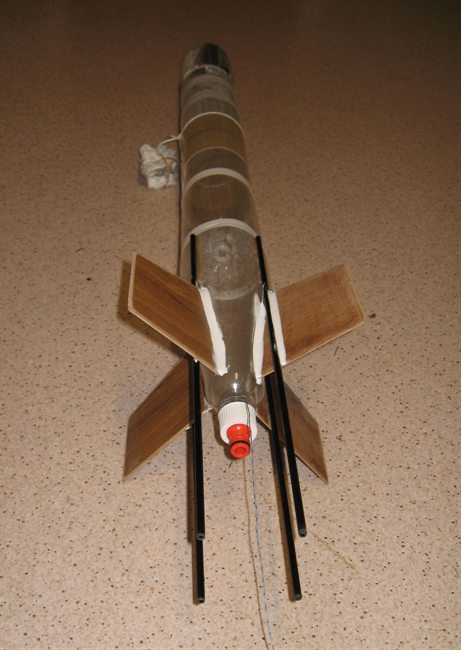
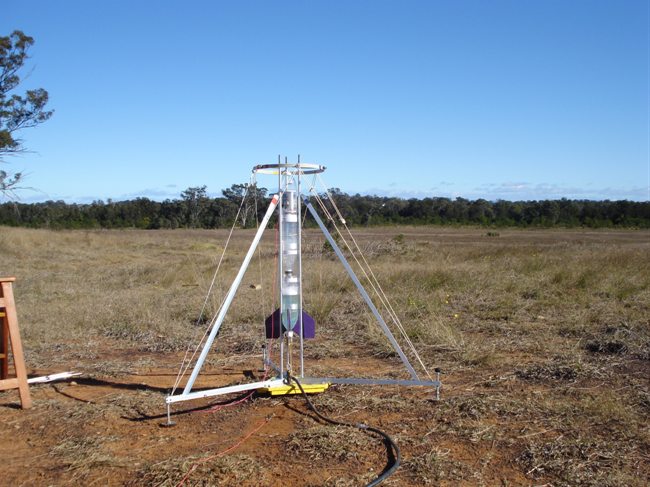
The two stacked on top of each other.
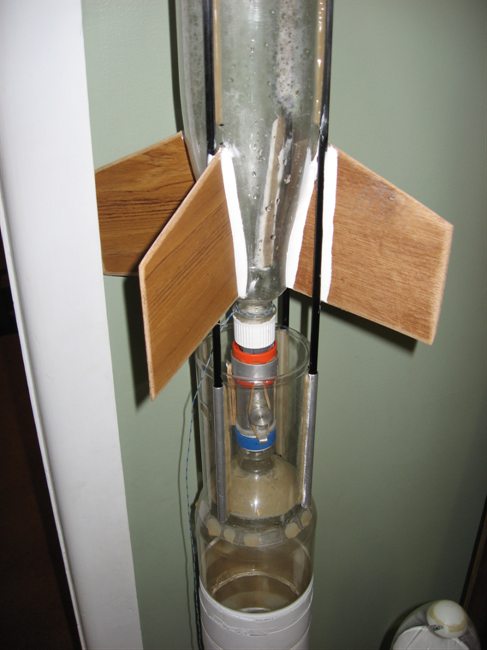
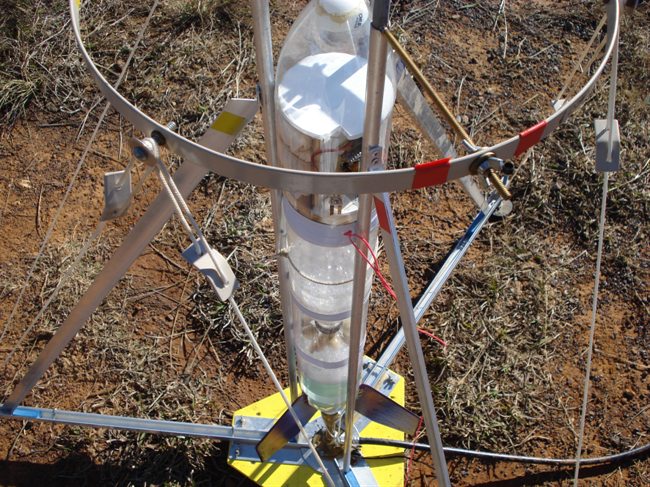
This image shows the details of where the
carbon fiber tubes fit into booster tubes.
Didn't even get time to paint the fins.
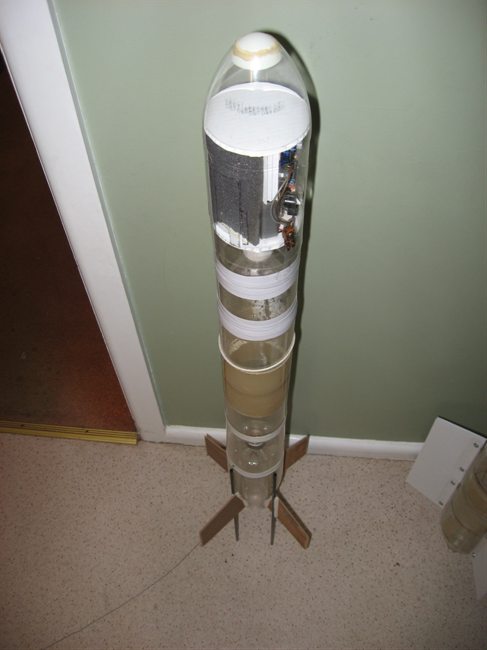
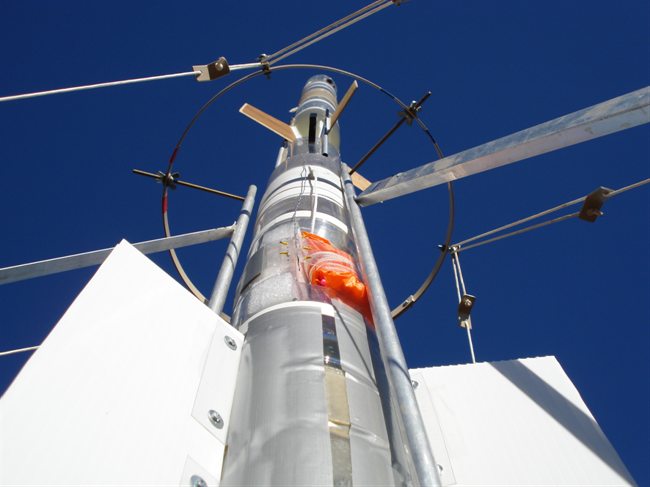
Top view of the sustainer.
The carbon fiber tubes are glued to the
bottle and further supported by the fins.
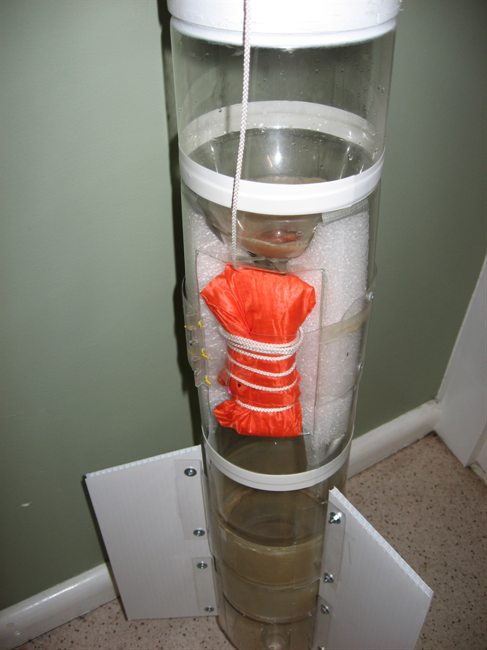
The Mk2. stager is surrounded by a collar
with thin-walled aluminium tubes glued to it for
supporting the sustainer.
The booster's parachute simply sits behind a
flap made from another bottle. The wire tied to
the sustainer releases the flap.
Looking down onto the stager of the booster.
Tachyon IVb rebuilt sporting a new set of
plywood fins.
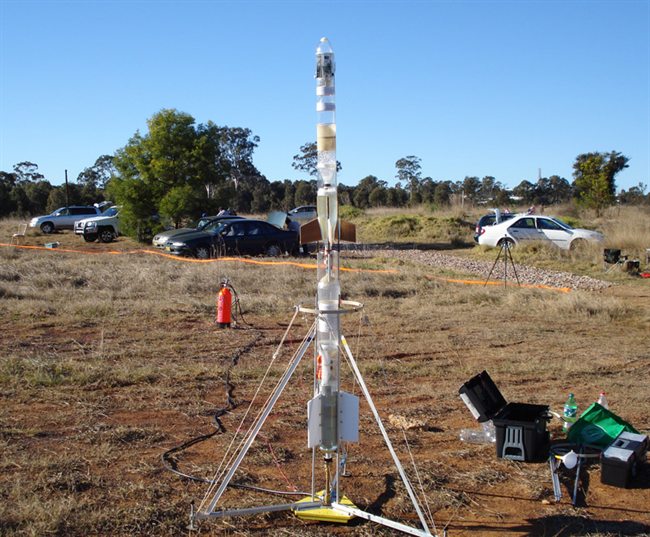
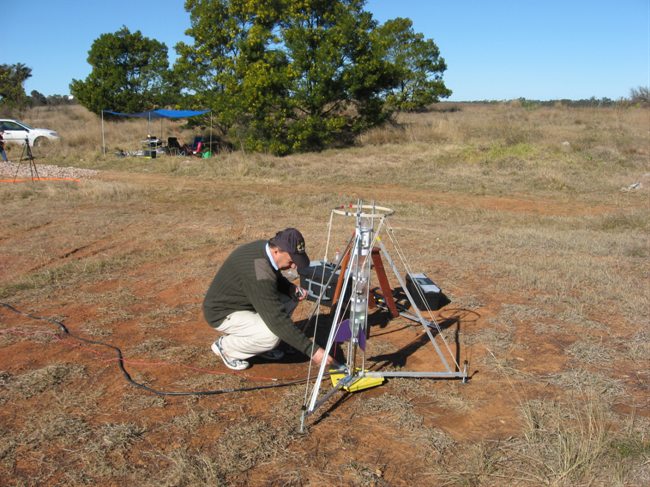
Setting up the booster and sustainer at
Doonside.
The booster fins need to be narrow in order
for them to clear the launcher ring.
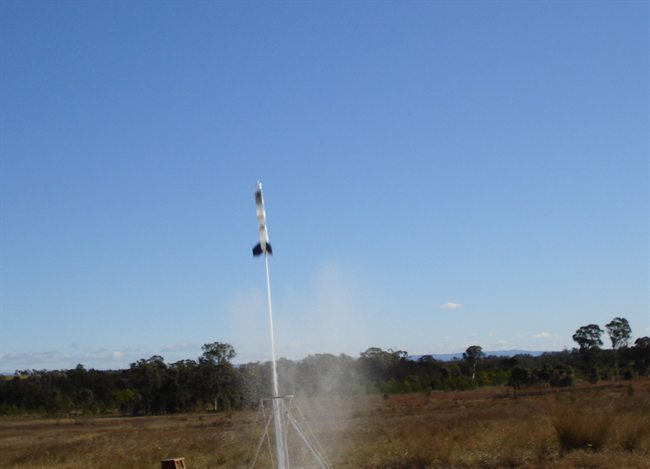
For the first flight the rocket is
pressurised to 120psi.
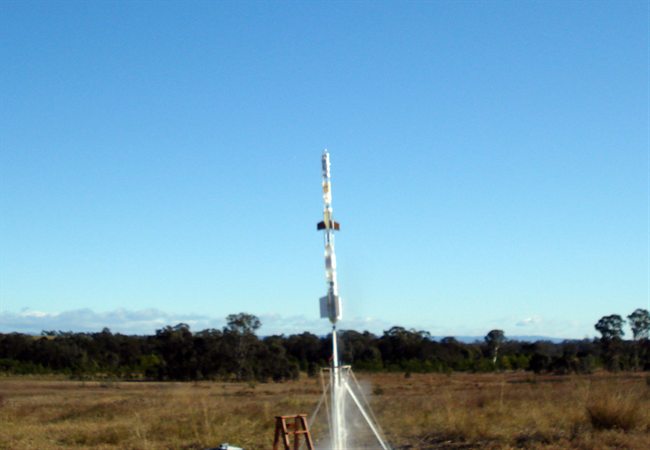
A little fuzzy on launch.
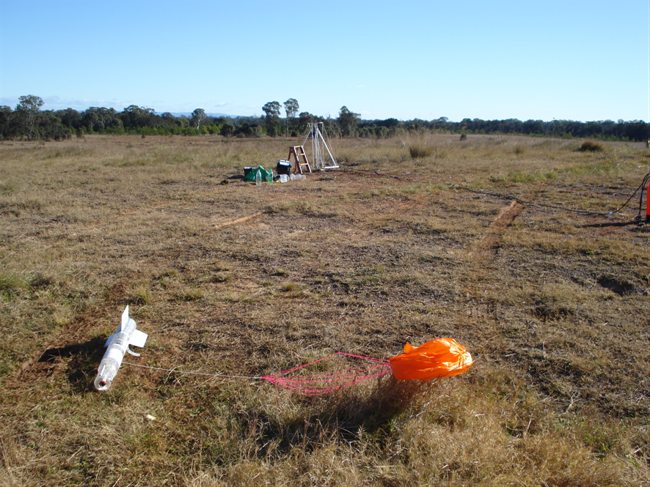
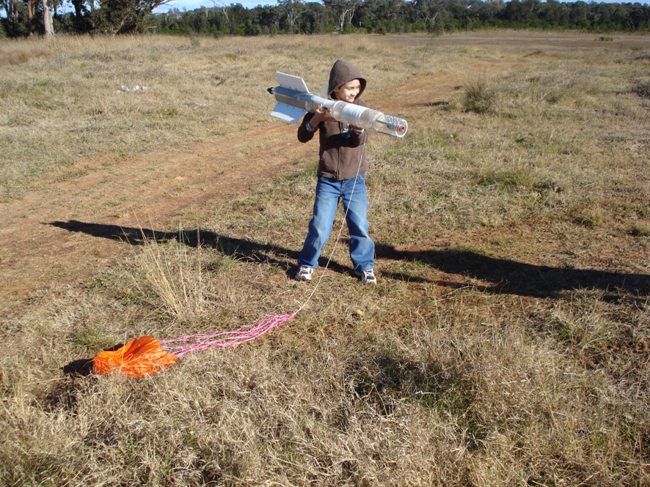
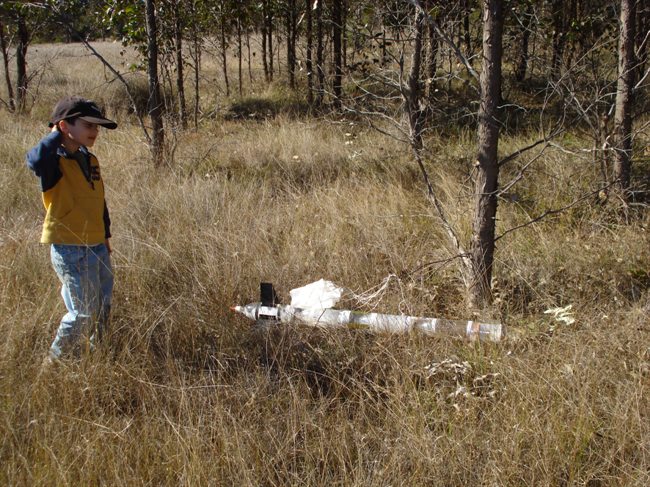
The booster landed fairly close to the
launch pad....
... and is useful as a pretend bazooka.
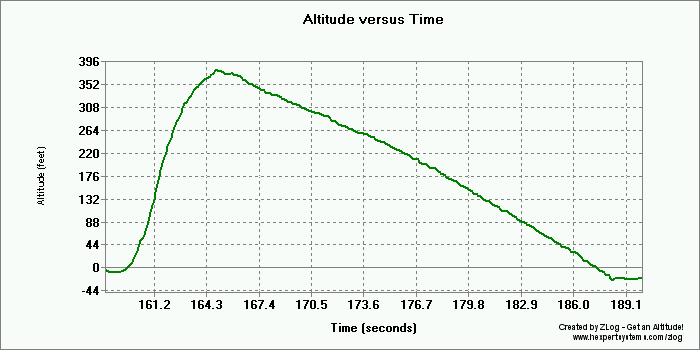
Altimeter plot of the Tachyon V flight.
Setting up Tachyon IVb on the pad.
A closer look. The pink string triggers the
flight computer.
Pressurised to 160psi on the first launch.
The rocket was fitted with a baffle over the
coupling.
Column of water looks fairly clean, indicating
that there is no blow through effect happening.
J4 lands just before a row of trees. The
parachute is hanging on the lowest branch.
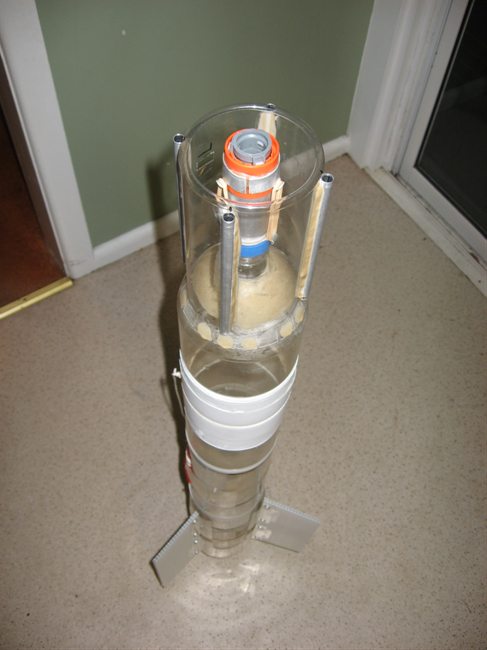
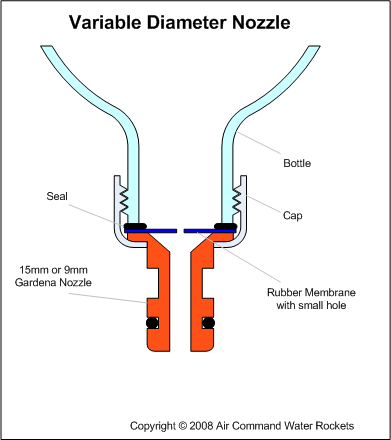
Variable nozzle assembled with Gardena
removed for clarity.
The variable nozzle components.
Showing how the nozzle adjusts itself
depending on the pressure.
Date:2nd
August
2008
Location:Doonside, NSW, Australia
Conditions:Cool, strong westerly breeze, sunny. Temp:
7-17 degrees C
Team Members at Event:
GK, PK, AK, Paul K and John K
With the
NSWRA launch day being delayed a
week due to bad weather we had just enough time
to put together the larger booster and
sustainer for the next test of the Mk2.
stager. Great pyro rocket photos of the
launch day
are available
here. We also did some experiments with
a simple variable diameter nozzle (see
below).
Tachyon V
Sustainer
We wanted to try a different method of
supporting a larger sustainer on top of a
booster in order to reduce the high drag
normally associated with a support skirt.
The sustainer uses a very streamlined bottle
for the tail cone. We have only 2 of these
bottles, and have been unable to find them
again on the supermarket shelf.
The support consists of 4 lightweight carbon
fiber tubes glued to the lowest bottle.
These extend well beyond the bottle and
loosely fit into corresponding tubes on the
booster. Not having dealt with carbon fiber
before, I was very impressed with the
rigidity of these thin and lightweight
tubes.
The full weight of the sustainer is
supported by the staging mechanism with the
tubes providing rotational and bending
stability. The tubes are there mainly to
prevent the sustainer snapping off at the
staging mechanism during boost.
The sustainer has 4 fins made out of 3mm
plywood glued directly next to each tube.
This not only provides extra strength to the
tubes, but also adds extra rigidity to each
fin. Everything was glued with PL premium,
but due to the bubbly nature of PL, fillets
were finished off with Selley's Sikaflex
glue.
The pressure chamber consists of a 2.1L
spliced pair of bottles Robinson coupled to
a 1.25L bottle. The Robinson coupling is
there to generate foam using the Jet Foaming
technique.
The recovery system is our standard one
with V1.5 flight computer. The nosecone is
also fitted with a Z-log logging altimeter
and a FlyCamOne V2 video camera.
Baryon II
Booster
The booster is based on two 2L spliced pairs
of bottles coupled together with a 22mm
tornado coupling. It uses a 15mm nozzle for
higher takeoff speed and so that we can
use a launch tube with it. The fins are long
but fairly narrow, in order for them to
clear the launcher ring. The top bottle of
the booster is fitted with the Mk2. stager.
Around the stager is a collar made from a
PET bottle. The collar has 4 thin walled aluminium
tubes glued to it. These tubes act to
stabilise the sustainer during the boost
phase.
The parachute is mounted between the two
bottles half way along the body. The
parachute release mechanism is the same as
the Baryon I booster - a flap held together
by a wire attached to the sustainer. During
staging this wire releases the parachute.
There are a few extra loops of the main line
wrapped around the parachute so that the
booster has a chance to slow down a little
before the parachute fully opens.
Launch Day Events
It was fairly calm when we arrived
at the launch site, but the weather
forecasts predicted a strong breeze for
the day. We quickly set up the launch
site in order to get the first launch in
of the 2 stage rocket. From previous
experience we knew that 2 stage flights
are best performed in calm conditions.
By the time we were ready to launch the
breeze had picked up a bit, and so we
angled the rocket into the wind.
We pressurised the rocket to 120psi
and launched. The rocket weather-cocked
into the breeze and by the time the
second stage released it was angled by
perhaps 20 degrees from the vertical.
Staging occurred right on cue with good
parachute deployment on both the
sustainer and booster. Due to the arced
flight, only 381 feet (116m) was achieved which
was significantly lower than expected.
We'll try this combination again in calm
conditions.
I thought I heard a small leak somewhere
from the rocket during pressurisation
but I am not sure where it came from or
whether it was from the launcher. We
will need to investigate to make sure
everything is okay for the next
launch.
Next off the launch pad was a
repaired
Tachyon IVb after the lower bottle
failed last month. We played it safe and
only filled it to 160psi. We wanted to
get at least one flight in before trying
higher pressures. This rocket was also
fitted with a baffle over the Robinson
coupling to prevent the blow-through
effect which is usually more evident with higher pressures. The
rocket took of visibly faster and had a
nice straight flight. For these first
test flights we didn't fit it with an
altimeter or camera in case of failures.
Due to the high wind conditions we
skipped over flying the long Axion
rocket and flew the trusty old J4. The
rocket also arced over soon after
liftoff due to the wind and flew a long
way down range. It landed just in front
of some trees, with the parachute
hanging 30cm from the ground on the
lowest branch. ... a close shave.
In light of the conditions we
decided to fly the smaller Tachyon IVb
rocket at 170psi, but as we approached
140psi a leak developed at the nozzle
cap and water started draining. We had a
video camera set up on a tripod close to
the rocket so we were able to see
exactly how much water was lost ~150mL , and
where the leak had occurred. Since we
were at 140psi, we decided to launch as
that was enough pressure for a good
flight.
The rocket had a nice flight again
although a post landing inspection
showed that the Gardena nozzle o-ring
had come out of its groove and was
threaded further up the nozzle! We
suspect that the gap between the nozzle
and launcher is perhaps just a fraction
too big and with the higher pressures
the o-ring could have been squeezed in
there more than it should. During launch
the pressurised water flowing past would
have finished pushing it up. The leak
was likely due to an improperly seated
washer in the nozzle. We have seen this
on a number of occasions and the remedy
is to take off the nozzle and put it
back on again.
The rocket seems to fly well with the
baffle, but it will be a while before we
can evaluate what sort of a performance
hit/gain it has.
There were some great pyro rockets
flown on the day by other members of
NSWRA.
(If the video does not play, try the latest
Flash player from Macromedia)
A day that you can walk away from without
damage done to rockets is a good day.
Variable
Nozzle
Over the past month we have been working
on a way to remove residual foam from inside
the rocket as it flies. On a
previous occasion we
found that a significant amount of foam can
remain inside the rocket which ends up being
dead weight, reducing the peak altitude.
Tim Chen had recently discussed the concept
of a variable nozzle for water rockets,
although his concept was quite different to
that below, it lead us to adapt the de
foaming design to the variable nozzle shown
below.
The original de foaming concept consisted of
a rubber membrane with a small hole in it in
the highest upper bottle. A larger plastic
ball would sit over this membrane and act as
a one way valve. Upon launch it would seal
against the membrane and as the pressure
continued to drop in the lower bottles the
ball would start getting forced through the
membrane until there was enough pressure
difference to cause the ball to drop through
the membrane causing a blast of air from the
upper bottle to help force the foam out of
the lower bottle while providing further
thrust. The ball would be caught in a small
cage under the membrane.
A rocket typically
needs to have a large diameter nozzle on
lift off to provide enough thrust to get up
to speed, but once stable flight is
achieved, a smaller nozzle can be used to
sustain the thrust for longer.
The
variable nozzle simply consists of a rubber
membrane with a small hole in it. As air and
water are forced out through this hole, the
more pressure you have the membrane
stretches and the bigger the hole gets. This
means that on launch with high pressure the
hole becomes very big and as the pressure
drops the hole gets smaller automatically.
The rubber membrane adds less than 1 gram
to the rocket and works with existing
Gardena nozzles. The membrane is simply
pinched between the nozzle and the bottle.
The rubber membrane was made from a swimming
cap, but rubber kitchen gloves, or bicycle
inner tube could be used as well. We are yet
to test fly it, but ground tests so far have
looked good. We are going to have to
experiment with different hole sizes and
rubber stiffness in order to see what the
best combination is.
Update: The static test stand
experiments have now been carried out. See
Day 75 for details.
The elasticity of the
material controls the relationship between
pressure and nozzle size.
It should also be
possible to use a launch tube with this
design.
Here is a video of how the nozzle
works. The Gardena nozzle has been removed
so that it is easy to see what the membrane
is doing. In the video the bottle is filled
with water with the nozzle at one end and an
air inlet at the other. We tilt the bottle
back and forth to either let only air flow
or water flow for the demonstration. And no
the green fingernail polish is not mine. :)
(If the video does not play, try the latest
Flash player
)
We'll publish the two techniques we are
currently exploring for clearing the foam
from the rocket in upcoming updates.
Good takeoff,
although rocket started pitching
over into the wind, and flew in a
long arc. Both parachutes opened
when they were supposed to and both
booster and sustainer made a good
landing.