Each flight log entry usually
represents a launch or test day, and describes the
events that took place.
Click on an image to view a larger image, and
click the
browser's BACK button to return back to the
page.
Day 82 - Investigating in flight water behaviour - Part #2
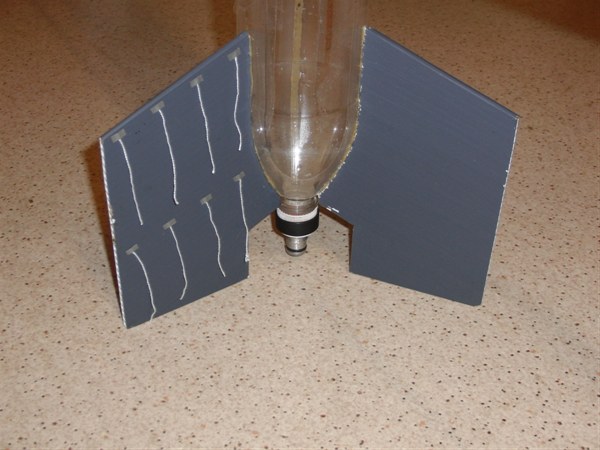
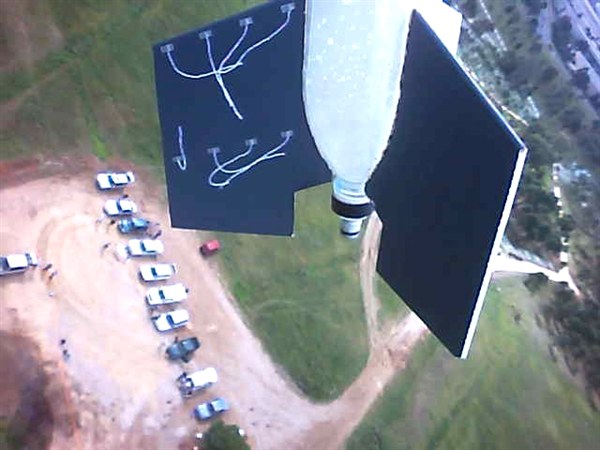
The fins have been painted a neutral gray to
assist with the camera's auto-iris. A set of
tell-tails have been attached to the fin to
observe airflow near the bottom of the rocket.
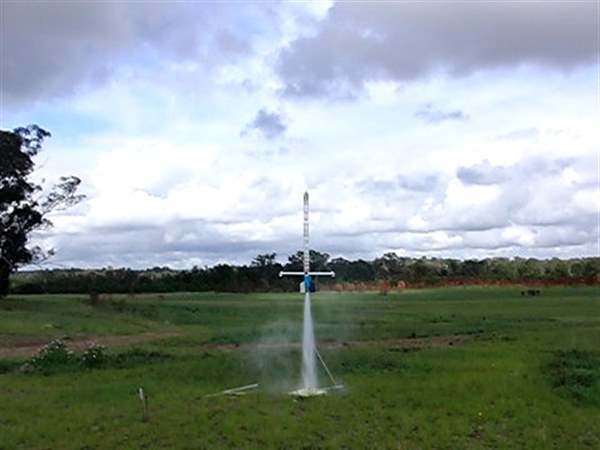
Launch #1 @ 130psi.
Parachute tangled and the rocket crashed
heavily buckling the top two bottles.
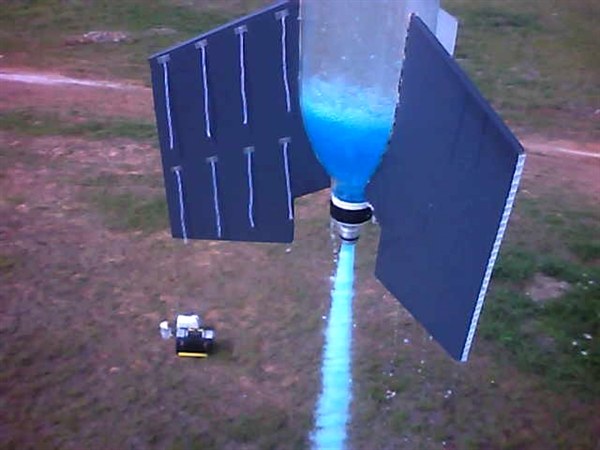
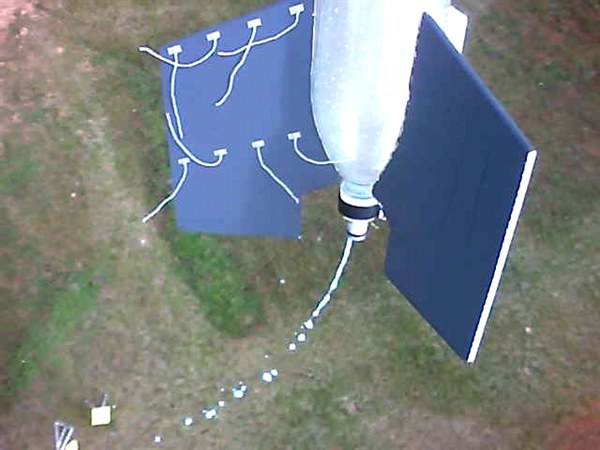
Water running out during the boost phase.
At the start of the air-pulse, water is
pushed up the sides of the bottle. Seen near the
top of the frame.
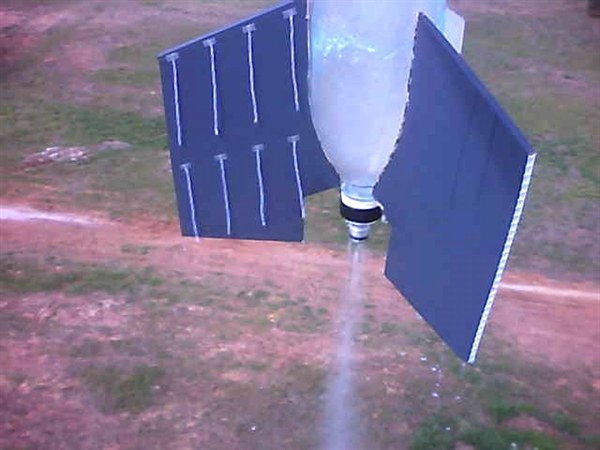
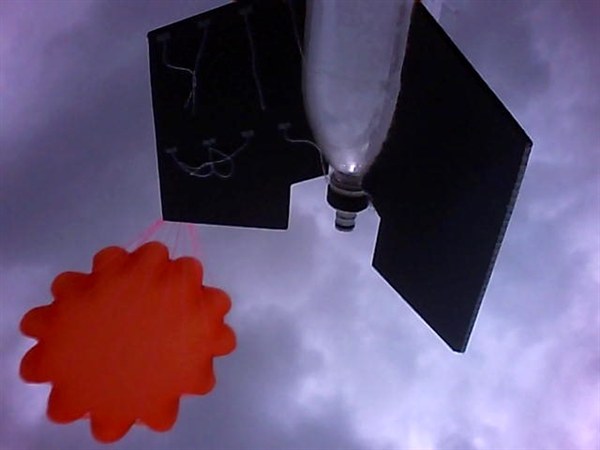
Starting to fall backwards, and looking out
over the NSWRA launch area.
Left over water draining out of the rocket
on the way down.
Last flight of the day.
Sikaflex 11FC is used to seal the splice.
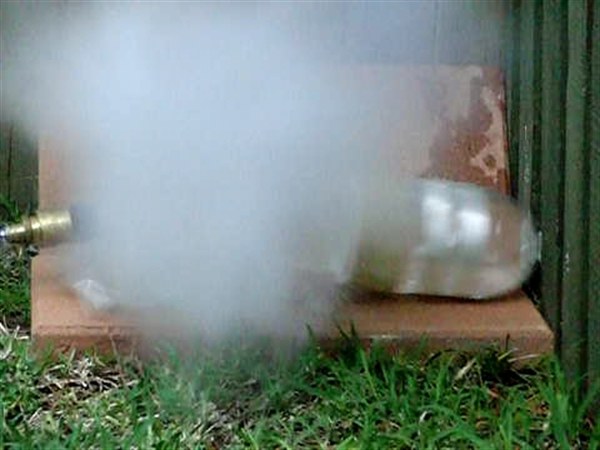
@190psi, the bottles are severely distorted.
You can see where the strapping tape broke.
Shock wave from the explosion creates a very
brief vapour cloud.
Shortly followed by the water from the
bottle.
The neighbours don't bother asking anymore
about the booms.
You can see some of the Sikaflex still
adhering to the edge of the bottle. This did not
happen with the epoxy glue.
The splice remained intact. The bottle
ripped itself quite cleanly at the sleeve edge.
Date:31st
October 2009(8am - 1:00 pm)
Location:Doonside, NSW, Australia
Conditions:Warm 23C.Light winds,
overcast
Team Members at Event:GK and John K.
This week we revisited the experiment
carried out on Day 80
while looking back at the bottom part of the
rocket during flight. We changed a couple of
things in the experiment to make it easier
to see what happens in the lowest bottle
during flight:
We painted the fins a neutral grey
to help prevent the camera seeing too
much white making everything else dark.
We only used coloured water this
time instead of foam to help provide a
better contrast.
Since one of the fins was going to take
up quite a bit of the video frame, we
decided to attach a set of 8 tell-tails (in
two rows) to see what the airflow is like
around the bottom bottle. We weren't looking
for any particular result with these, it was
more or less out of curiosity.
Flight day report
We arrived at the launch site about
8am. Setup was fairly quick and straight
forward with no issues.
The rocket was pressurised to 130
psi and launched. The flight was
straight and stable. The parachute
deployed around apogee, but it was
quickly obvious that the parachute
didn't want to play ball. The parachute
became tangled and acted more like a
streamer than a parachute. With such a
heavy nose, the rocket impacted quite
hard into the ground.
The slow motion video showed how much
the boom arms bent during the crash, but
sprung back again without problems.
The nosecone was only slightly damaged,
and the top two bottles on the rocket
buckled. All important components
survived well without problems.
The video from on board the
rocket was also good.
I always bring along spare nosecones
and bottles, so it literally took 5
minutes to unscrew the buckled bottles
from the rocket, and screw in the new
ones. I also configured the new
nosecone's flight computer to the
correct flight profile settings, and the
rocket was ready to go again. It's great
having this modular capability in the
rockets for events such as this. The
only difference was that the new
nosecone did not have the extra ballast,
so I extended the parachute deploy delay
a little.
The second flight was similar to the
first, but this time the parachute
opened well and the rocket landed
without incident. Good video of the lowest bottle
was obtained.
The third flight was again launched
at 130 psi as the previous one, and good
onboard video was acquired again. The
parachute opened a little late than we
would have liked.
We only flew the three flights on the
day, as we spent a bit of time video taping pyro rockets on the day.
What we learned
Both of the experiment improvements
worked well, and the detail of the water was
a lot clearer than the last time around.
It was quite obvious from the footage
that even under acceleration the water still
gets pushed up the sides of the bottle
during the air pulse. Some of the water can
be seen draining from the rocket while under
parachute.
The retained water may only translate to
a couple of percent reduced performance, but
it is something to consider when designing high
performance rockets with Robinson couplings.
People optimize the weight of their recovery
systems and 20mL of water saved is 20 grams
of payload.
The tell-tails showed the airflow quite
well along the fins, although I had expected
to see the ones closest to the rocket
show more of a curvature as the air comes
back together near the bottom of the rocket.
It was also interesting to see exactly
when the rocket actually started falling
backwards after apogee as the tell-tails
could be seen lifting. Something that is
normally difficult to judge from onboard video of
the ground, since the closest reference is
at least a couple of hundred feet away.
Splice Experiments ... continued
Since starting the splice testing a
couple weeks ago,
we've tried the Epoxy and PL splice as well
as the Sikaflex and PL splice. Both used the
#5 splice arrangement.
Epoxy
After letting the epoxy splice sit for a
week we pressurised the spliced-pair and at
around 120 psi a small leak developed. We
kept increasing the pressure until the
splice failed at ~150psi.
It was the PET bottle that failed rather
than the splice. It tore itself fairly cleanly from around the edge of the
sleeve. The epoxy glue though separated
cleanly from the bottle that flew off. This
means that the epoxy did not do as good a
job of holding onto the PET, even though the
1cm x 1cm tests showed promising results.
The reinforcing shells worked well and
the bottles did not show any signs of stress
in the neck area.
Sikaflex 11FC
When both the Sikaflex and PL cured we
pressure tested the spliced-pair again to
destruction. This time the results were a
lot more promising. The splice remained
sealed during the entire test.
The final burst pressure was 190 psi
(13 bar). In the slow motion video you can see
the reason for the failure. The glass
strapping tape broke over one of the splits
in the reinforcing jacket, which resulted in
the jacket no longer reinforcing the bottle,
and the bottle exploded. Normally these
bottles burst around 165psi. It tore itself away
from the other bottle in a similar manner as
the Epoxy test, but this time you could see
traces of glue on both bottles which
suggests the Sikaflex was holding well to
the PET all
the way to the end.
The region around the edge of the splice
undergoes quite a bit of stretching, which
appears to have helped the epoxy fail, but
the Sikaflex being so flexible continued
to seal despite the stretching.
The bottle has a cross-sectional area of
9503 mm squared (14.73 square inches)
which means that at 190 psi the
splice was holding the equivalent of
1,269 kg (2798 pounds) stopping the two
bottles from flying away from each other.
That's the equivalent of hanging a small
family car from the end of the splice!
A little bit of air entered the splice
because all the water ran out in the air
hose so when the bottle let go there was
quite a loud boom. Luckily the neighbours
now know that this sort of thing happens
on the other side of their fence from time
to time and don't bother asking about
it anymore.
Before the test I attached a skewer stick
to the end of a piece of blue-tack and stuck
it on the bottle right next to the sleeve.
This was intended to help show the bottle
expanding more outside the sleeve than close
to the sleeve. In the end it was difficult
to tell if there had been significant
distortion because there was a wrap of glass
tape right next to the sleeve. You can see
the distortion more clearly on the other
side because the reinforcing tape is further
from the sleeve.
Next we will be making up a number of
these spliced pairs and test them to 10%
over the intended pressure and build a
rocket out of them.
Good vertical
flight, parachute deployed after
apogee but tangled and did not open
properly. Nosecone damaged, and the
top two bottles were damaged. All
electronics survived, and good video
was obtained.
Good vertical
flight. Parachute opened late, but
rocket landed well. The nosecone was
replaced for this flight and did not
have the additional ballast. Good
video was obtained.