Each flight log entry usually
represents a launch or test day, and describes the
events that took place.
Click on an image to view a larger image, and
click the
browser's BACK button to return back to the
page.
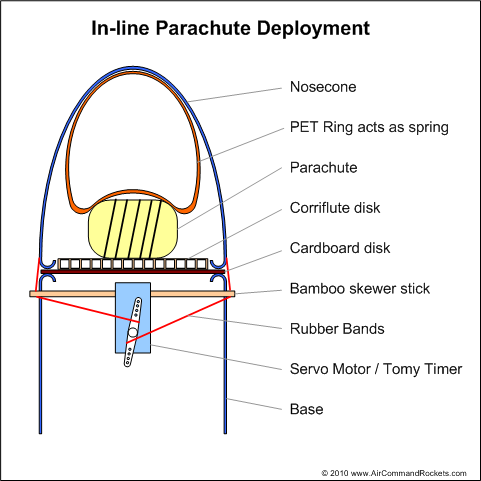
Day 86 - In-line Parachute Deployment Mechanism
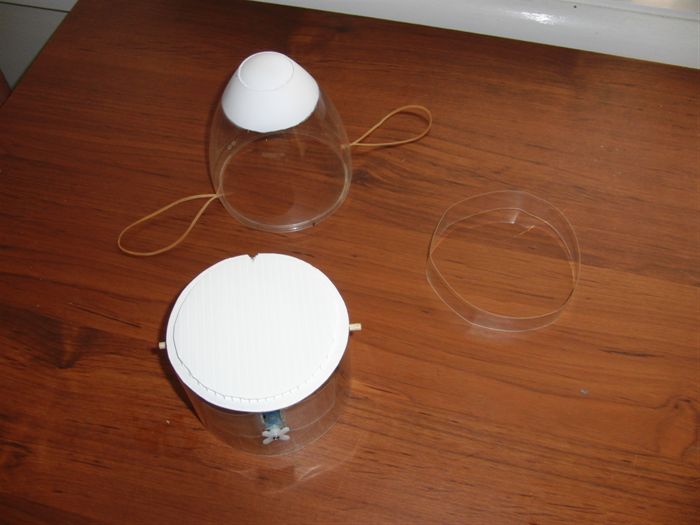
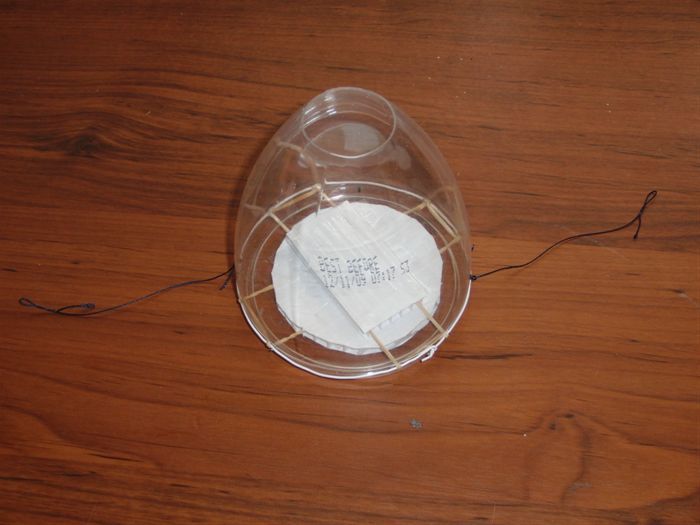
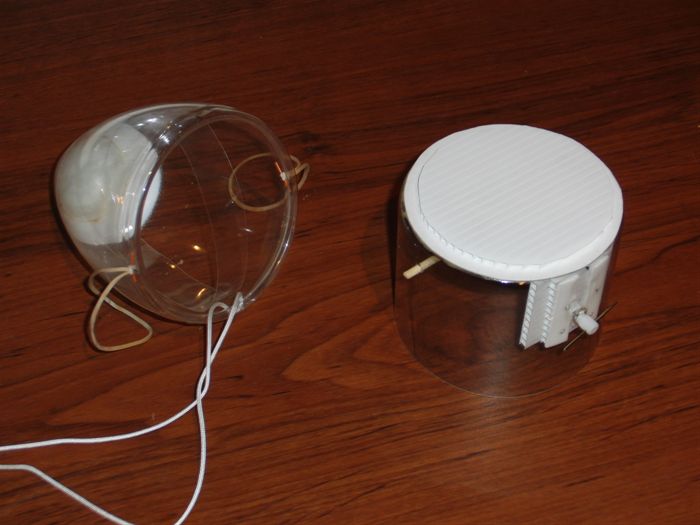
Components of the in-line deployment
mechanism. Nosecone, base and PET ring.
Bottom view of the base. Skewer stick
provides attach points for nosecone.
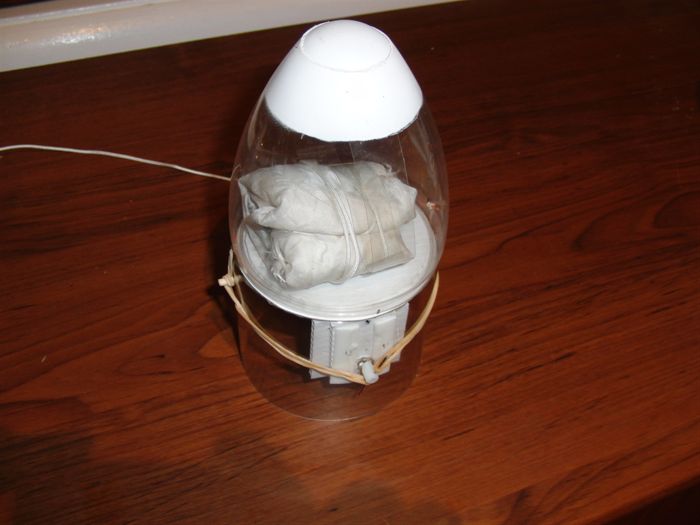
The parachute is placed on top of the base.
The nosecone and PET ring are pressed down
over the parachute and secured by rubber bands
to the servo.
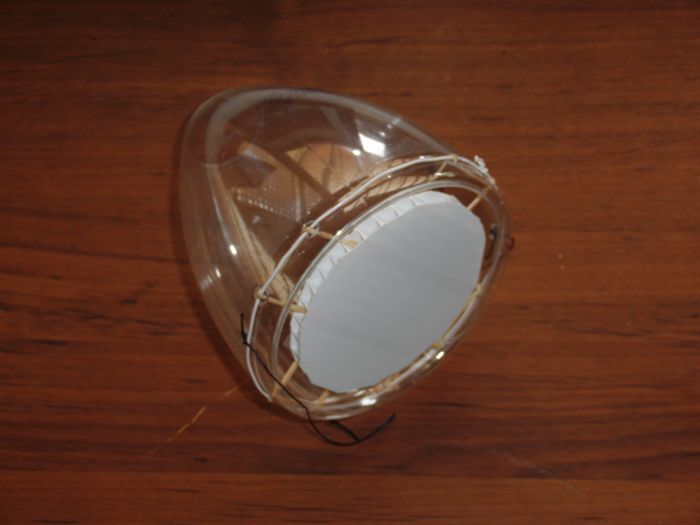
Side view. The PET ring prevents the
parachute from moving around.
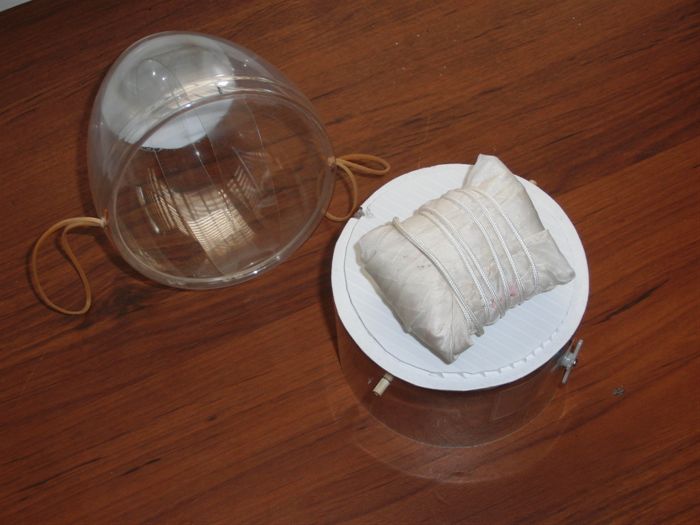
An early nosecone prototype using rubber
bands and ejection plate.
Top view of the same prototype.
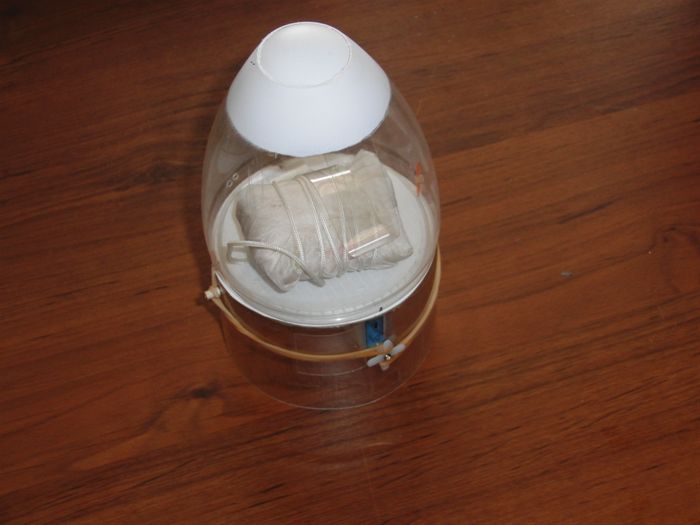
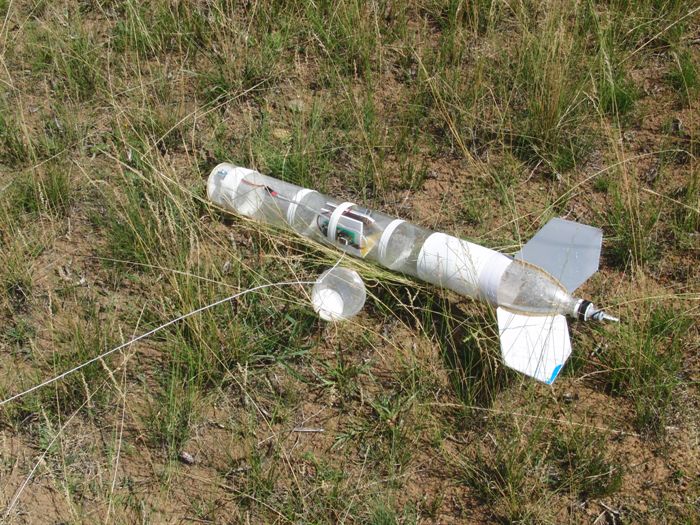
In-line deployment mechanism ready for its
first flight.
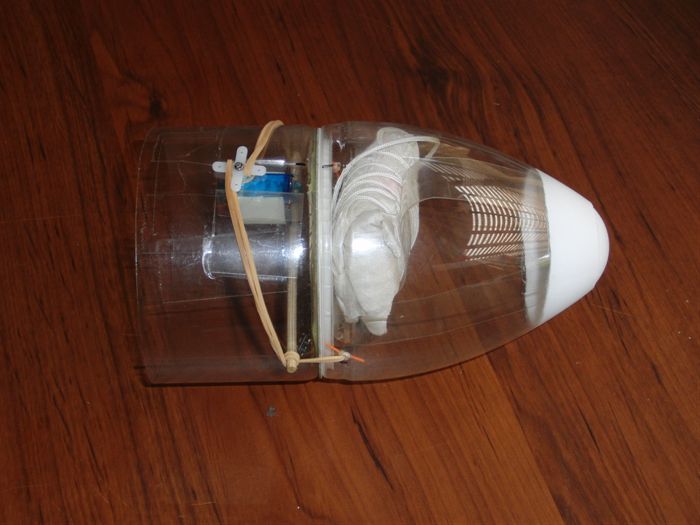
Launched at 130psi
The nosecone is attached to the main
parachute line to prevent it being lost.
A Tomy timer version of the same mechanism.
The rubber bands simply wind up around the
Tomy timer spindle
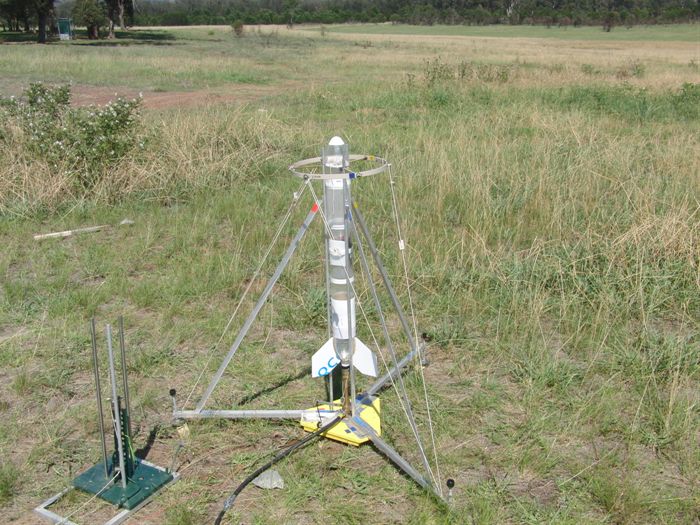
Polaron VIIIx on the pad for the first
launch of the day.
The recovery crew is quickly on the scene.
Launch #2. DV camera decides to munch the DV
tape.
Prepping the igniter for Paul's 2-stage pyro
rocket.
Connecting it to the launch controller.
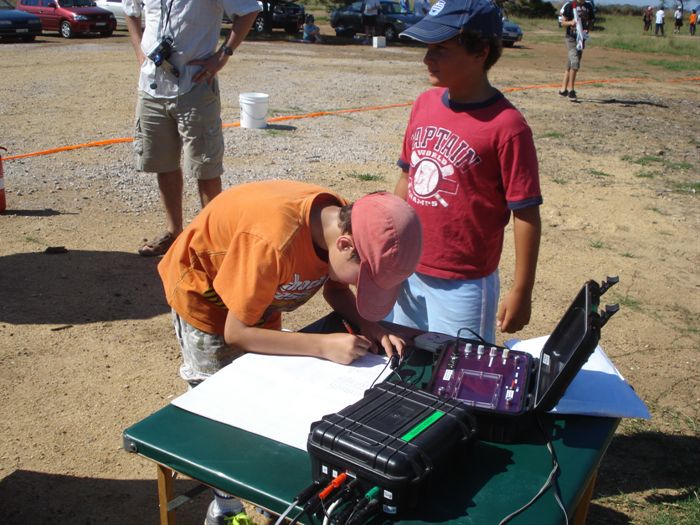
Launch paperwork is always important.
Booster is flying on a C6-0
(Photo:Andrew
Eltobaji)
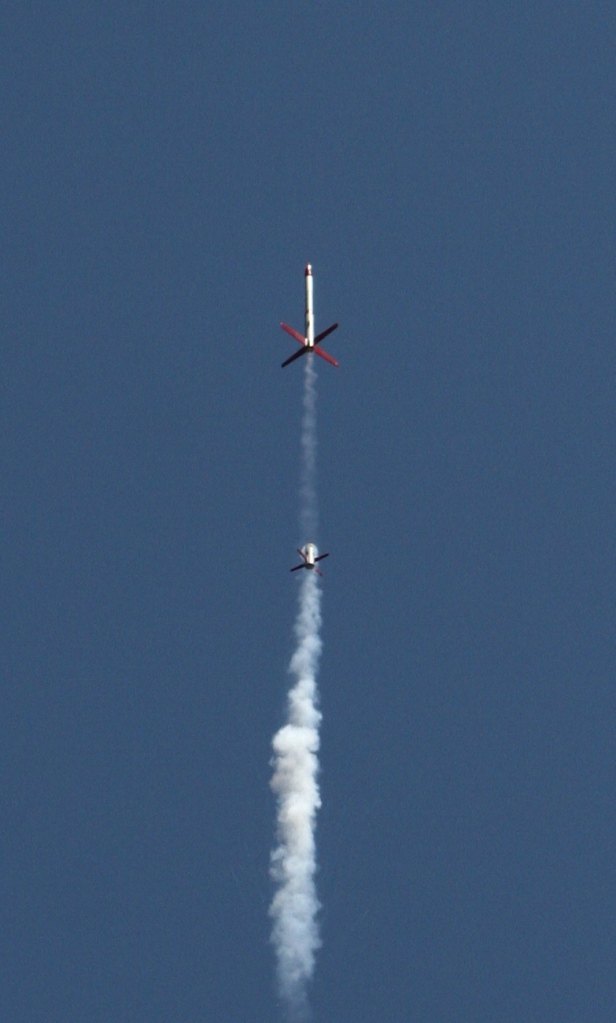
Just after staging.
(Photo:Andrew
Eltobaji)
Date:10th
January 2010
Location:Doonside, NSW, Australia
Conditions:Hot (35C) with clear skies and
light breeze. 5km/h early increasing to
~20km/h later.
Team Members at Event:PK, GK,
Paul K, John K and Jordan K.
The last couple of weeks we have been
working on a new lighter and smaller in-line
parachute deployment mechanism. It is partly
based on Daan and Pleun's design
here.
The main design criteria were:
simple construction, minimal components
and lightweight. The side deployment
mechanism we use on our 90mm diameter
rockets weighs about 135 grams including
flight computer, servo and 9V battery.
The new parachute deployment mechanism
will use the smaller V1.7 flight computer,
with a 3.7g servo and a small 6V battery.
All up it should be around 60 grams.
Nosecone
The nosecone is made from the tapered
section of a bottle with the neck cut off.
Half a ping-pong ball is glued inside the
hole left by the neck. The bottom edge of
the nosecone is curled on a hot frying pan
to strengthen it.
The first nosecone we made had 2 rubber
bands and a corriflute pusher plate. It was
a little more complicated than we liked
though. There are a couple of problems with
using rubber bands for this application. a)
They eventually perish if they remain
stretched. b) They exert a greater force the more
you stretch them. This means it is harder to
keep the nosecone attached as they press
against the parachute.
So we replaced the rubber bands and
pusher plate with a simple PET ring. It is
trivial to make, does not
perish and the way it is folded works
a little like a
compound bow, in that it needs little
force to hold it in place, but once released
it provides enough force to eject the
nosecone and parachute.
Base
The base is made out of a straight
section of bottle with one end curled. On
top of the curled section is a piece of
cardboard (it could be corriflute) that
helps hold the base's shape and provide
support for the nosecone. To stop the
nosecone moving around laterally a smaller
circle of corriflute is glued on top of the
cardboard. This is made to fit exactly into
the rounded edge of the nosecone. This
design prevents the nosecone from moving
sideways but once released it provides an
unobstructed platform for the parachute to
slide off. There is nothing for the
parachute to catch on.
A bamboo skewer stick is pushed
horizontally through the base and is used as
the attachment pins for holding down the
nosecone. Two rubber bands are attached on
opposing sides of the nosecone. These rubber
bands are only stretched when the nosecone
is attached to the rocket. When not in use
they remain un-stretched and so don't
perish.
Setup
You simply place the parachute on the
base and press it down with the
PET ring in the nosecone. The PET ring keeps it
held down
so it does not move. It is possible to use a
wider ring or
two rings arranged in a cross form for more
force, or smaller rings from narrower
bottles for less force. This might be useful
when using a larger parachute. The PET ring
is simply taped inside the pointy end of the
nosecone to prevent it falling out.
The rubber bands are then wound once
around the end of the skewer stick which
makes sure the nose cone is securely held
down and the end of the rubber band is
hooked on to the servo horn arm.
Depending on the design the parachute can
either be connected to the side of the
rocket, or to the top of the rocket.
If the parachute is attached to the side
of the rocket then a small channel needs to
be filed in the base to let the parachute
cord go through. This allows the nosecone to
sit flat on the base.
Alternatively if the rocket body has a
neck at the top you can make a hole in the
middle of the base and thread the parachute
cord through and attach it around the neck.
You would most likely want to use a shock
cord to prevent damage to the base when the
parachute opens. The nosecone itself is
attached on the main parachute line to
prevent it being lost during separation.
Tomy Timer version
We have also made a Tomy timer version of this
deployment mechanism. Without the parachute the entire
nosecone section that includes the
deployment mechanism weighs only 35 grams!
(See pictures at left) we have not flown the Tomy timer version yet, but will do on the
next opportunity.
Test Setup
For these first flight tests we placed
all the electronics in the gap between the
bottles to increase the chances of survival
in case of a crash. We used the
3.7g servo as will be used in the final
implementation of the mechanism. The one
nice thing about setting up the servo this
way means that the servo isn't really under
any load as all it has to do is rotate in
the direction of the pull of the rubber
bands. This means the servo will not need to
draw a lot of current and a small battery
can be used.
Eventually all the electronics and
battery will be placed in the base.
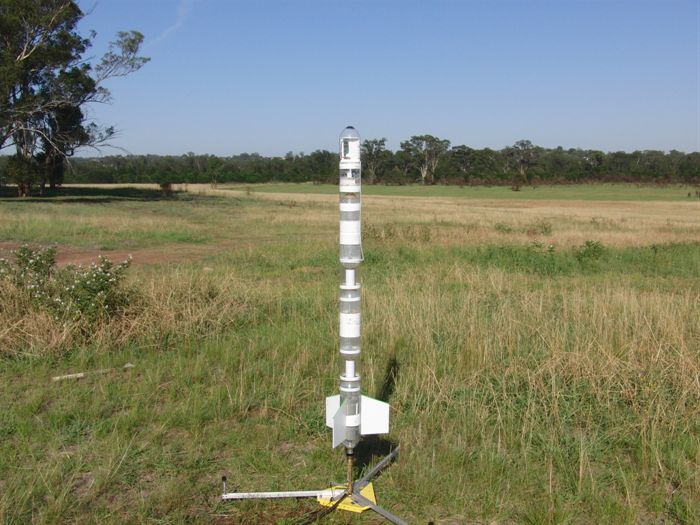
The mechanism was tested on
the
Tachyon VII rocket. At 3.35L capacity it
was launched with 1L of water, 9mm nozzle
and 130psi launch pressure.
Flight Day Report
This flight day report covers both the
Day85 and Day86 updates.
We arrived at 8 am at the launch
site as usual and set up the 15mm launch pad.
We knew it was going to be a hot day and
so we wanted to get the mercury
experiments off the ground early.
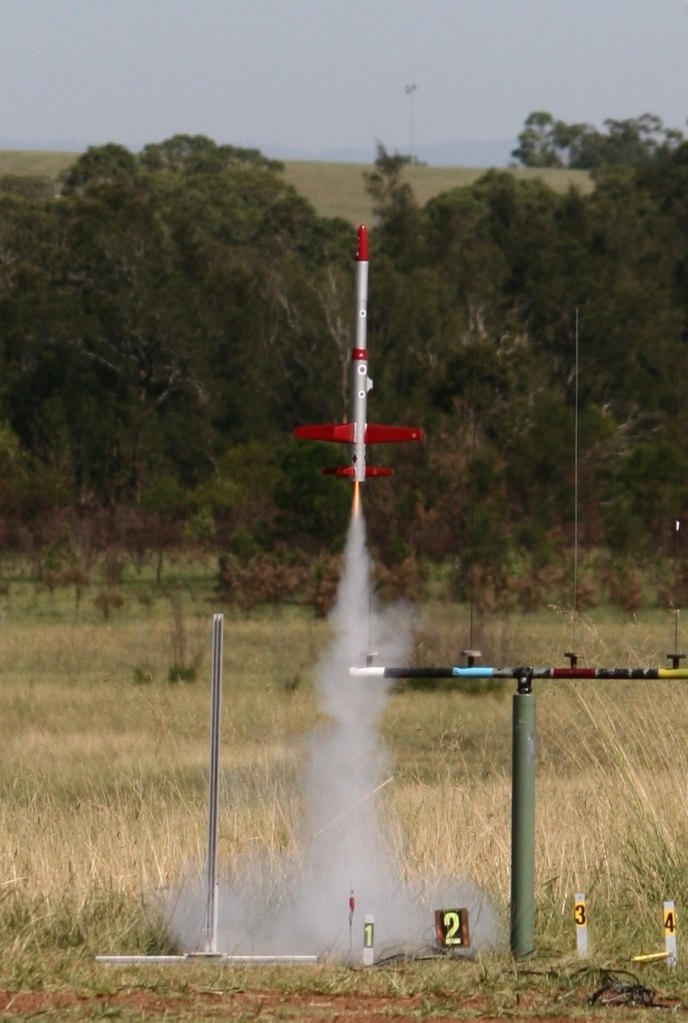
We launched the
Polaron VIIIx rocket
at 110psi 2 times within 30 minutes.
Because the rocket is made up of the
spliced pairs from the exploded
Acceleron V rocket, we did not want to
push them to their limits. 110psi was
enough for the experiment.
Both flights went well with good
landings and without damage. (see
Day 85 for
experiment details)
While I was filming launch number 2
the DV camera stopped and said that I
needed to take the tape out because it
was jammed. Great, at 130psi you just
don't put everything on hold. I quickly
switched the high-speed camera to HD
video as I needed to get the flight in
real time for the experiment. It all
turned out well, but I don't have
high-speed of the second flight. I took
the tape out and wound it back into the
cassette and replaced it with a spare.
No more troubles after that.
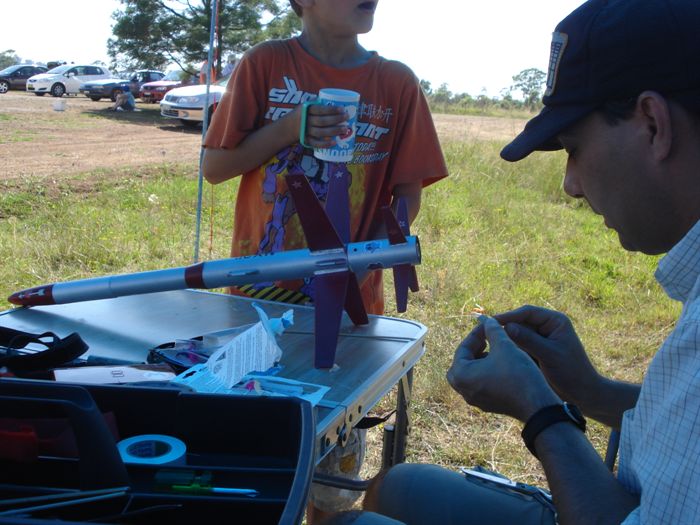
We put the rocket aside and prepped
Paul's Pod 2 pyro rocket for it's first
flight of the day. We flew it first as a single
stage on a C6-5 motor to get one good
flight in before attempting the
two-stage flight again. The flight went well
again with good landing.
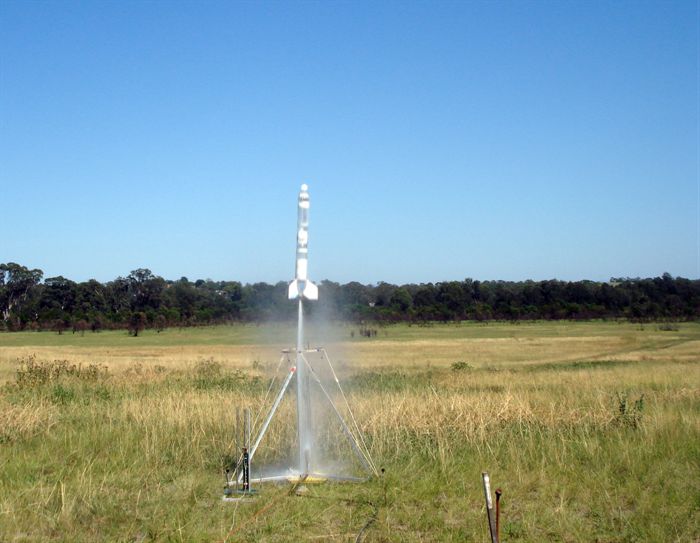
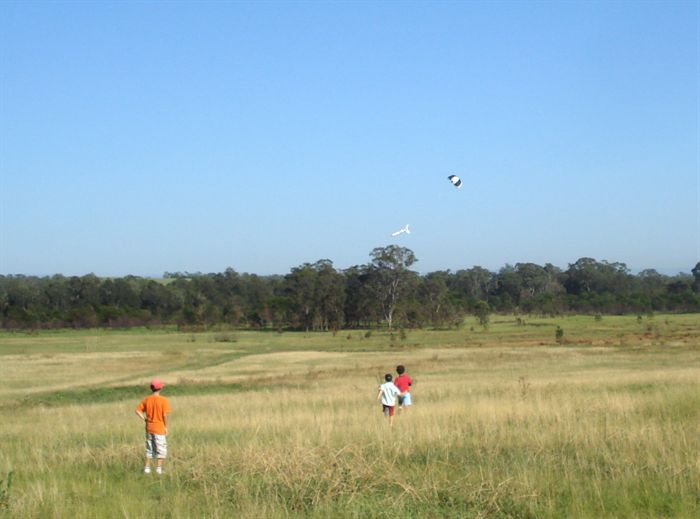
Next was the test flight of the new
in-line
deployment mechanism. The rocket flew
well although the parachute deployed
later than was expected at 6.7 seconds
after launch. The deploy delay was set
to 4.6 seconds. I am not sure
why the chute opened that late as the rocket
flew close to the sun it is hard to
see from the video. Whether the air pressure
on the nose was keeping it pinned down
or it just took longer to open, but the
parachute opened in plenty of time for a
safe landing. We launched the rocket
with a 9mm nozzle and at 130psi.
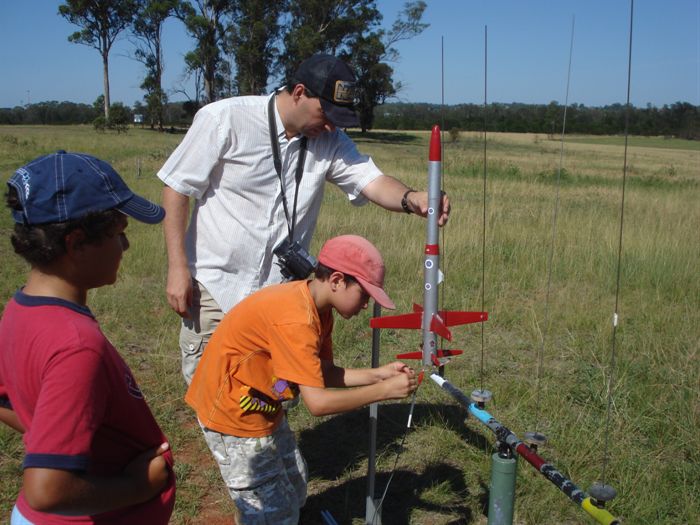
Next we set up the Pod-2 rocket for
a 2 stage flight.
Since the crash last launch day we made a couple of
changes to increase the chances of the
second stage igniting. We reduced the
motor gap to about 5mm from the previous
2cm and put some tape on the inter-stage coupler to
make it tighter. The flight went well
and this time the second stage
ignited. This was our first successful 2
stage pyro flight. The only damage was a
fin snapped on the booster on landing,
but a bit of epoxy will fix that up. The
booster used a C6-0 motor.
For the second test flight of the
in-line deployment mechanism I shortened
the deploy delay to 4.2 seconds to make it deploy
sooner. This time the parachute opened
sooner at 5.76s but still later than what I would
have wanted. .
Otherwise the results of the deployment
tests were successful. Next we'll need
to test it on larger rockets with bigger
parachutes and at higher altitudes to
see how well it works.