Each flight log entry usually
represents a launch or test day, and describes the
events that took place.
Click on an image to view a larger image, and
click the
browser's BACK button to return back to the
page.
Day 97 - Acceleron V to 864' (263m) and Polaron G2
progress
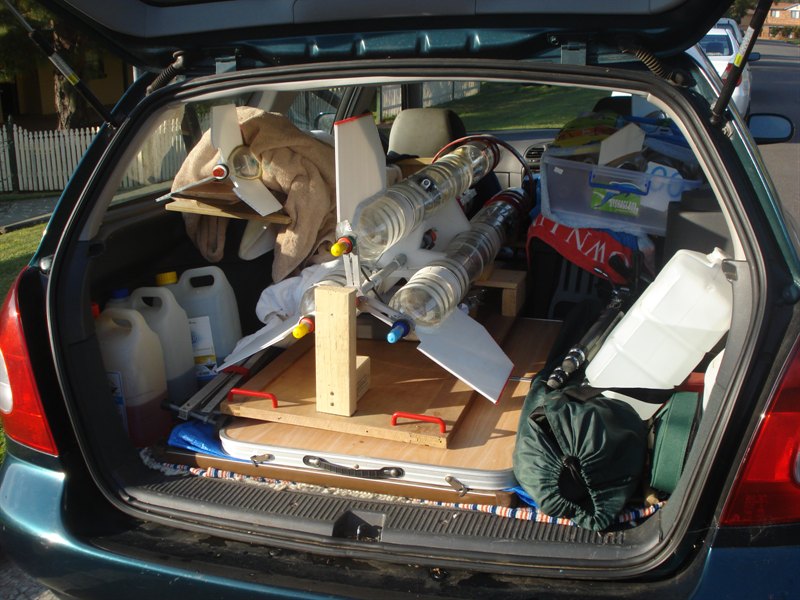
"Just taking some plastic bottles for
recycling officer"
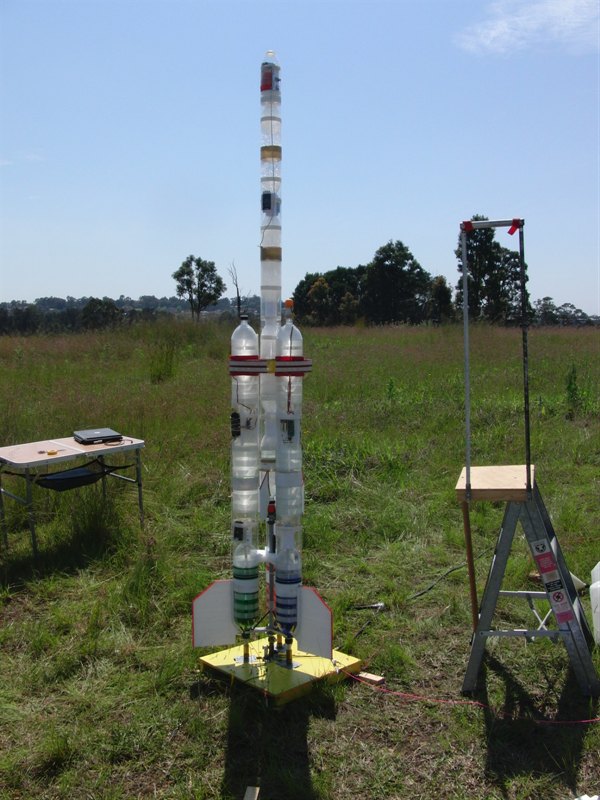
It takes about an hour to set up the launch
pad and rocket for the first flight.
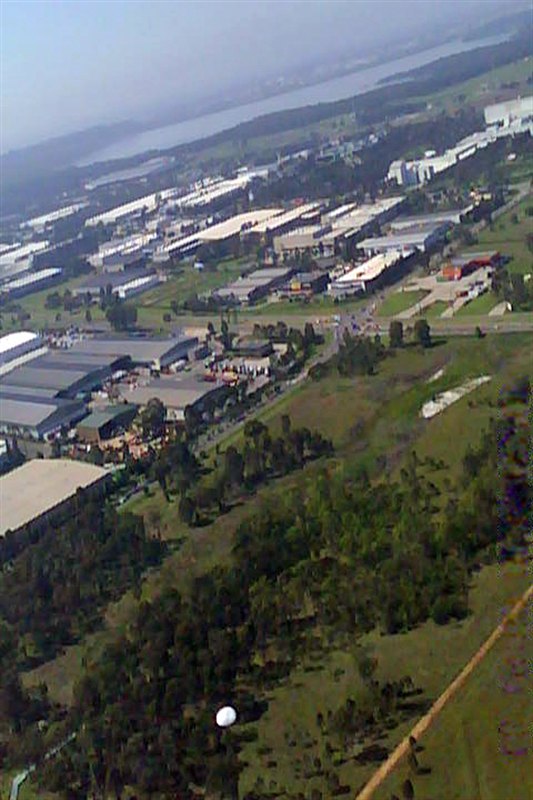
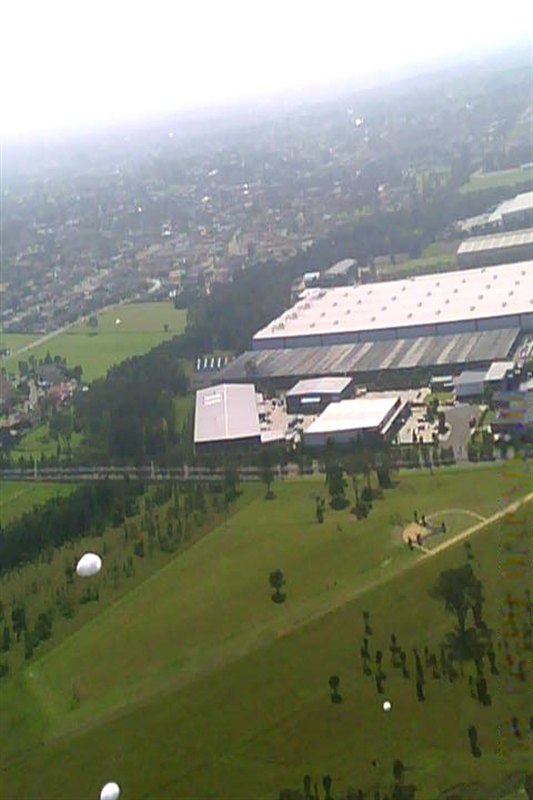
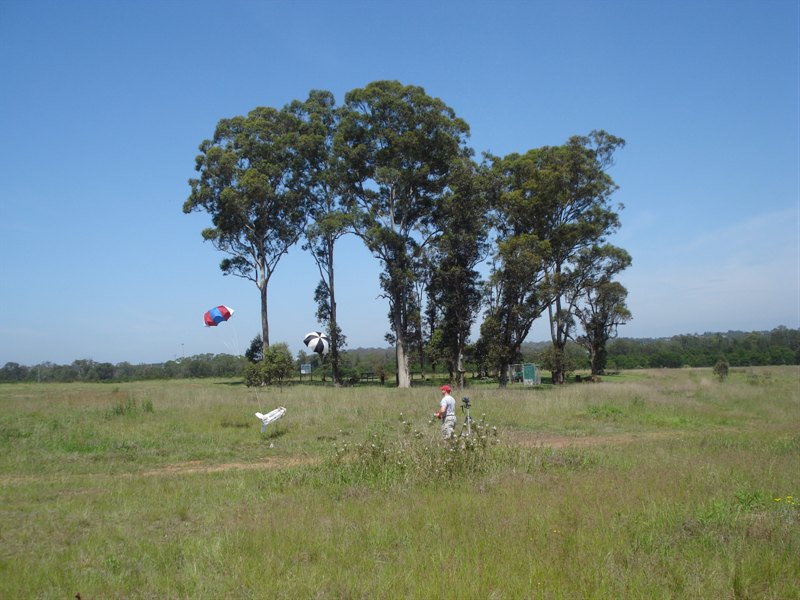
... they were shortly later joined by more
UFOs ...!!!
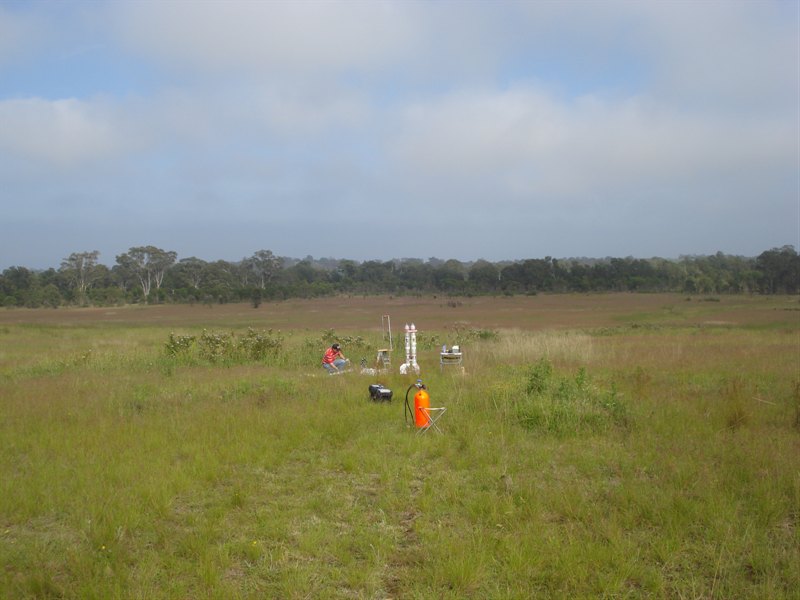
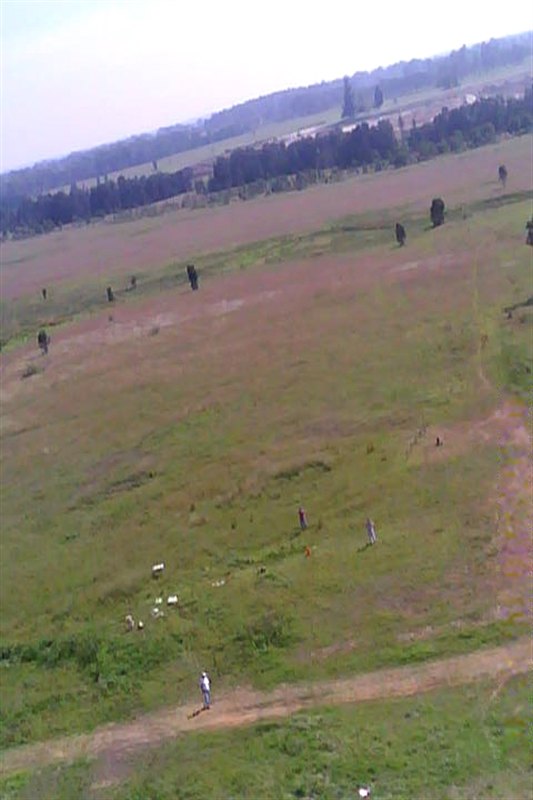
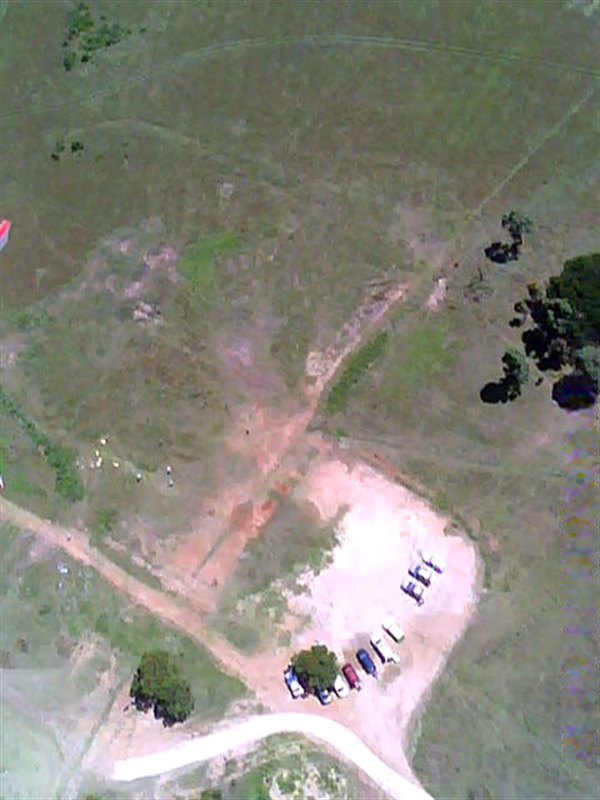
Coming in for a landing. The car park at the
Doonside launch area.
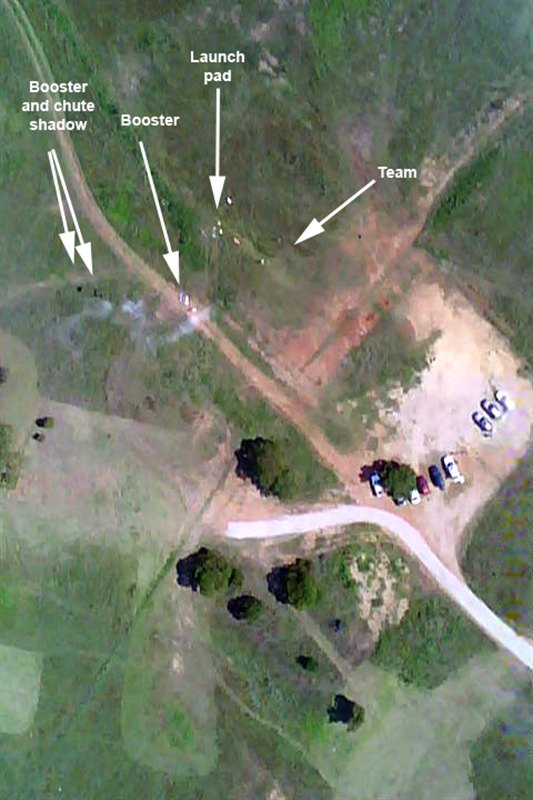
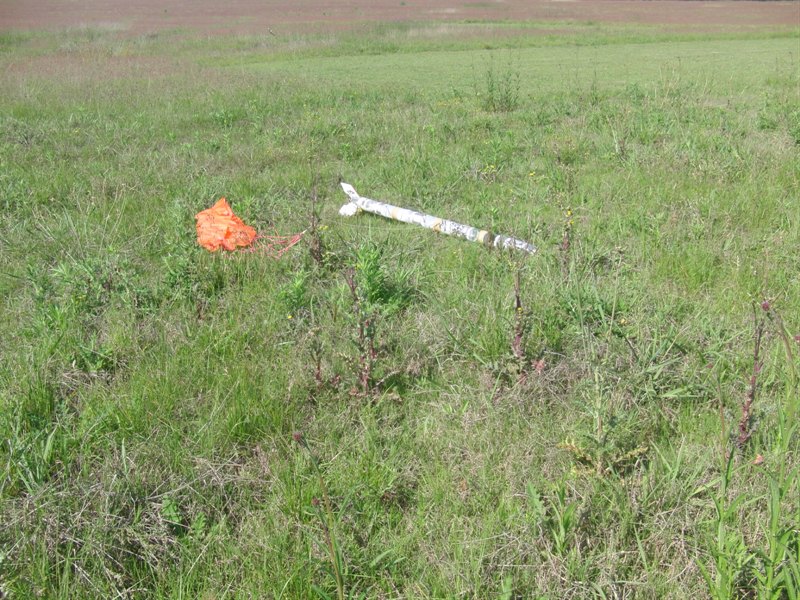
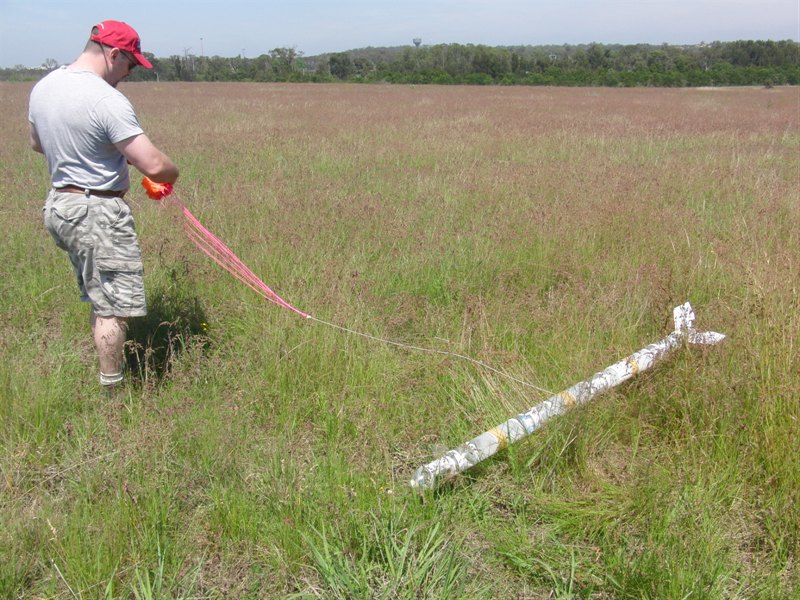
Launch team looking back at the rocket.
Tall grass makes for gentle landings.
The sustainer landed only a short distance
away.
Re-entry scorch marks were not evident in
post landing analysis.
Both main and backup parachutes opened right
on cue.
Booster landed well without any serious
damage.
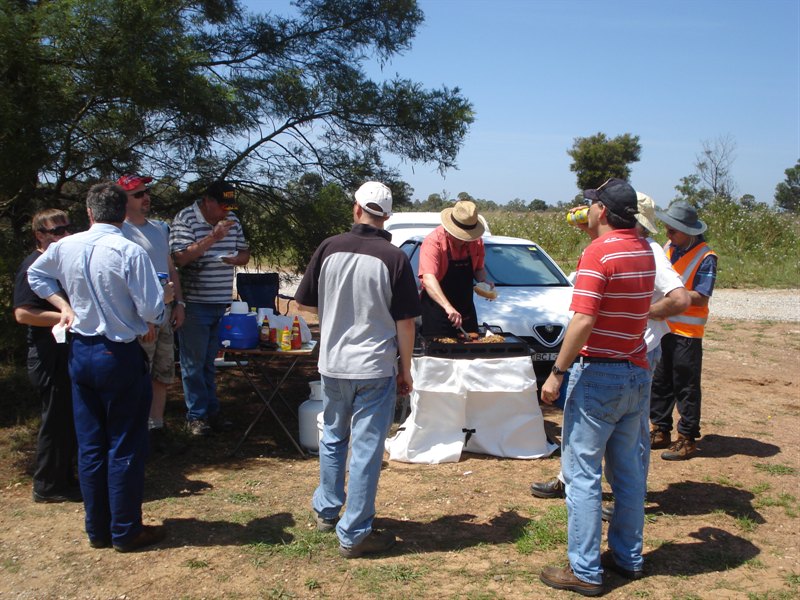
Break for a BBQ. ...mmmm ....sausages .....
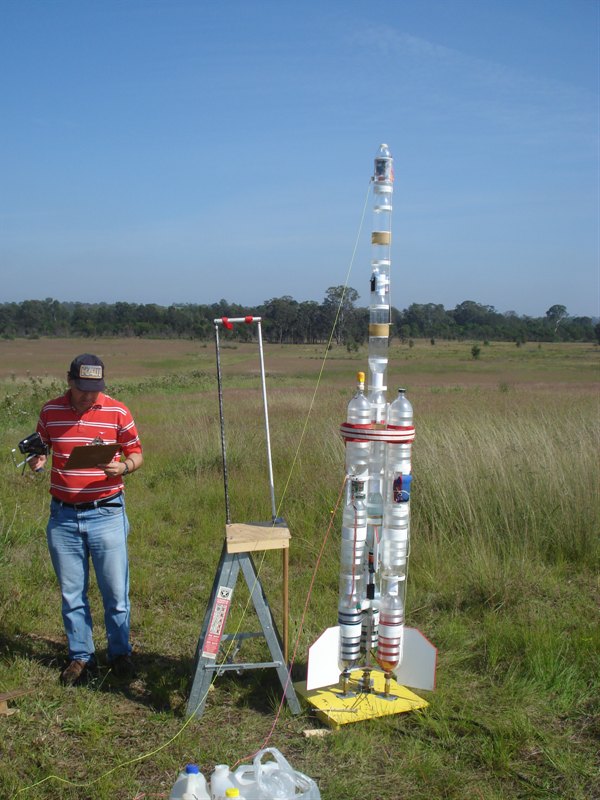
Ready for flight #2.
Just before touch down.
The clear skies let us see the rocket during
the entire flight.
Looking back down to the launch area.
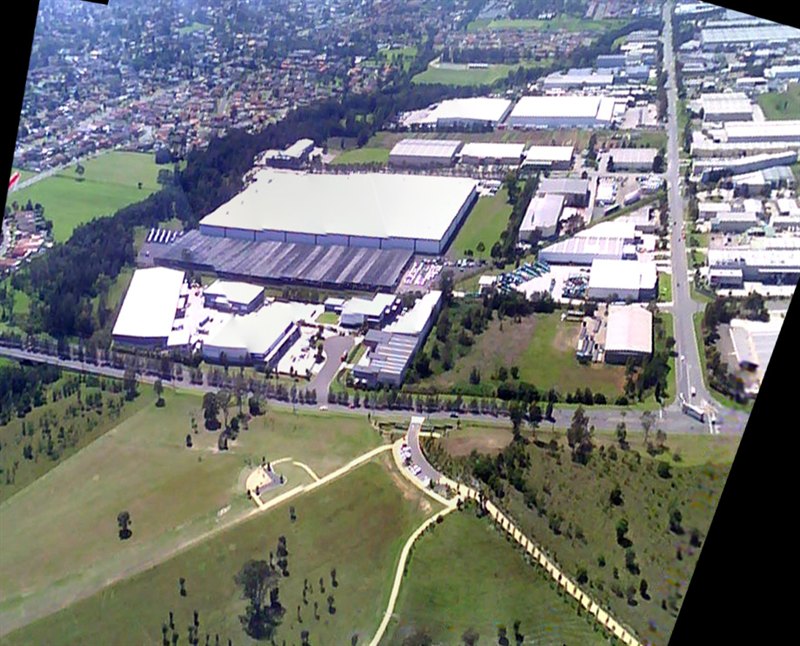
Panorama looking East of the launch are.
Looking South-East. Prospect reservoir
New housing development along Doonside road.
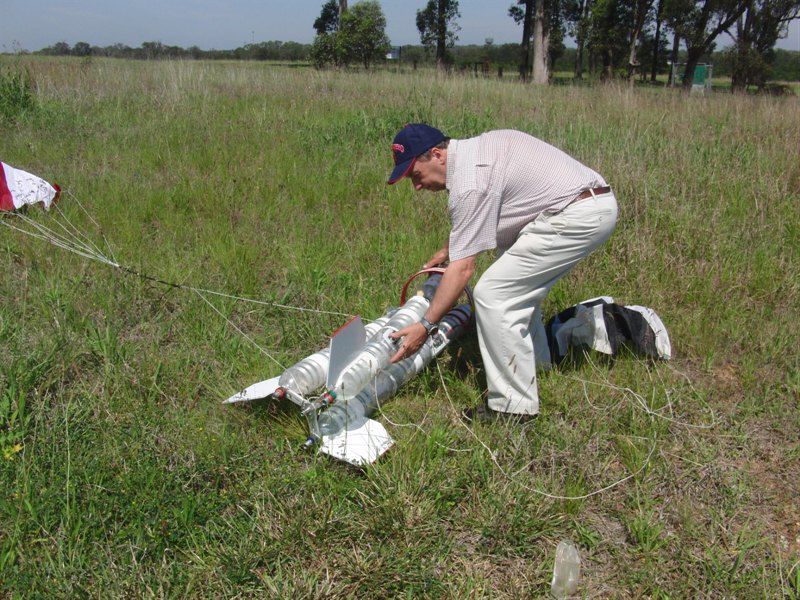
Twisted booster. The booster was not damaged
and was simply untwisted.
Sustainer landed around 150 meters away from
the pad.
Date:30th
October 2010
Location:Doonside, NSW, Australia
Conditions:Warm 29C, clear 5-10km/h wind.
Team Members at Event:PK and
GK
Launch Day Report
We wanted to fly the
Acceleron V booster again, since it was
repaired and we hadn't flown it for
quiet a while. The sustainer has had a
couple of modifications made to it, such
as remote arming, smaller fins, and the
top 1.25L bottle was replaced with a
2.1L spliced pair. As we arrived at the launch
site around 8:30 am, there was early fog
but that cleared by the time we had the
launcher ready. The weather was great
for launching though there was a slight
breeze in the direction of the rocket
eating trees.
We set up the rocket
on the launch pad, and went through
the checklist. When I turned on the
back-up flight computer I noticed it
had switched into the configure
mode. This is normal behaviour when
the ARM button is pressed. It looked
like there must have been a short
somewhere. As part of the Acceleron
V servicing we did a couple of weeks
earlier we added a set of contacts
in parallel with the ARM button to
be able to arm it remotely. (To
prevent false triggers during
pressurisation) It must have been
this connection that was shorting
out. To check it properly would have
needed us to pull the rocket apart
and at least 30-40 minutes work. So
we cut a larger access hole in the
fairing and unscrewed one side of
the flight computer and poked a
stick underneath the PCB to try to
move the wires going to the set of
contacts. Thankfully that fixed the
problem, but we weren't sure if it
would crop up again. In the two
launches we did, the problem didn't
come back, but I'll need to go back
and fix it properly.
Other than that
hiccup, the rest of the tasks on the
checklist went smoothly. The booster
still used 2.5L of water in each
segment, but we added an extra 200mL
to the sustainer for a total of 1.5L
of water/foam mix. We pressurised both
the booster and sustainer to 120psi.
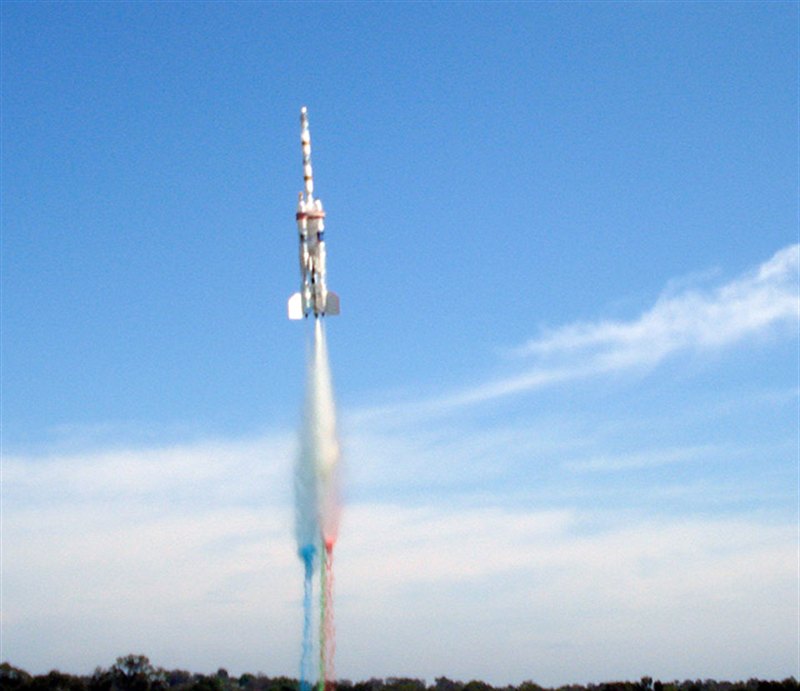
The launch was really good and
mostly vertical. The sustainer
released right on cue or perhaps a
little late but vertical, and then
powered to 864 feet (263m) on
foam. The foam makes it really easy
to track the rocket on its way up.
This was our new personal highest
altitude to date with the last one
at 810 feet.
Both the booster and
sustainer opened their parachutes
right on cue and landed reasonably
close to the pad. The booster
slightly cracked the balsa ring
brace, but it looks like it was an
older break from the explosion last
year. A bit of tape fixed it right
up ready for the next launch. We
downloaded all the data first from
the two on-board cameras and the two
on-board altimeters, in case we lost
or damaged the rocket on the next
flight and we didn't want to loose
the data from the first flight. Both
cameras and altimeters captured good
data.
Flight #1
Booster altitude plot
Sustainer altitude plot
Within an hour we
had set the rocket up again on the
pad, but because the wind had
shifted around and was now going
directly for the trees we angled the
launcher slightly so the rocket
would fly away from the trees.
We pressurised the
rocket to 120psi again, and
launched. The rocket angled over
slightly in the intended direction,
but the flight was nearly identical
to the first. The staging was very
clean again and the sustainer
powered it's way up to 829
feet (252m). This was partially
due to the angle and so did not go
completely vertical. Even though it
travelled lower, it still flew for 5
seconds longer. I think this was our
longest duration flight at 68.6
seconds.
Both booster and
sustainer landed well. In the post
landing picture and video you can
see that the booster looks damaged.
It is actually only twisted and is a
result of the boosters design to
allow it to flex. Untwisting it
aligns everything up again. The slow-mo video also shows the condensed
fog coming out of the nozzles just
after burnout and prior to staging.
We hadn't seen that before in our
launches.
Again both
altimeters and cameras recorded good
data. The new battery on the
FlyCamOne2 is working well and we
haven't had any more early
shut downs.
Many thanks also
goes to David, Craig and Phil for
helping us with the remote arming,
launching and camera operation.
Flight #2
Booster altitude plot
Sustainer altitude plot
Flight computer
settings:
V1.6
V1.6
V1.6
Primary
Secondary
Sustainer
0.
0
0.
0
0.
0
1.
0
1.
1
1.
8
2.
1
0.1 secs
2.
8
1.8 secs
2.
2
8.3 secs
3.
0
3.
0
3.
0
4.
0
4.
0
4.
0
5.
1
0.1 secs
5.
1
0.1 secs
5.
1
0.1 sec
6.
0
6.
0
6.
0
7.
V
7.
R
7.
V
8.
7
1.12 secs
8.
7
1.12 secs
8.
F
2.4 secs
9.
U
9.
V
9.
0
A.
0
A.
0
A.
V
B.
F
2.4 secs
B.
F
2.4 secs
B.
F
2.4 secs
C.
0
sound OFF
C.
0
sound OFF
C.
2
Sound ON
D.
0
D.
0
D.
4
E.
0
E.
0
E.
5
Polaron G2 - Progress Update
We have been posting day to day progress
on our blog of the Polaron G2 development,
but I'll do a summary here of all the
updates since day 96.
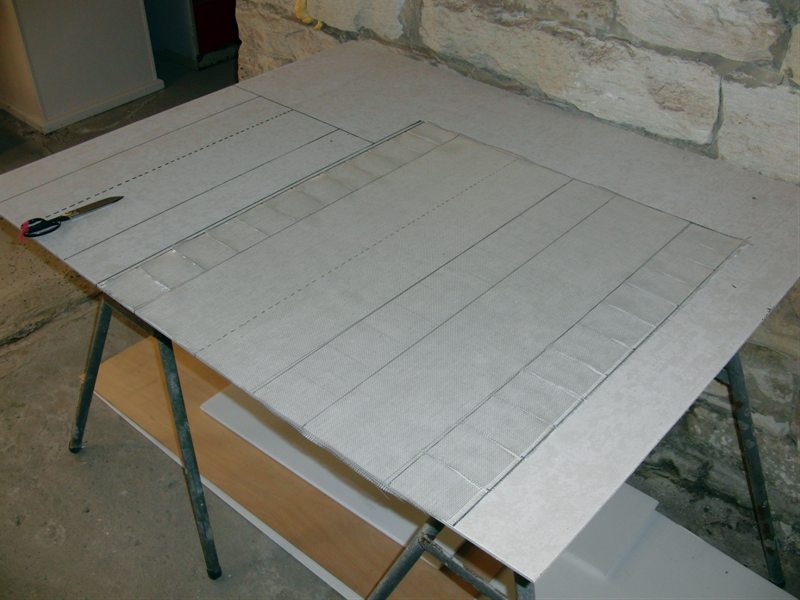
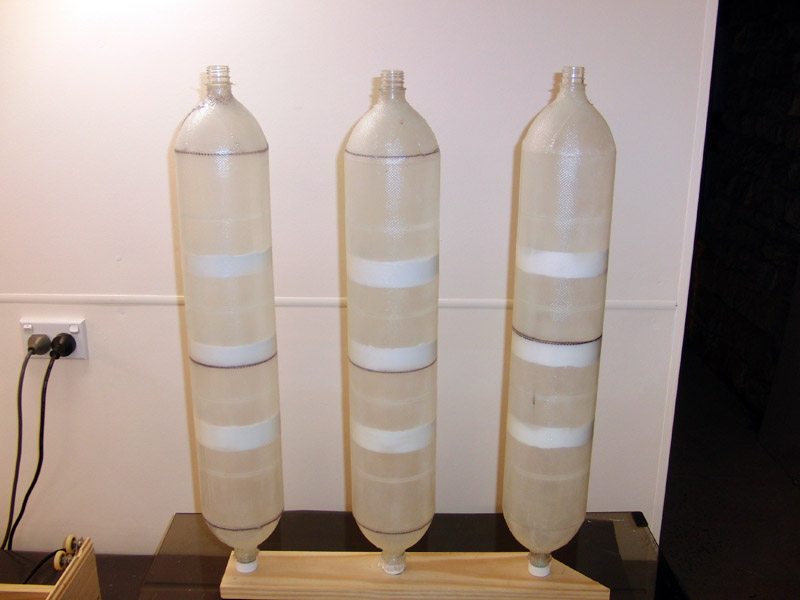
Spliced Quads
We have been reinforcing and testing the
spliced quads shown in the previous update.
We now have 5 spliced quads made and tested
to 270psi. Two more are curing and need to
be sanded before testing. We now have enough
of the spliced quads for phase 1 of the
development. So far we are happy with how
these are turning out, but we won't know for
sure until they are used on real rockets.
4 x 2L bottles spliced together
with Sikaflex 11FC
200gsm glass cloth cut to the
pattern.
Wrapping glass fibers into
grooves
Wrapping cloth on to the quad
We use West Systems epoxy as the
resin.
The quads are then placed on a
rotisserie to cure the epoxy evenly
and without runs.
The quad is then sanded to clean
up any uneven edges.
Then it is hydro tested to
270psi inside an old scuba cylinder
with the bottom cut off to contain
noise and any shrapnel.
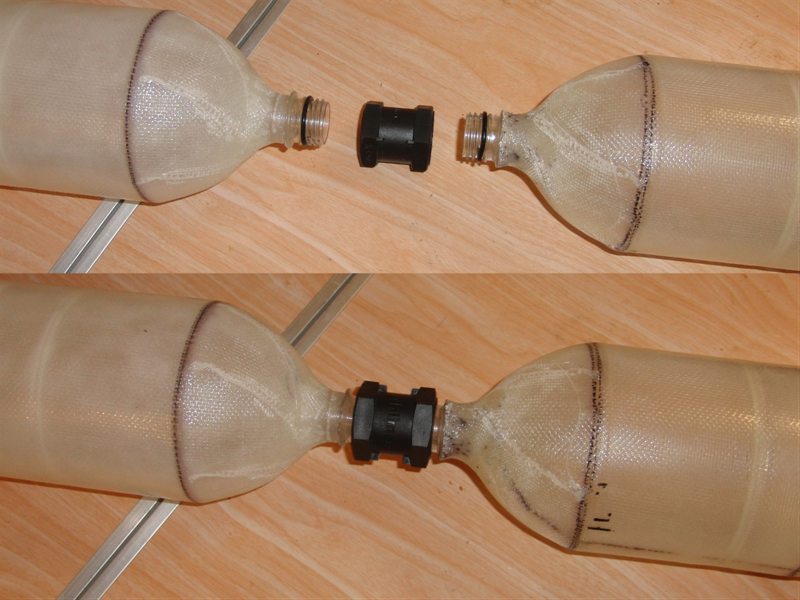
Spliced quads ready for
assembly.
These are joined using tornado
couplings with a couple of o-rings
to seal them.
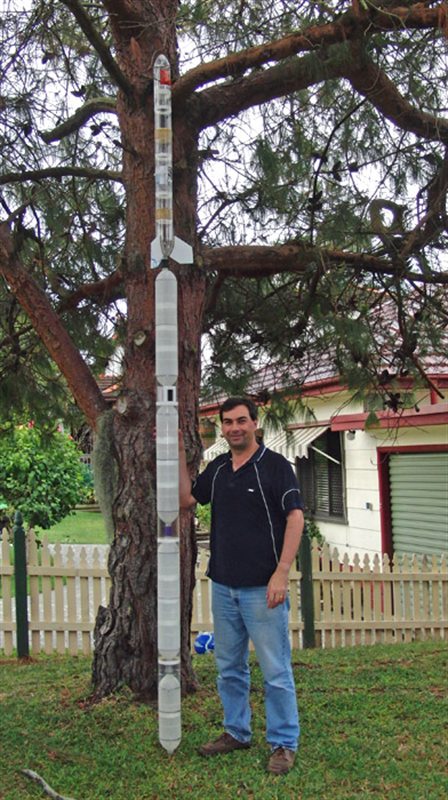
Phase 3 main stage assembled
with a representative sustainer on
top. Now where did I put that
ladder?
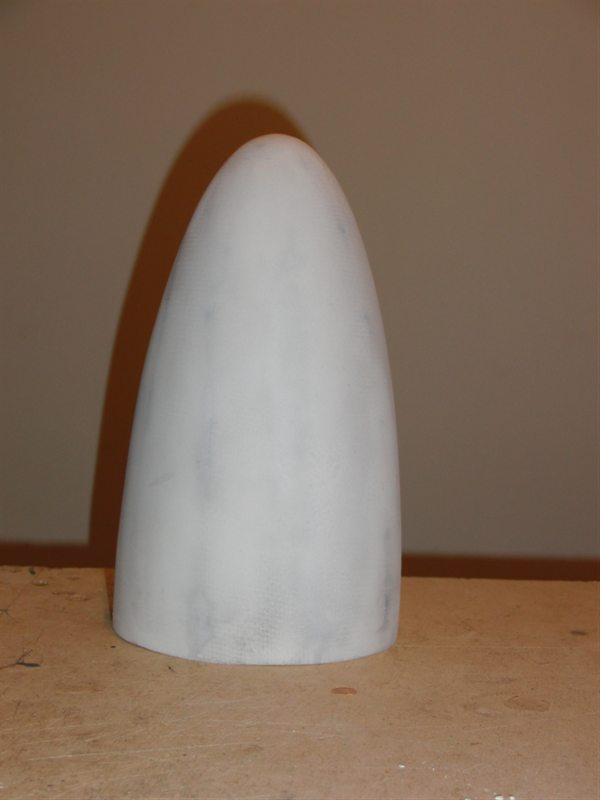
Nosecone
We have spent quite a bit of time in the
last month making up a nosecone plug so that
we can make fiberglass nosecones with the
proper shape rather than just tops of
bottles. A big thanks goes to the guys on
Australian Rocketry's
forum and the
Yahoo water rocket forum
who gave
us a lot of great tips for making the plug
and nosecone. It's been a very good learning
experience.
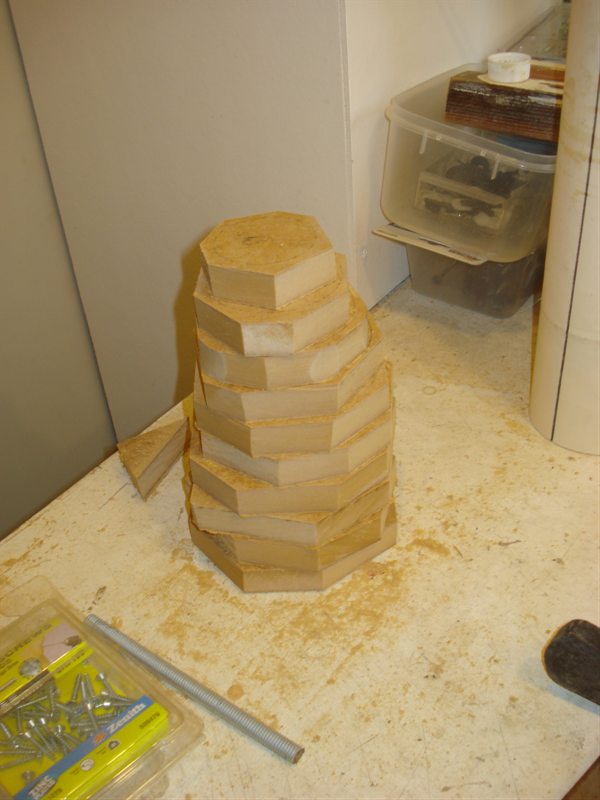
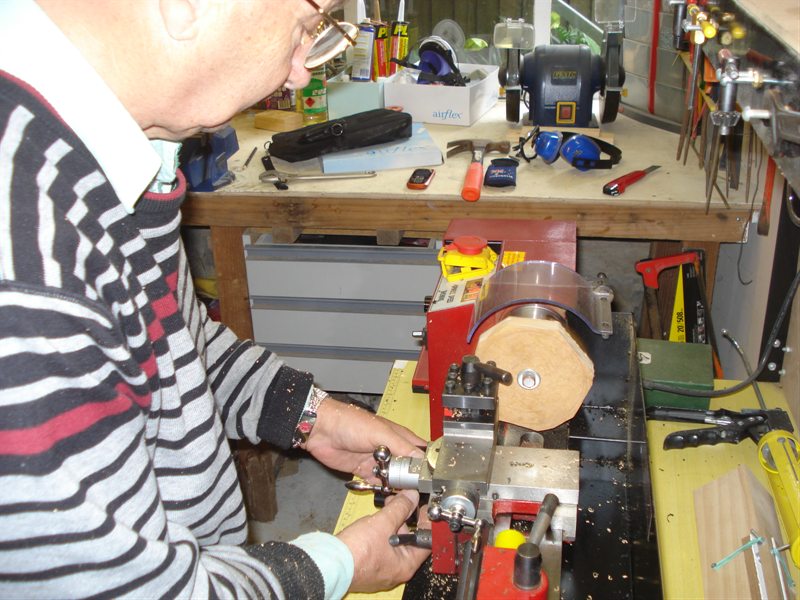
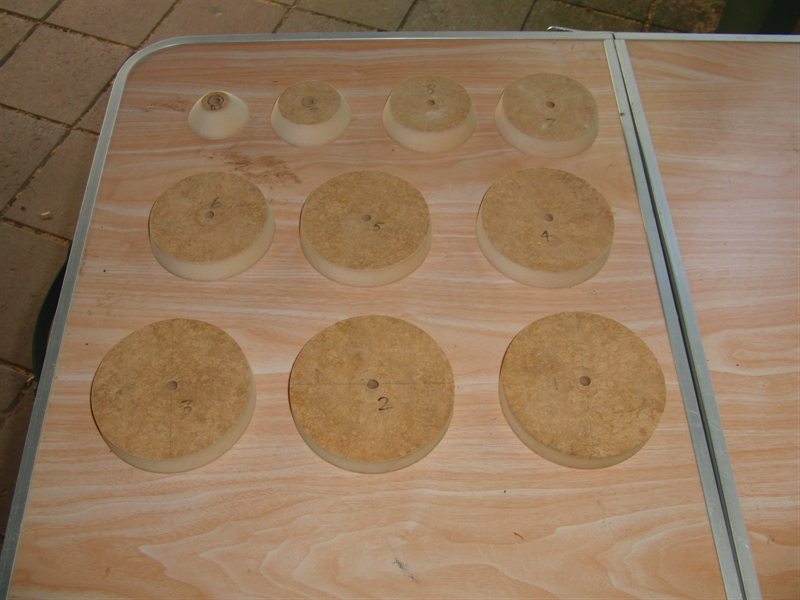
We made the plug from 10 layers of 19mm
MDF. These were first rough cut with a
circular table saw, and then individually
machined on the lathe to the correct
dimensions. These were then glued together
with PVA glue, and the whole shape was
sanded smooth. We then applied a couple of
layers of epoxy to seal the surface, and
used putty to seal up any imperfections. We
then sprayed the whole nosecone with spray
putty and sanded it all smooth again.
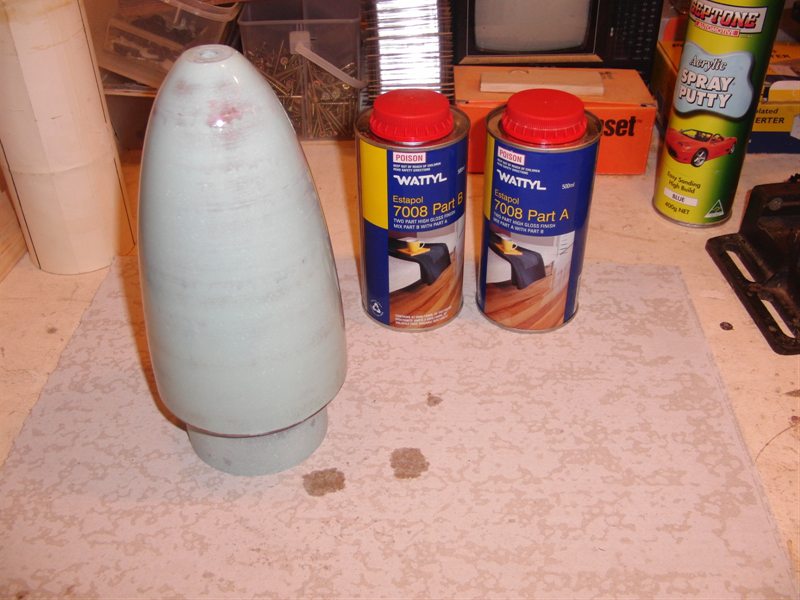
Next we applied a coat of Wattyl Estapol
7008 2-pac paint to the plug which left it
nice and shiny. We then applied 8 layers of
mould release wax and polished it again.
We used 2 layers of 200gsm glass cloth
for the nosecone. Because we had trouble
removing the nosecone from the plug, we had
to cut it length ways. Though it came away
from the plug cleanly.
This cut was then patched from the inside
and the whole nosecone was covered with a
layer of micro-balloon / epoxy mix to fill
in any imperfections. We glued half a
ping-pong ball into the end of the nosecone
and covered it with more epoxy. The whole
nosecone was then sanded again and is now
ready for spray paining. This first nosecone
weighs 70 grams, but we will use the 85gsm
cloth on the second test nosecone.
19mm MDF roughly cut to shape.
These are then machined
individually to the exact
dimensions.
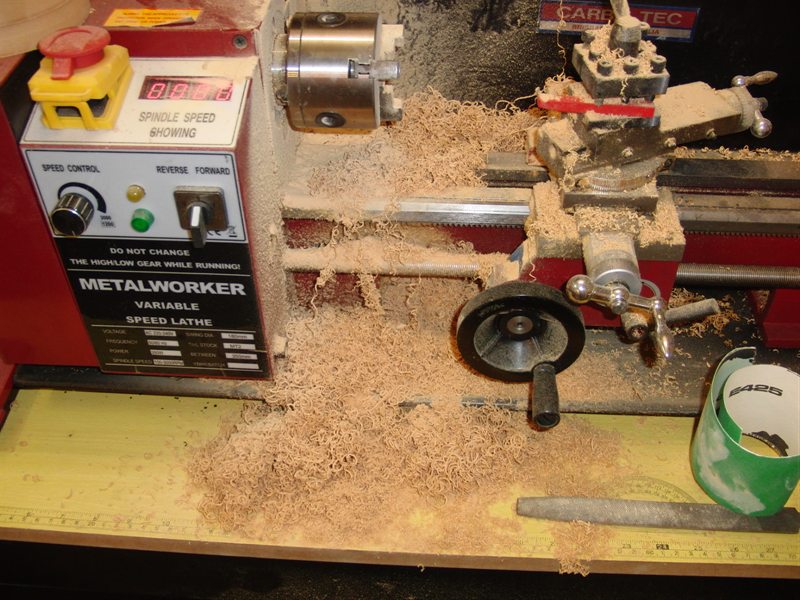
A nice mess is left to clean up.
:(
All 10 disks ready for gluing
They are glued together with PVA
glue.
The nosecone plug ready for
sanding. Sanding is done on the
lathe.
The plug was then coated with a
couple of layers of epoxy, and
sprayed with spray putty and sanded
smooth again.
We then brushed on Wattyl
Estapol 7008 2 pac clear paint to
make the surface nice and hard.
We placed it again on the
rotisserie to keep an even coat on
the plug.
We then applied 8 coats of
release wax to the surface.
200gsm glass cloth was then cut
out to give us 2 complete layers
Applying the epoxy
Nosecone removed from the plug.
We had a bit of trouble removing
it so we had to split it.
The cut was then patched from
the inside and the whole nosecone
was coated with a paste made from
microballoons and epoxy to fill in
all the cracks.
The nosetip was then added and
sanded smooth. Here it is after the
first coat of undercoat. Currently
the nosecone weighs 70 grams.
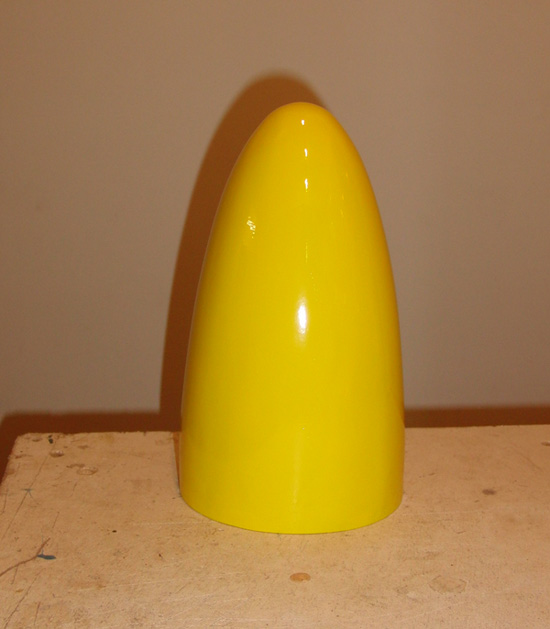
A couple of coats of primer and
a further two coats of gloss enamel.
Parachute Deployment Mechanism
We have been considering what would be
the preferred parachute deployment
mechanism to use in phase 1, and currently
it looks like we are going to go with an
in-line design similar to the one we
developed earlier.
This will allow us to utilize the space in
the new nosecone, and make the payload bay a
lot shorter for the electronics. The camera
and altimeter will be located between the
top two spliced-quads, to offer some
protection in the event of a hard landing.
In phase 2 we are likely to use a
dual-deploy mechanism as we expect higher
altitudes and don't want the rocket to drift
too far. The main parachute will be deployed
the same way as described above, but the
drogue chute will be located mid body of the
rocket between the spliced quads. We'll use
the MAD to deploy the drogue after apogee,
since it will be much more difficult to
predict how the rocket will perform. This
should bring the rocket down horizontal for
the first half of the descent, then the main
will deploy from the nosecone.
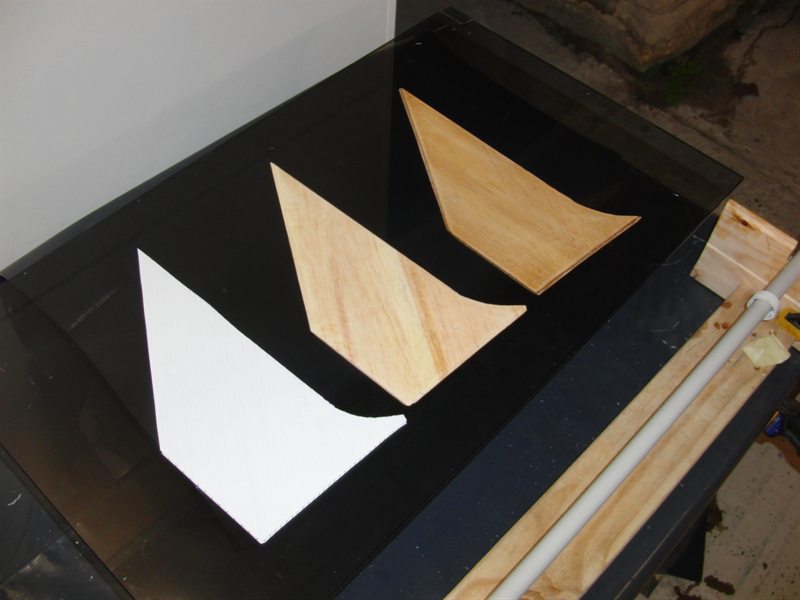
Fins
We have also been investigating different
fin materials to use with the G2 rocket. We
compared 3 different ones:
Regular 4mm 3-ply plywood -
This fin is very tough, but the main
drawback is its weight. At 74 grams it
is the heaviest and thickness is 4.2mm.
Balsa Sandwich - Made out of
two 1.5mm sheets of balsa wood glued
together at 90 degrees to each other
with PVA glue. One layer of 200gsm
fiberglass on either side. Epoxy resin
was used for this. The fin is quite
tough and weighed in at 43 grams. The
thickness is 3.9mm but the main drawback
is the amount of work involved to do
this and the higher cost.
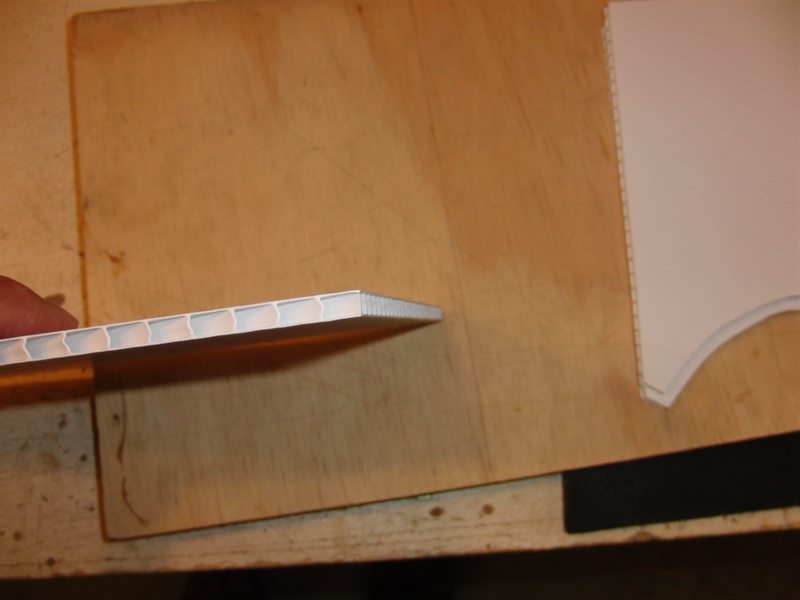
Corflute - This weighed in at
25 grams, but has a thickness of 5mm. It
is quite tough, and has a good finish,
but the main drawback is that it is made
from polypropylene and hence harder to
glue and paint. The leading and trailing
edges are made from plastic straws.
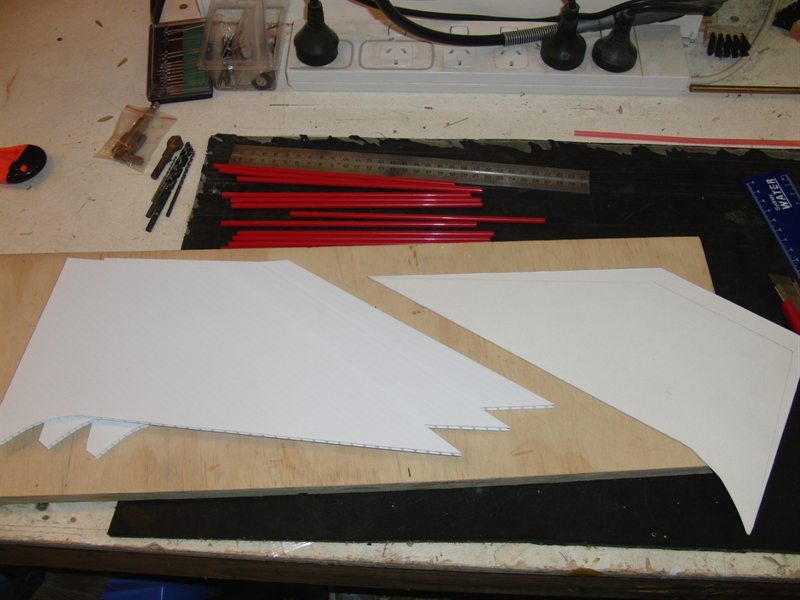
We have decided to go with the Corflute
fins on the first trial flights to see if
they can hold up to the higher speeds and
loads. If it turns out we can't use them,
then we would switch to the Balsa Sandwich.
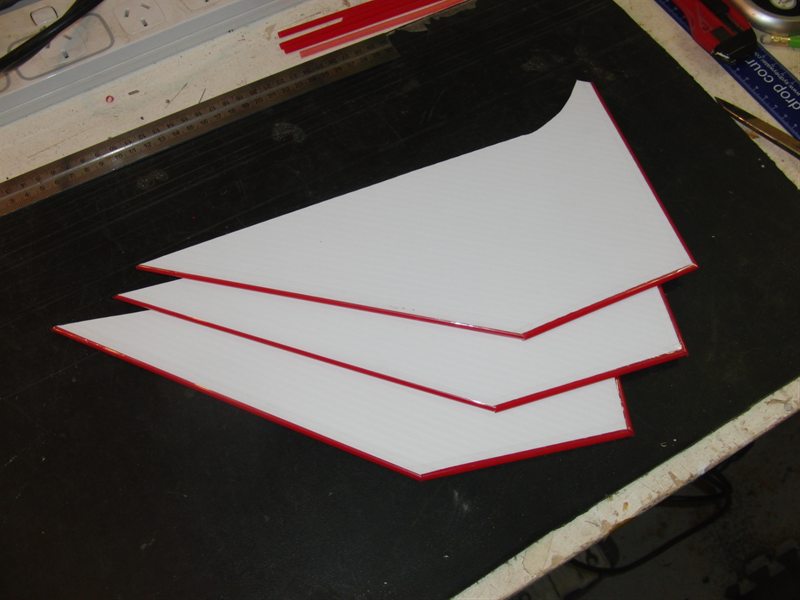
We have the 3 fins now made and they are
awaiting to be attached to the removable fin
can.
Three fins being tested. Left to
right: Corflute, balsa sandwich and
plywood.
Corflute fins cut out using a
cardboard template.
Cut Corflute has flat edges.
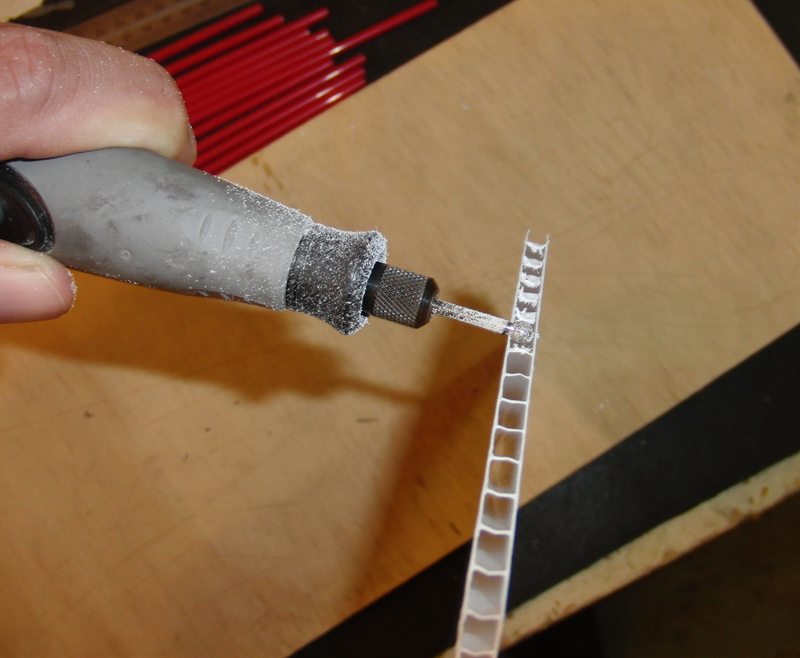
In order to embed the leading
and trailing edges we use a Dremmel
tool with a round sanding bit to cut
a channel.
Zlog Altimeter x 2,
FlycamOne2 x 1, MD-80 clone camera x 1
Altitude / Time
170' (52 m) Ac.,
864'
(263 m) Ax. /
12.1 secs(Ac), 63.4 secs(Ax)
Notes
Very good straight
flight. Sustainer had quite a bit of
spin. Good parachute deploys on both
sustainer and booster. Good
altimeter data and video from both.
Booster sustained minor damage to
ring brace.
Highest flight to date.