|
Date: 27th
November 2010
Location:
Doonside, NSW, Australia
Conditions:
Warm 29C, mostly clear skies
5-20km/h wind.
Team Members at Event:
PK, Paul K and
GK
It's been a fairly quiet month as we have
had many non-rocket related commitments such
as kids birthday parties, sports and school
concerts. Though we have continued to
develop the Polaron G2 nosecone and
recovery system. We also launched a
couple of rockets at the NSWRA launch this
week, but it was more for fun than testing
anything new.
Polaron G2 - Progress
Nosecone
We have continued to try to improve the
nosecone making technique from the last
update. The main problem was trying to
remove the nosecone from the plug without
having to need to split it along the length.
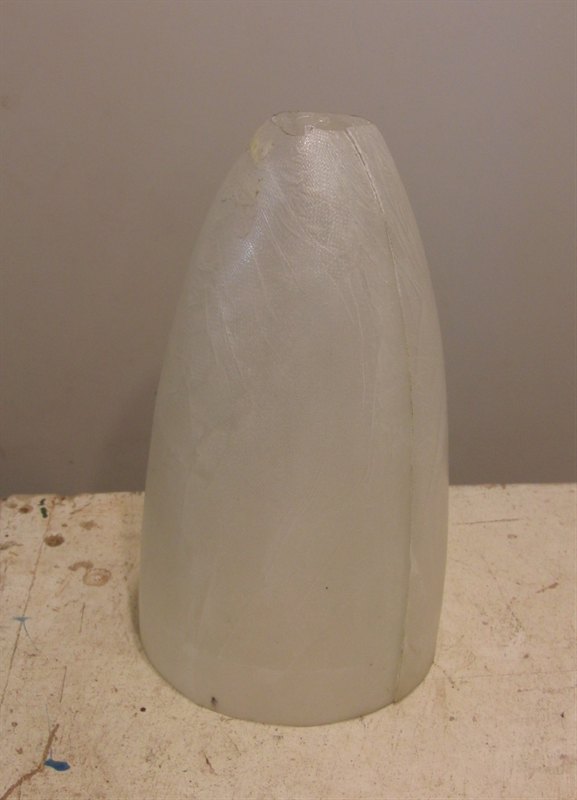
In the second attempt I tried using some
glad wrap on the plug, but I couldn't get
all the wrinkles out, and as a result it
turned out a bit lumpy, especially near the
point. I tried three layers of the 85gsm
cloth, but the end result was that it was
probably too thin to take a bit of
punishment. I had the same trouble getting
the nosecone off the plug as before. I did
try a bias cut on two of the layers
though, and it seemed better to work with.
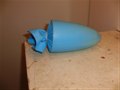
 |
The second attempt did not work
out too well with glad wrap on the
plug. This one is going in the
bin. |
 |
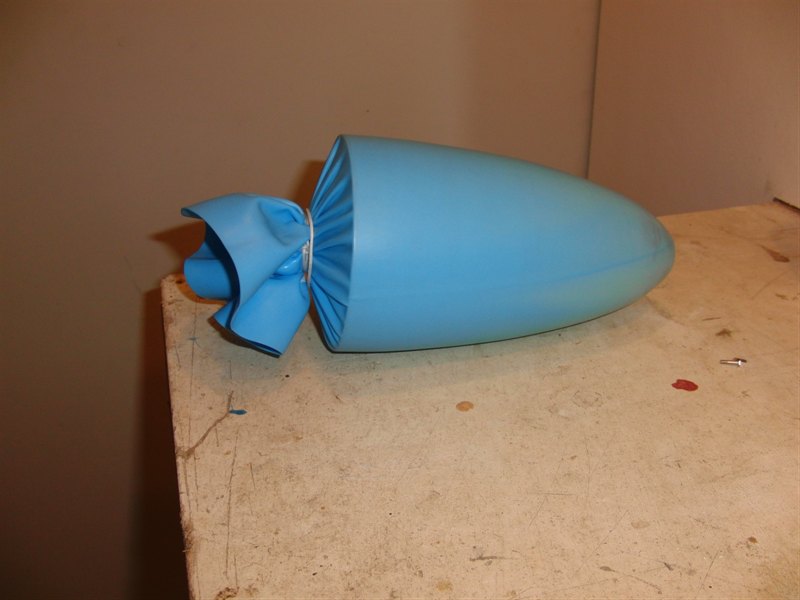
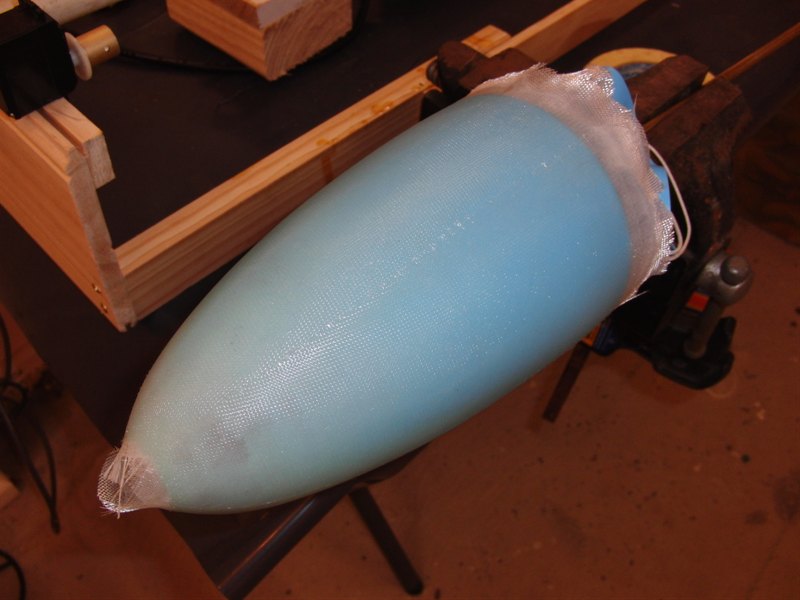
For attempt #3 I used a silicone
swimming cap ($7 from BigW)
stretched over the plug and tied
with a string. |
 |
This time I used one layer of
the 200gsm cloth and two more layers
of the 85gsm cloth on top. This gave
a very nice finish to the nosecone,
and it was very easy lay over the
swimming cap. Again the bias cut
cloth seemed easier to conform to
the shape. |
 |
Because of how the cap stretches
- thin at the point and thick near
the base (~0.8mm), I was hoping that
with the extra thickness around the
base I would be able to stretch the
cap more after the nosecone cured
and hence reduce the lining diameter
giving that important gap to
separate.
I trimmed the excess glass from
around the base and then slowly
worked my way around stretching the
cap and you could see it separate
between the nosecone and cap. This
propagated almost 3/4 of the way
from the base to the nose and was
easy to do. Unfortunately when
trimming the glass I nicked the cap
in a couple of places so I ended up
ripping holes in it. But that was
enough to quite easily pull the
nosecone off the plug.
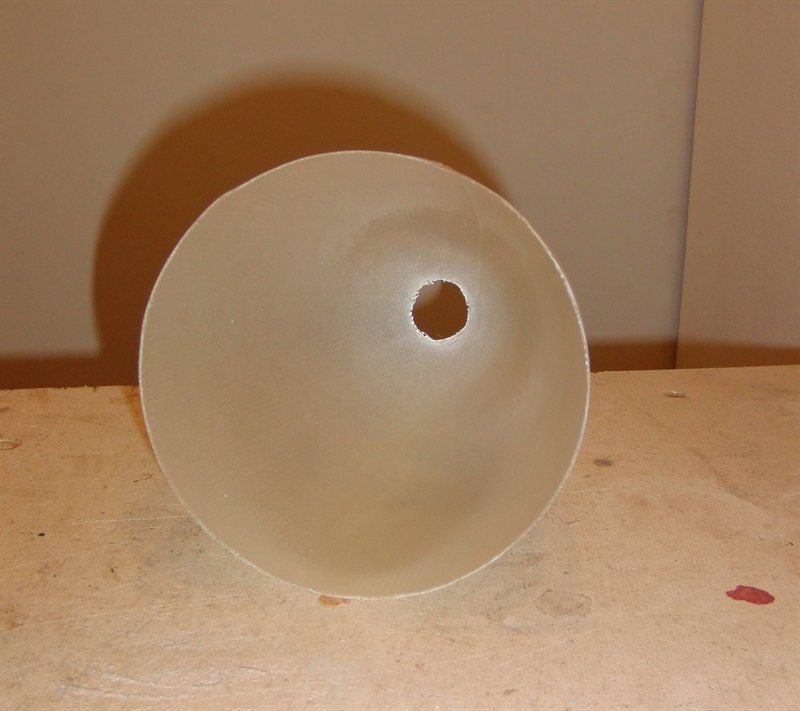
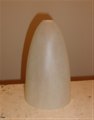
So here is one clean nosecone, and
the finer weave on the outside
should make this one easier to
finish off the surface. I am tempted
to stretch another cap over the
outside when I lay it up which may
give it a nice smooth finish, but
air bubbles might be a problem. |
 |
I also didn't use a black marker
on the pattern this time which
should stop it from bleeding through
when painting. |
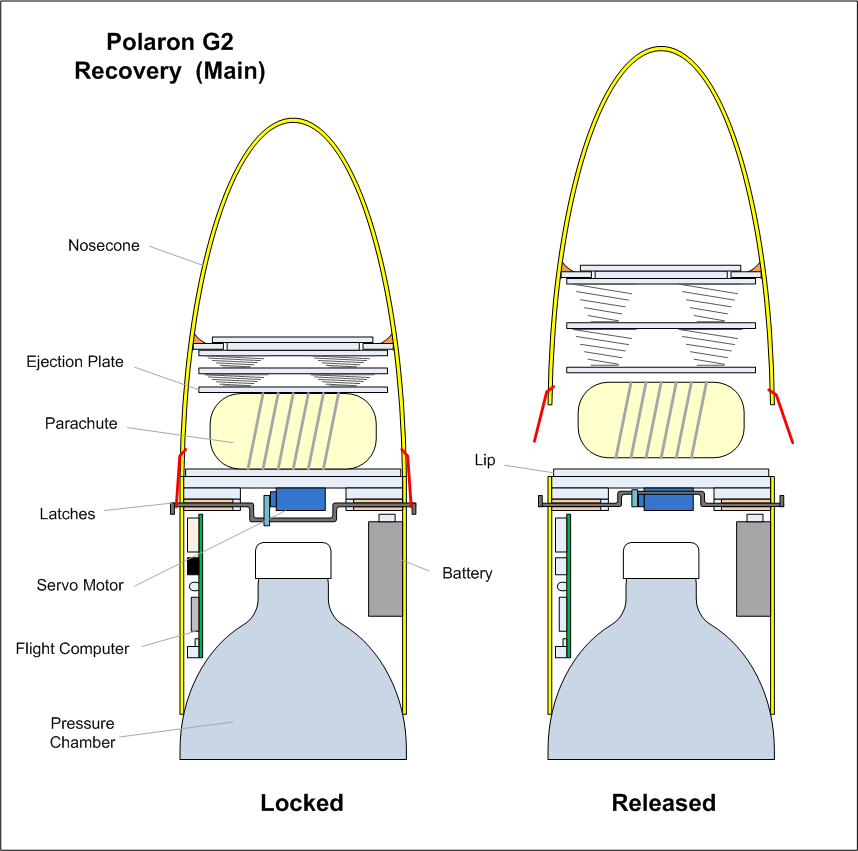
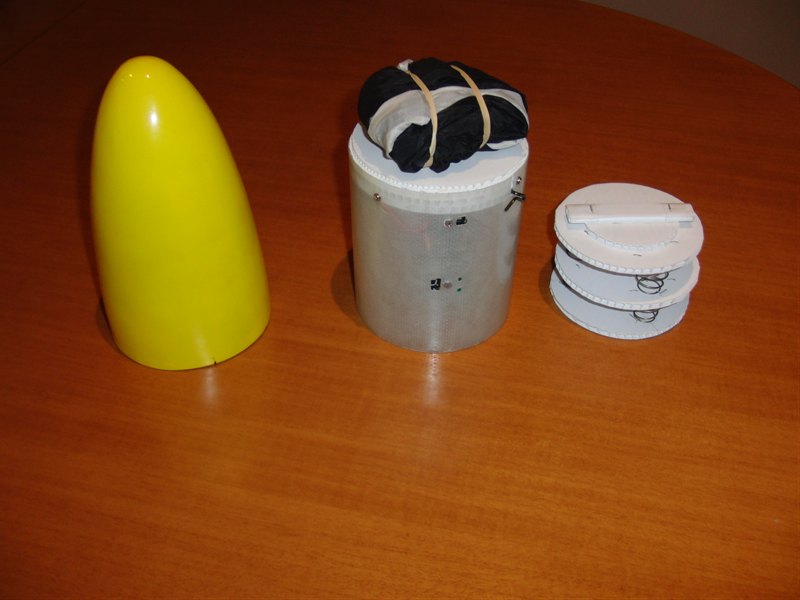
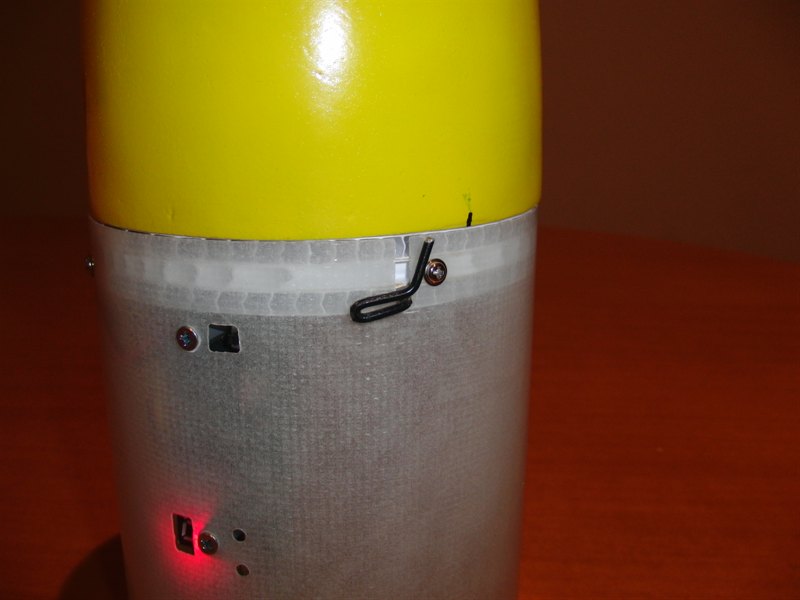
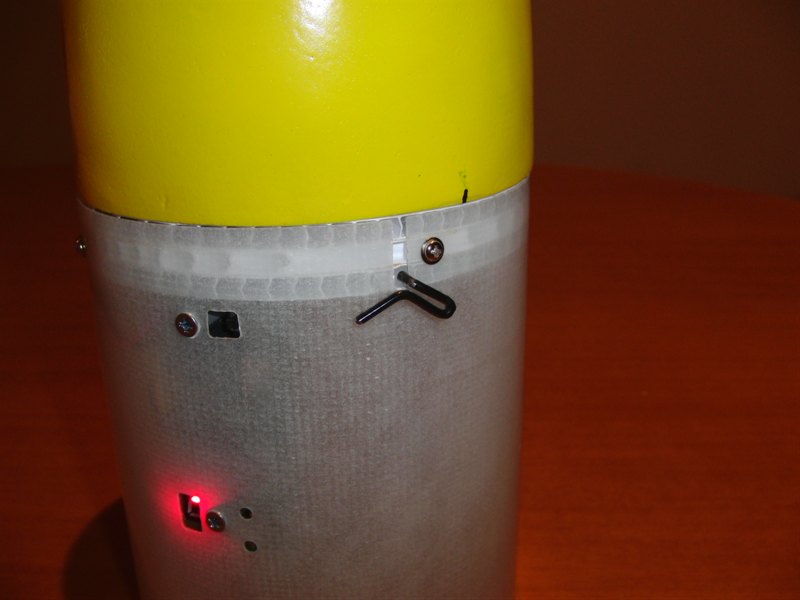
Recovery System
The recovery technique we are using for
G2 is similar to the in-line one we
trialled earlier this
year with several improvements and in larger
scale. This first version is still a
prototype so it is a little heavier than
we'd like, but good enough for first
flights.
How it works:
The parachute is simply packed and placed
on top of the flat platform on the base. The
nosecone has a spring loaded ejection plate
inside it. When you put the nosecone on top
of the parachute you compress the ejection
plate and then lock down the nosecone on
either side with latches.
The nosecone side of the latch is simply
a rubber band made from an o-ring so
it stretches less. The base latch pivots so
that the loop is caught and held down.
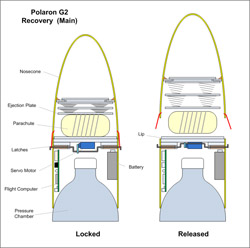
click image to zoom in
When it's time to release the parachute,
the base latch pivots back so that the loops
on both sides slip off and the nosecone and
parachute are free to fall/slide off. The
springs ensure there is enough force to just
separate them and the uneven airflow does
the rest. The springs should be strong
enough to overcome the air pressure on the
nose. In the final full recovery system,
there will be a separate drogue parachute
mounted in the mid section of the rocket,
and will be triggered by PK's MAD. This will
cause the rocket to come down sideways (more
drag) and so when it later comes to
deploying the main, the airflow over the
nosecone will be sideways and hence even
easier to deploy the main parachute.
 |
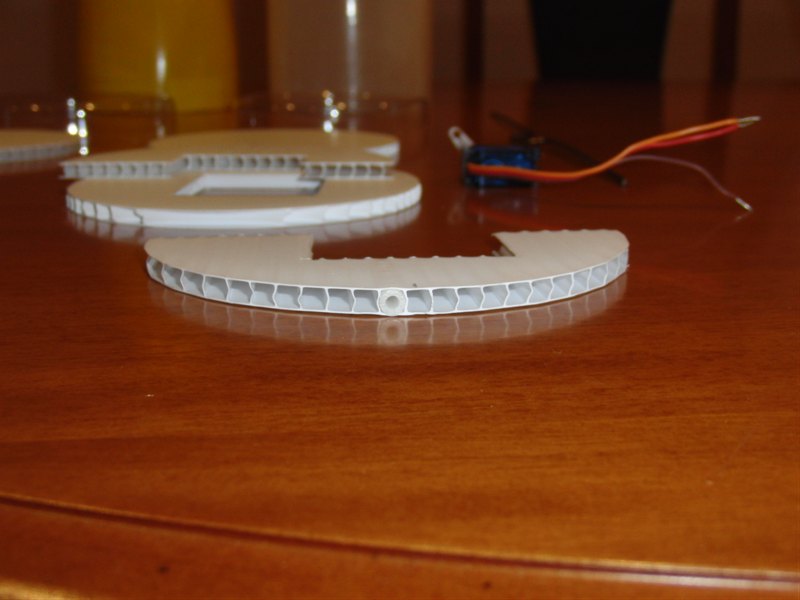
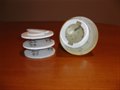
Some of the components that make
up the deployment mechanism. We
didn't end up using the two clear
rings in the photo as we changed the
design. The fairing for the base is
made from two layers of 200gsm
fiberglass. |
 |
We made a couple of inserts to
go into the Coreflute to support the
crank shaft. |
 |
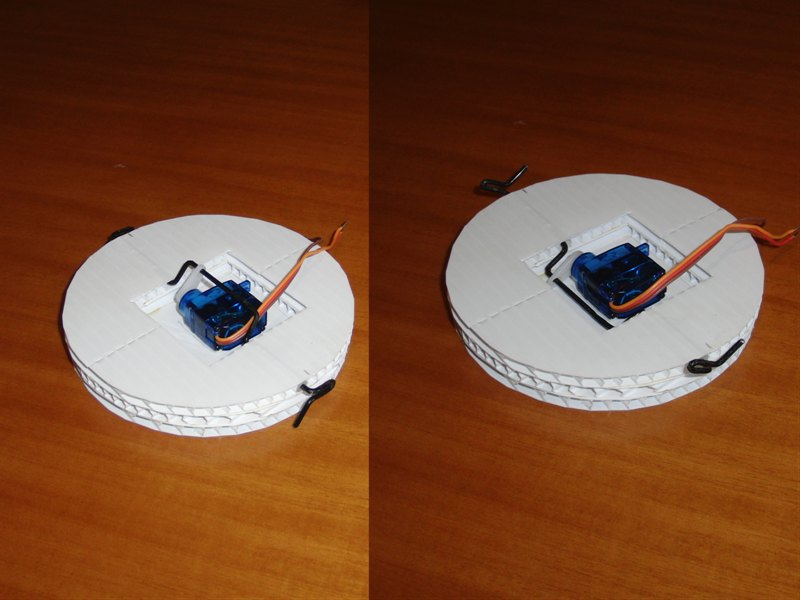
Servo motor with crank and
latches. This way we release both
latches at the same time. |
 |
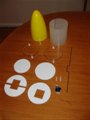
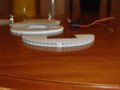
Ejection plate components are
made from 5mm Corflute. |
 |
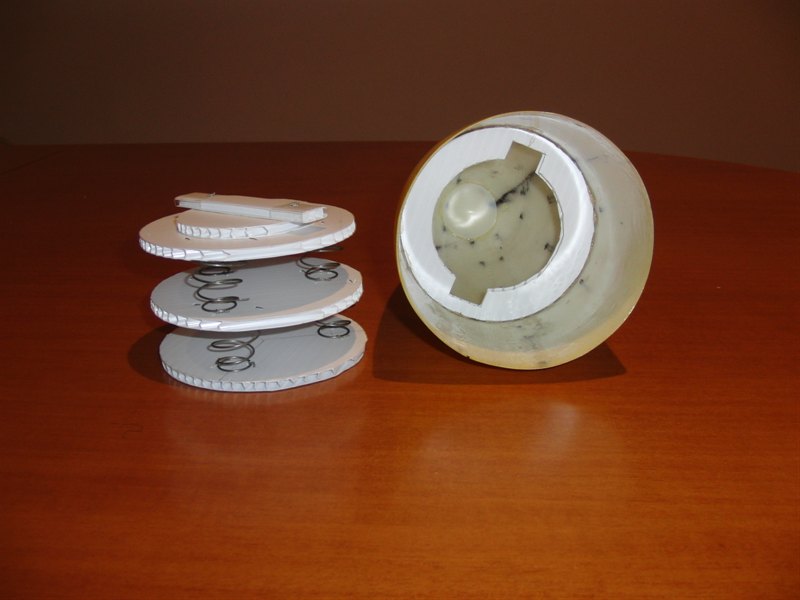
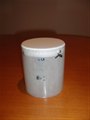
The ejection plate locks into a
slot inside the nosecone. This
allows us to replace the ejection
plate for different sized
parachutes. We use conical springs
which compress down well. (Looking
into nosecone on the right) |
 |
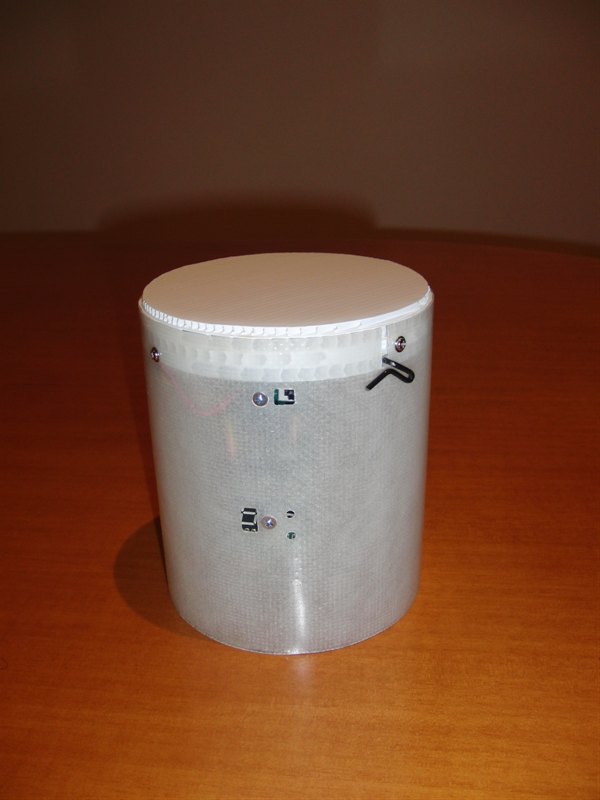
The base has a smooth top
without any obstructions to allow
the parachute to easily slide off in
the air flow. There is a small lip
around the outside which fits inside
the inner edge of the nosecone. This
keeps the nosecone from sliding
around sideways when in the locked
position. |
 |
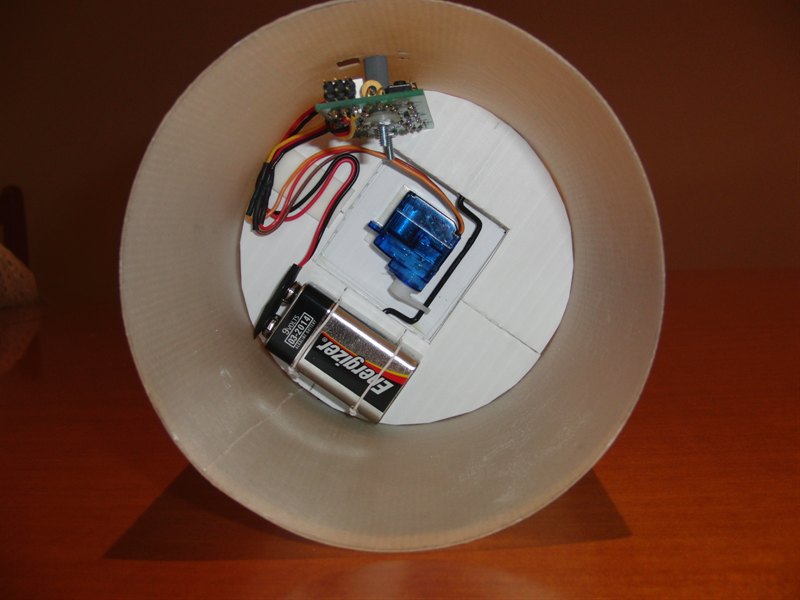
Looking into the base. The
components are spread out around so
that we can fit a part of the
pressure chamber in the space in the
middle. |
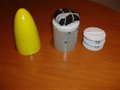 |
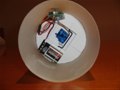
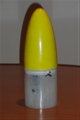
Nosecone, base with parachute on
top and the ejection plate. |
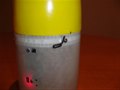 |
Latch in the open position. |
 |
Latch in the closed position. |
 |
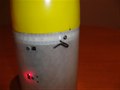
An O-ring is used as the rubber
band to catch onto the latch. |
 |
Overall nosecone and deployment
mechanism. |
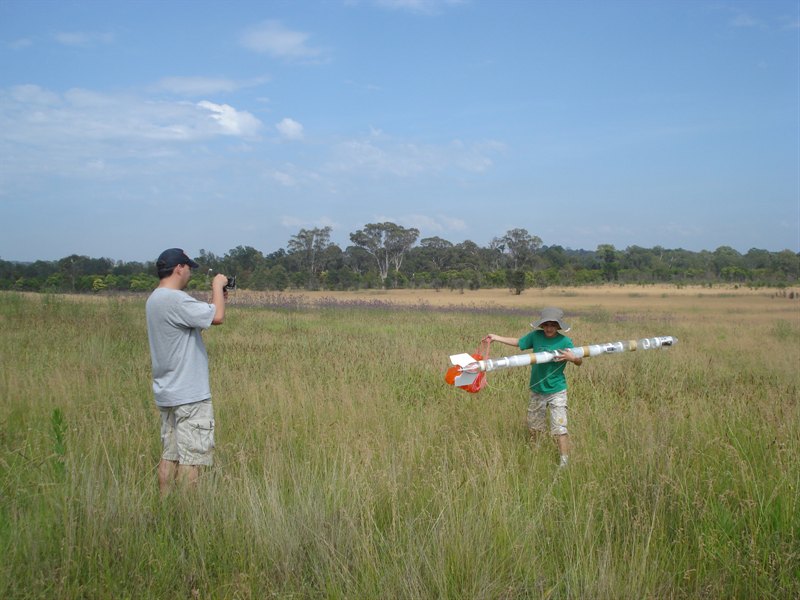
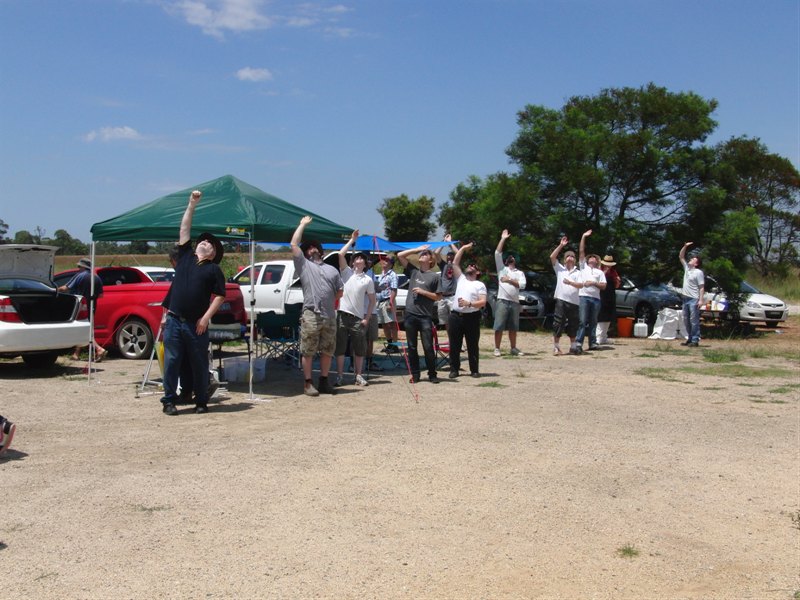
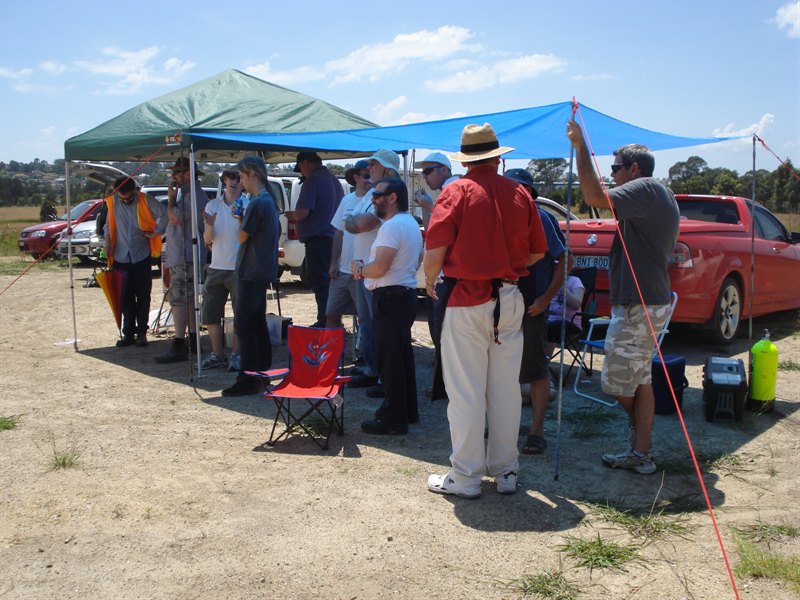
Launch Day Report
Due to all the commitments we had during
the week, we only packed the sustainer from
the Acceleron V rocket and a few spare
rocket components so that we could make one
up on the spot should the rocket crash. The
predictions were for high wind on the day,
so we weren't sure what we should fly
anyway. It turned out to be a nice day and
the wind was fairly calm during the morning.
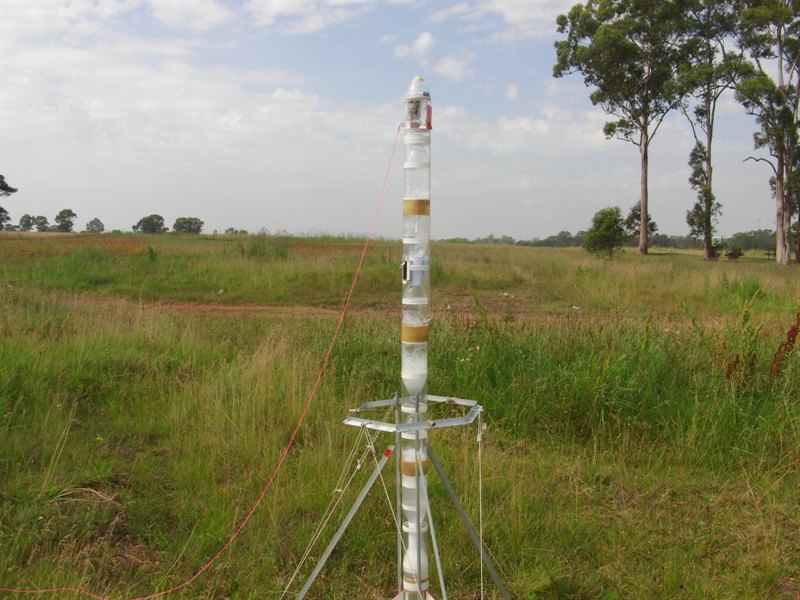
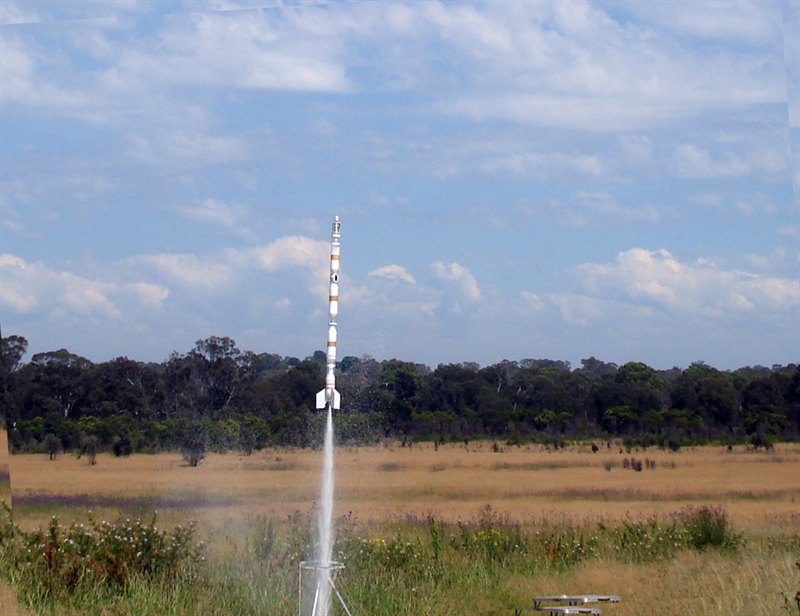
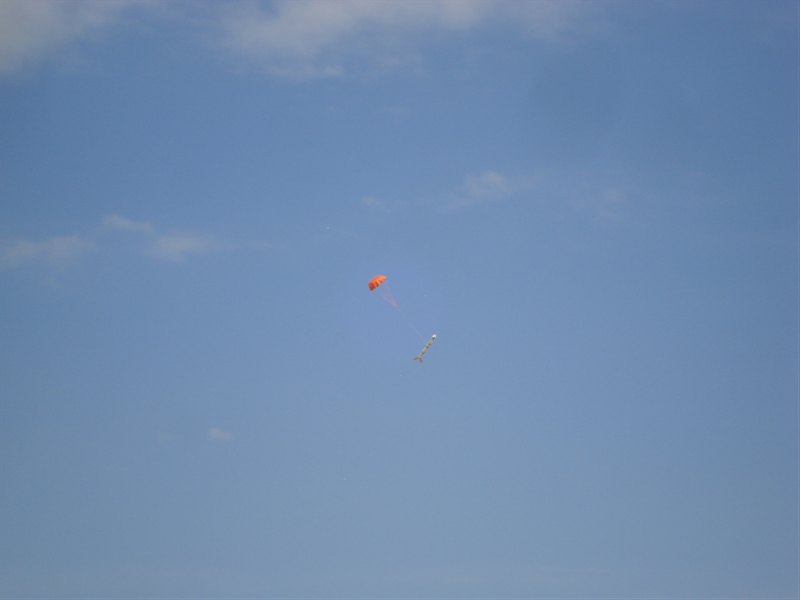
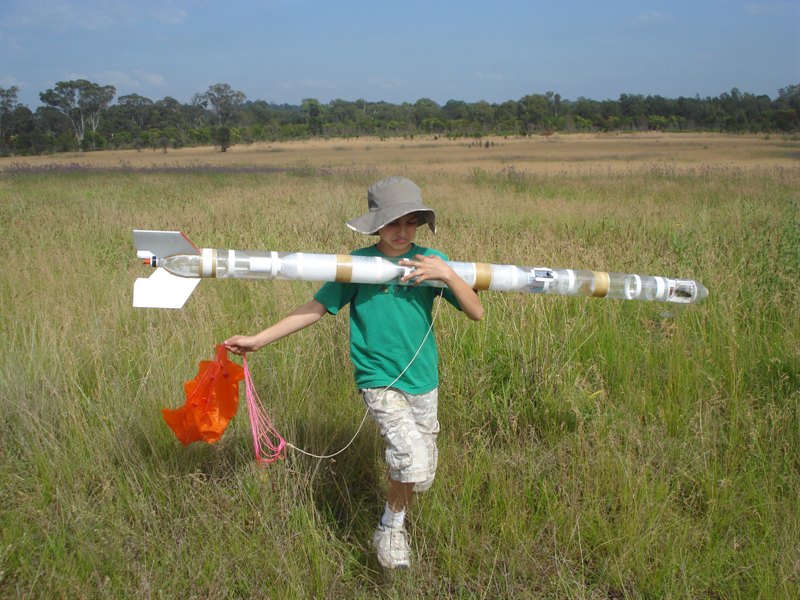
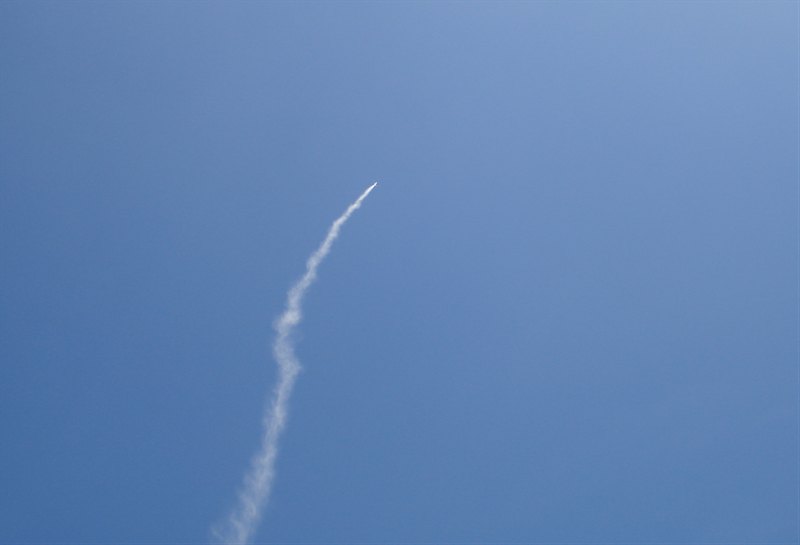
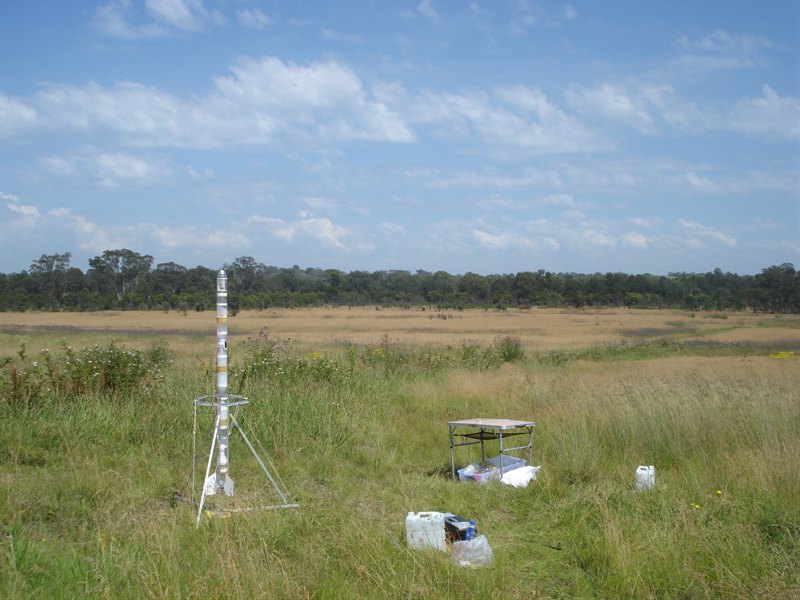
We flew the first flight at 125psi with
1.8L of water and foam. The flight was good
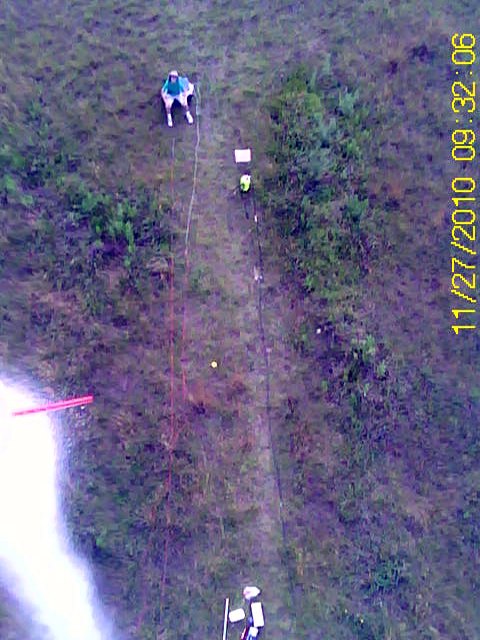
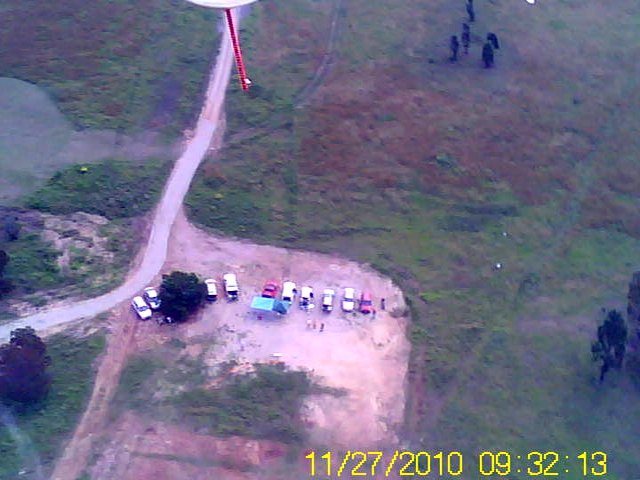
with good recovery. The on-board video is
shown in the highlights video below. Because
the wind direction was towards the rocket
eating trees I decided to take out the
altimeter in case the rocket got snagged.
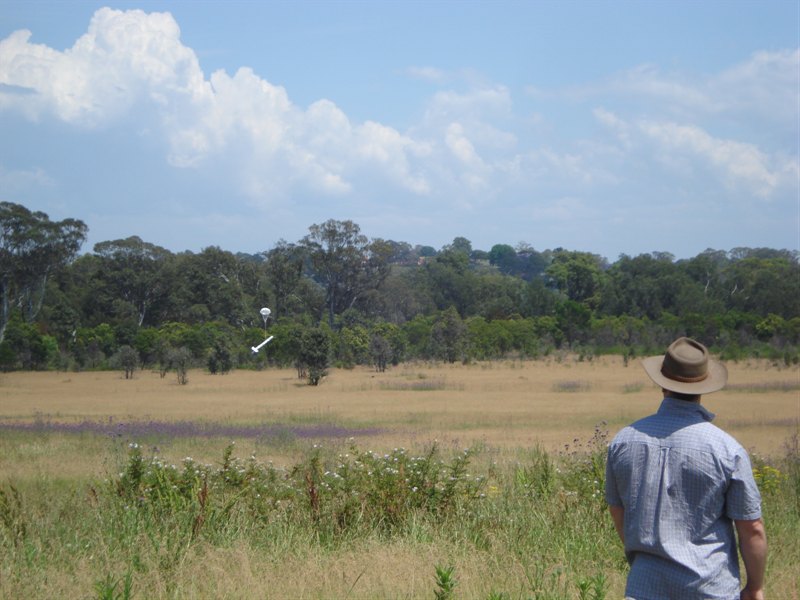
As the wind picked up a little for the
second flight, I removed the camera again
because of the danger of getting snagged in
the tree. We also added an extra second to
the deployment timer to help the rocket come
down quicker. The flight was good again with
a nice long foam trail.
For the last flight, I swapped out the
bigger parachute for a smaller one with a
hole, again to try to stop the rocket
drifting too far. Again the flight was
virtually identical to the previous flights
and the rocket ended up landing fairly close
to the trees.
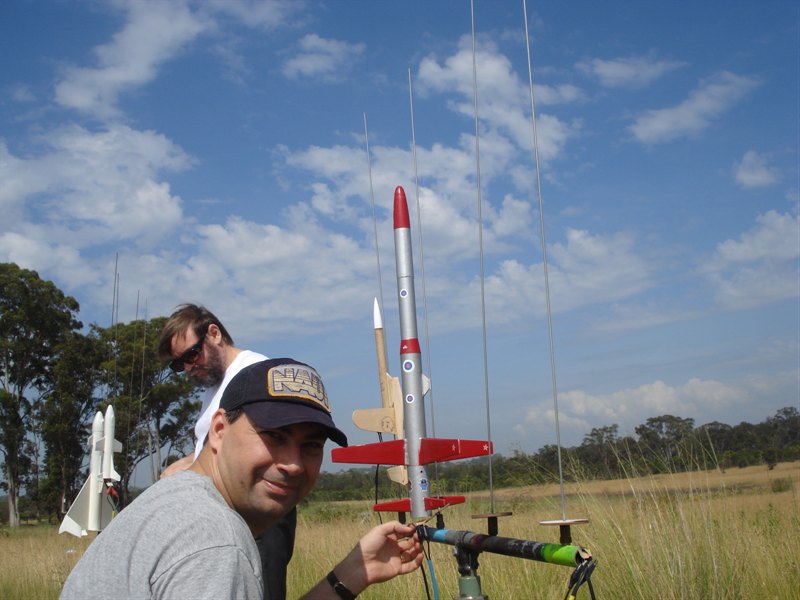
We also flew Paul's Pod 2 2-stage rocket
on a C6-0 and a C6-5. The rocket weather
cocked into the wind and flew in a nice long
arc. The stages separated well, but the
delay seemed a bit long and when the
parachute finally deployed it ended up
ripping a fin off the rocket. We couldn't
find the fin in the tall grass, but it
should be fairly easy to repair.
We were happy the water rockets performed
well and it's always nice to get them back
in one piece.
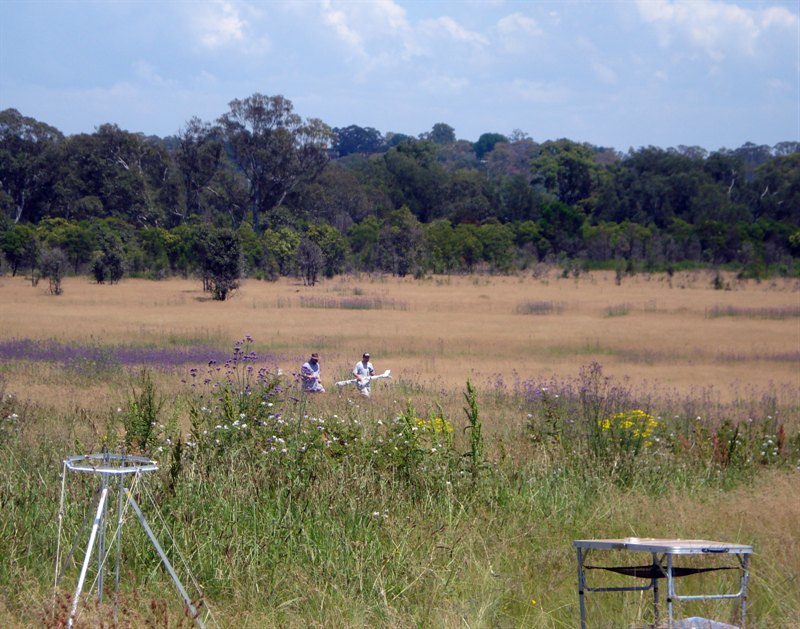
We wanted to test fly the G2 nosecone but
ran out of time during the week to prepare
the test rocket, there is always next time.
In the video below I have combined both the
pyro rockets and water rockets flown by club
members at the NSWRA launch at Doonside.
Day 98 - Highlights
Flight Details
| Launch |
Details |
| 1 |
|
Rocket |
|
Axion VII |
|
Pressure |
|
125 psi |
|
Nozzle |
|
9mm |
|
Water |
|
1.8L + foam |
|
Flight Computer |
|
V1.6 - 5 seconds |
|
Payload |
|
MD-80 clone camera x 1 |
|
Altitude / Time |
|
? / ? seconds |
|
Notes |
|
Good flight with
good parachute deploy. Rocket landed
well. Good onboard video. |
|
| 2 |
|
Rocket |
|
Axion VII |
|
Pressure |
|
125 psi |
|
Nozzle |
|
9mm |
|
Water |
|
1.8L + foam |
|
Flight Computer |
|
V1.6 - 6 seconds |
|
Payload |
|
None |
|
Altitude / Time |
|
? / ? seconds |
|
Notes |
|
Good flight with
deploy past apogee. Slow takeoff
again. No camera was on this flight.
Delay added to open parachute later
in flight. |
|
| 3 |
|
Rocket |
|
Pod 2 (Paul's Praetor) |
|
Motor |
|
C6-0 and C6-5 |
|
Altitude / Time |
|
? / ? |
|
Notes |
|
Good flight, but
weather cocked into the wind.
Staging was nominal and the parachute ejected well after
apogee. Ejection event broke a fin
off the rocket. |
|
| 4 |
|
Rocket |
|
Axion VII |
|
Pressure |
|
125 psi |
|
Nozzle |
|
9mm |
|
Water |
|
1.8L + foam |
|
Flight Computer |
|
V1.6 - 6 seconds |
|
Payload |
|
None |
|
Altitude / Time |
|
? / ? seconds |
|
Notes |
|
Good flight with
slow takeoff. We used the smaller
white parachute for this flight to
stop it drifting too far. Good
landing. |
|
|